

Last week I finished glazing my piece! Now all I have left is to wait for it to be fired one last time in the glaze kiln and then connect the hut to the chicken feet.
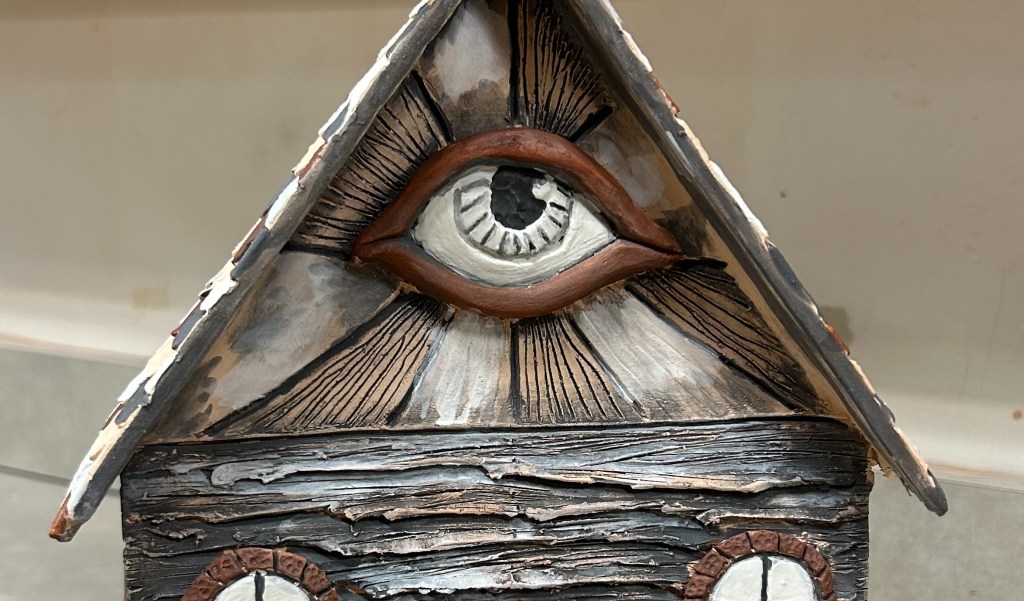
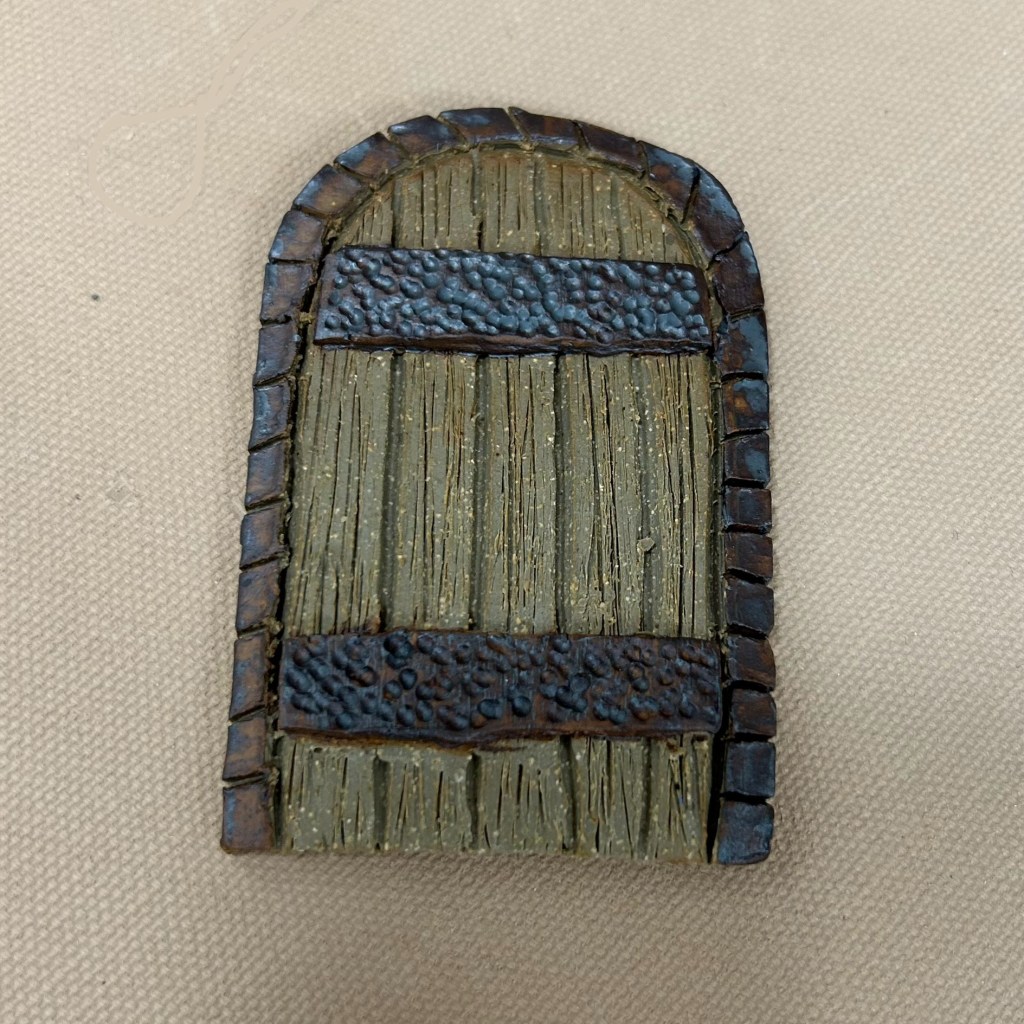
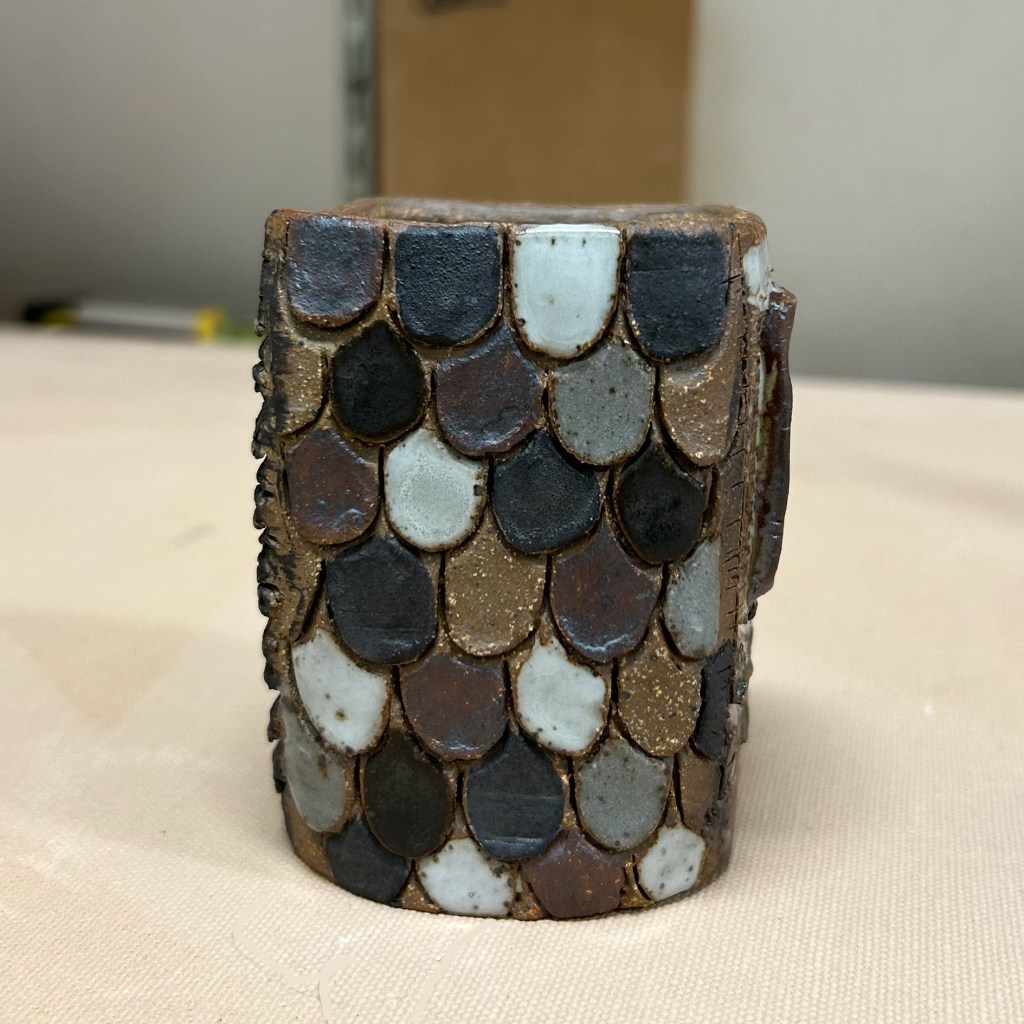
I took my time on this project figuring out what glazes I wanted to use. For me, this last step is the most intimidating part because you can work so hard and put a lot of time into a project just for the glaze to come out in a way that you didn’t expect. To try and prevent that from happening I made test tiles tried out the ideas I had on the small pieces of clay and fired them to see how they would come out. It added some significant waiting time to the process but I am so glad that I did this step. In image 1 I tested out how the door would look with raw clay and iron oxide. Image 2 was a test with 3 glazes: Waxy Black, San Miguel, and Leach White along with black underglaze, iron oxide and raw clay, this was how I ended up glazing the roof. It was very time consuming but hopefully worth it in the end. Image 3 was to test the siding on the hut, I used black underglaze with some wiped off.

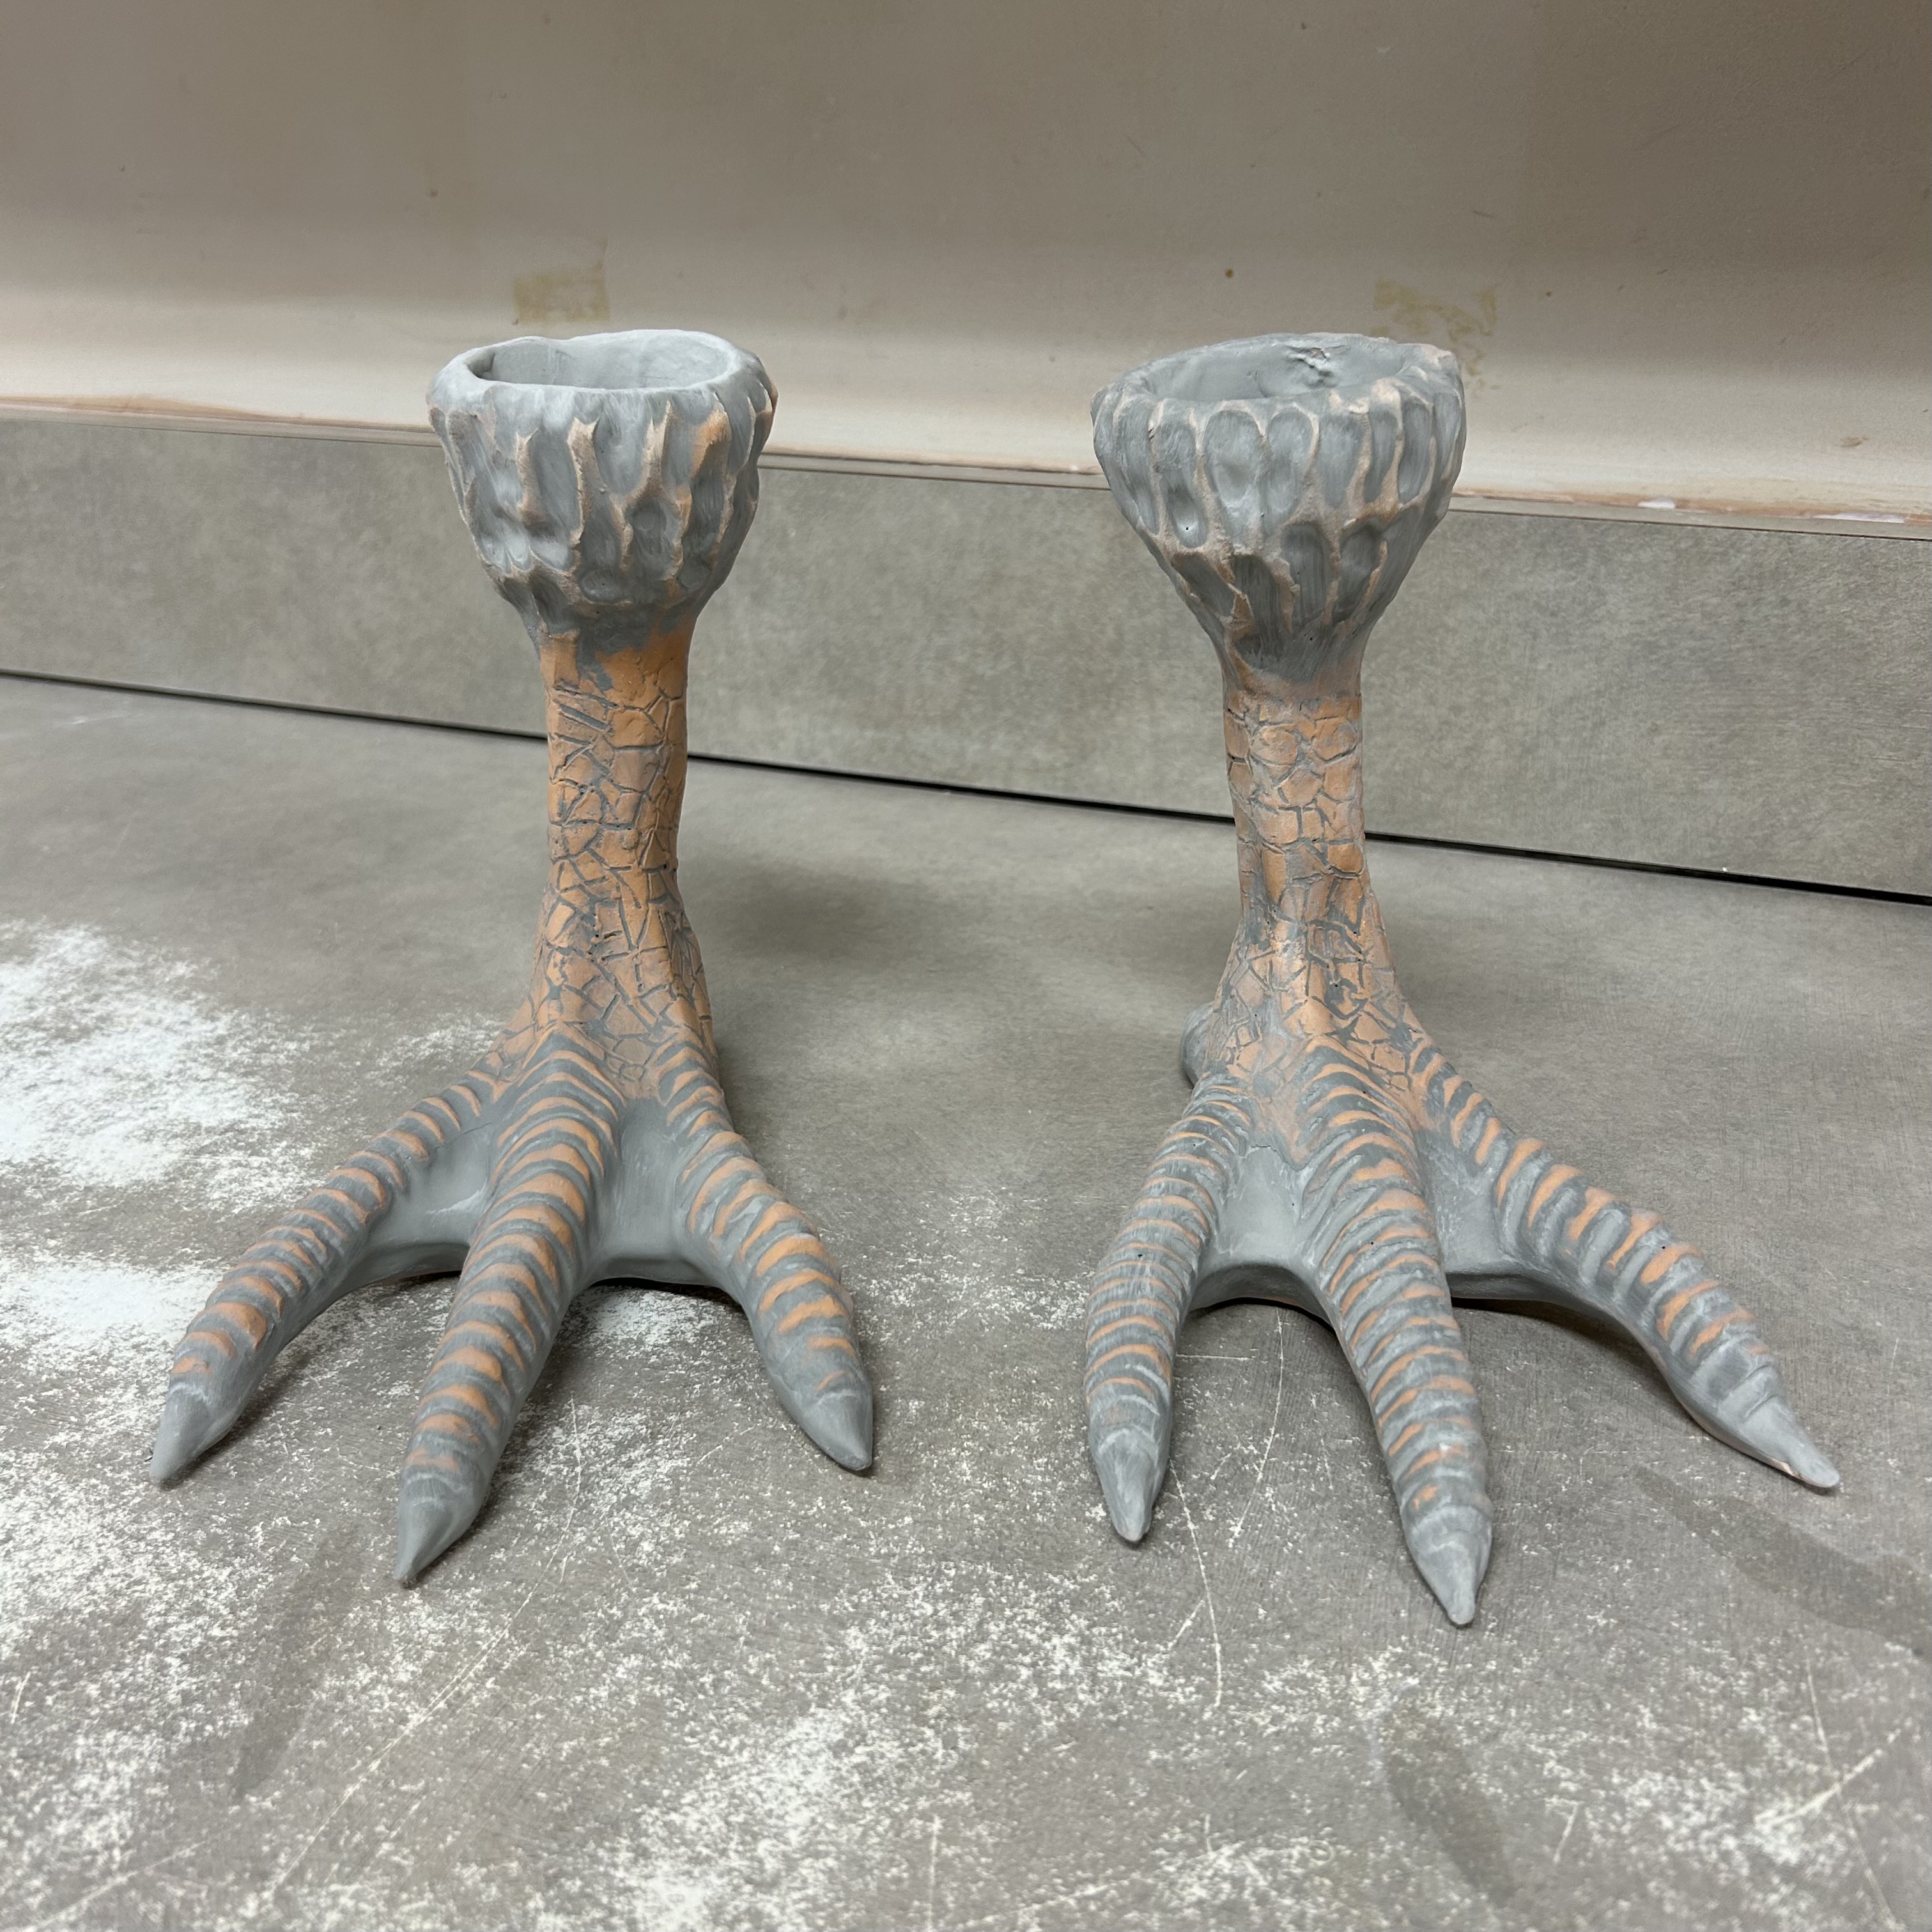
I glazed the chicken feet that will be the base of the hut. I used some Waxy Black glaze and sponged some off so it gives a worn and more natural effect.

Glazing this piece was a long process, it took me about 8 hours. I did it in 2 days. The first day I did everything but the roof and the last day the roof was all I did. I loved the process, when I’m doing ceramics it barely feels like work! That’s the update! I will have one more update of the finished hut!