Hi everyone! I’m writing excitedly this week because I’ve been getting great results in the ceramics studio! For our class, we were assigned to find a glaze recipe we liked, make, and test it in the studio. It felt like a very intimidating task, but in actuality, it’s not as complex.
I began researching recipes early in the semester, but didn’t settle on one to try until about a week ago. I found the recipe on a website called Glazy, and the title of the recipe was “Korean Stromboli Green Celadon.” It was an interesting name, but a bright result, which I was looking for. It was honestly luck that I stumbled upon this recipe because we had all of the chemicals needed, and the test images included on the website were done on a darker clay similar to what we use in the studio, making it easier to gauge the results we could expect. Once I got the go-ahead from my professor, I dove right in.
The process begins with safety, wearing a mask to protect from the chemical dust, turning the fans on in the studio, and trying your best not to spill or create more chemical dust. Once that’s understood, it’s time to measure the chemicals. There’s a scale and scooper that you can use to make accurate measurements, and then each chemical is poured into a bucket after being measured. Once every chemical is measured, some recipes require you to stir the chemicals while they are still dry, and mine did need this. I went over to the spray booth, where there was a ventilation system, and slowly mixed the powders. Once combined, I leveled the powder in the container and added water. Once the water is added, I let the mixture sit and do its thing for a few minutes. Then, I used a drill with a beater attachment to thoroughly mix the glaze. My specific glaze is extremely thick and settles very fast, so it can be a pain to mix, but my professor added a substance that is supposed to make it settle slower. The only thing about this glaze is that you have to stir it very frequently, but other than that, it works very similar to other glazes we have in the studio.
Since we’re only in the testing stage, I only made a small amount of the glaze. With that small amount, we ensure that there is as little waste as possible if the glaze doesn’t work out. To see if the glaze works, we have to test it out. We don’t test glaze on our pieces, but make test tiles. Test tiles allow us to see if a glaze drips or what a different number of dips into a glaze will look like. So, I dipped my test tile once and then dipped it halfway to see what one dip versus two looked like. Then, it all came down to how it fired in the kiln.
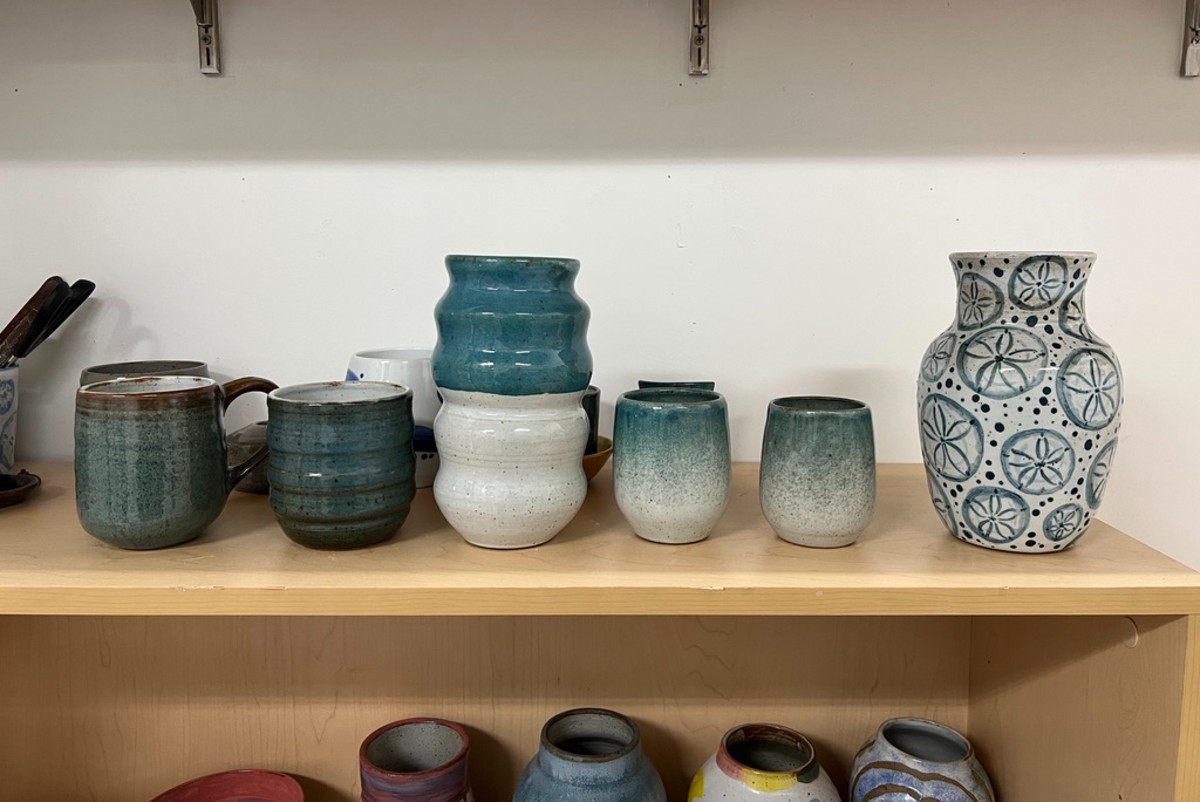
When we finally unloaded the kiln, I was shocked by the results. It was gorgeous! The color was vibrant and didn’t vary too much from the picture on the recipe website. I’ll include a picture of the tile below. Immediately, I wanted to try it out on some of my pieces, so that’s exactly what I did. I made a larger batch of the glaze and then started applying it to my pieces. I dipped my first piece into my glaze twice to have one piece with only my glaze. I decided to experiment with the other pieces in a couple of different ways. First, I dipped three pieces into our white color in the studio. Then, I air-brushed my glaze on the two smaller pieces on top of the white base. On the remaining piece, I dipped the piece halfway into my glaze; this way, I could see what would happen if the glaze was on top of a white base. I was very nervous about seeing the results because there was a chance the white glaze and my glaze wouldn’t work well together. To my surprise, they looked terrific when we unloaded the pieces from the kiln. I’ve never been more proud of something in my ceramics career. I love the glaze I made, and it’s even better that it looks great with the white as a base. I’ll add some images of the final pieces below!


Well, I hope you all enjoyed hearing a bit about the process of making a glaze and how my experiments went! I’m excited to come back next semester and experiment with my glaze, but I also want to try and make more glazes. Have a great week, everyone!
-Jenna