

Hi Everyone! Hope the start of the semester is going well. The first two weeks of the semester in my etching class we started off with a simple etching on a piece of Plexiglass. I wasn’t sure what to draw on it, but I decided to make it a very detailed drawing of my dog Rylo. He is a 2 year black lab, full of energy and I love and miss him so much, so of course I wanted to make one of my artworks about him!
For the process, typically you would take a drawing/sketch and put the Plexiglass on top of it so that you can trace it and etch in the lines. For this scenario, I took a picture of Rylo and brought it into Photoshop to make it a black and white, detailed line drawing. I then printed it out so that I could etch onto the Plexiglass right on top of it. As for the etching, we use these really sharp needles that “etch” and dig into the Plexiglass to make imprints for which the ink will seep into when printing. Here is some of the process of my etching below. I taped the Plexiglass onto the paper so I could do it in different sittings, because there was a lot of detail to do all at once!
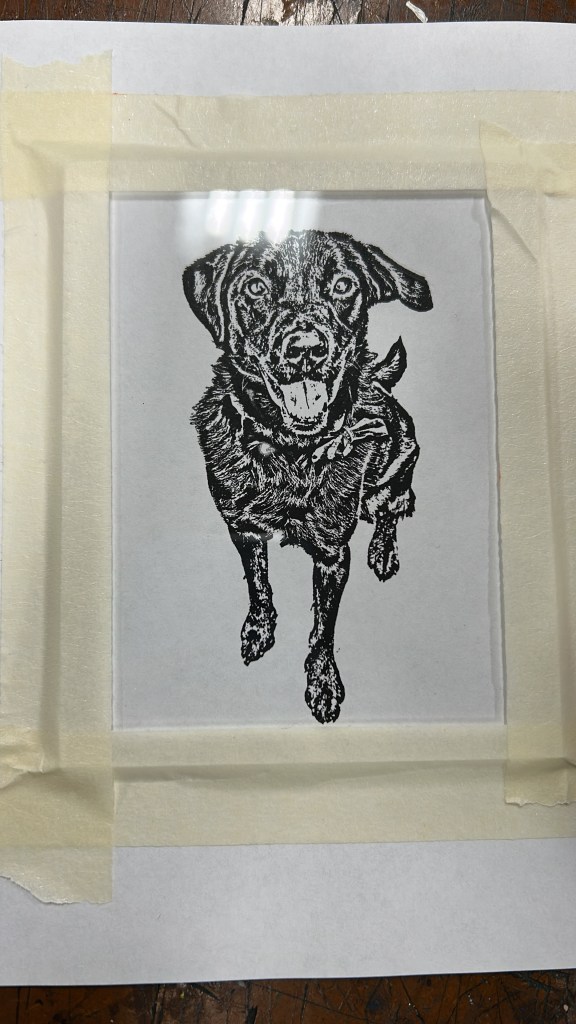
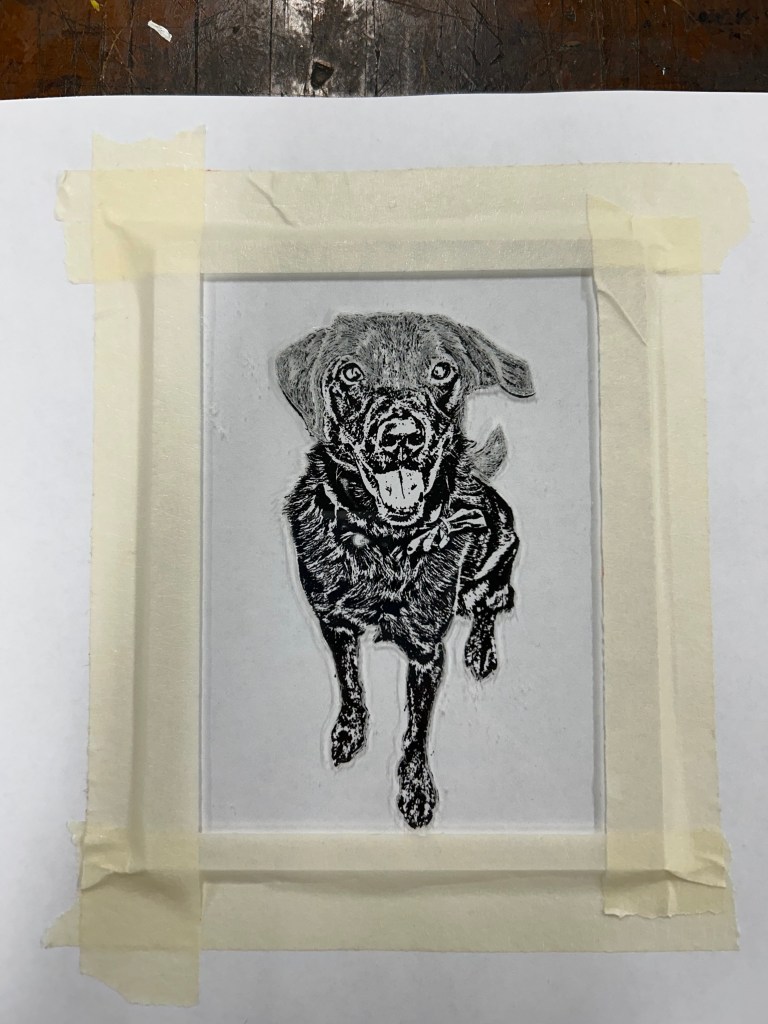

As you can see, all the white lines are the etching lines that are in the Plexiglass on top of the picture. Once I finished this part, it was time to start prepping to print it. First you have to sand the edges of the Plexiglass because if it’s a sharp edge, it might rip your paper when printing because the Plexiglass is going to be pressed into the paper. Next, you have to prep the special printmaking paper by soaking it in water for at least 5 minutes, and then blotting it dry until it is damp. This allows the ink to absorb and actually show up on the paper. Then, to ink up the Plexiglass you just have to swipe some ink on top of it with some old cardstock paper scraps making sure to go in all directions and completely cover it with ink. Then carefully in circles, wipe off the ink with what we call a tartlatan. Essentially this is just a starchy cheesecloth and it takes the ink off without making a mess. You can use these to wipe off as much ink as you want, especially in the background, either to have a more grey tone background or to try to get it as white as you can.
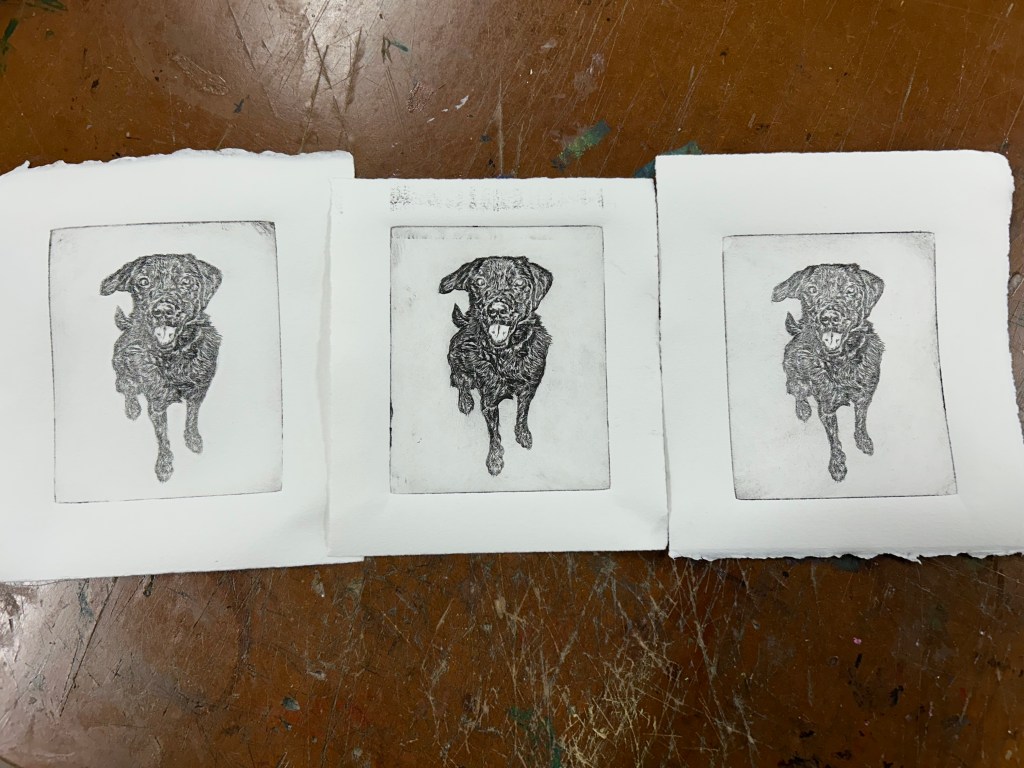
Once you are happy with the ink and it is filled into all of your etching lines, you are ready to put it through the press. This process is also backwards, so whatever you draw, the actual etching print is going to be the other way, so keep that in mind. You simply place the Plexiglass (preferably on a piece of paper underneath) with the ink facing up, and then your damp paper right on top of it that you want to print on. Then a thick cloth goes on top of it to make sure that it rolls through the press smoothly. Some big wheels turn, the cylinder press rolls it through and makes an imprint of the etch into your paper, and you have your final product! Here is what my first one looked like, and as you keep doing it the etching lines will slowly fade and you might have to re-carve into it if you want more than a few prints.
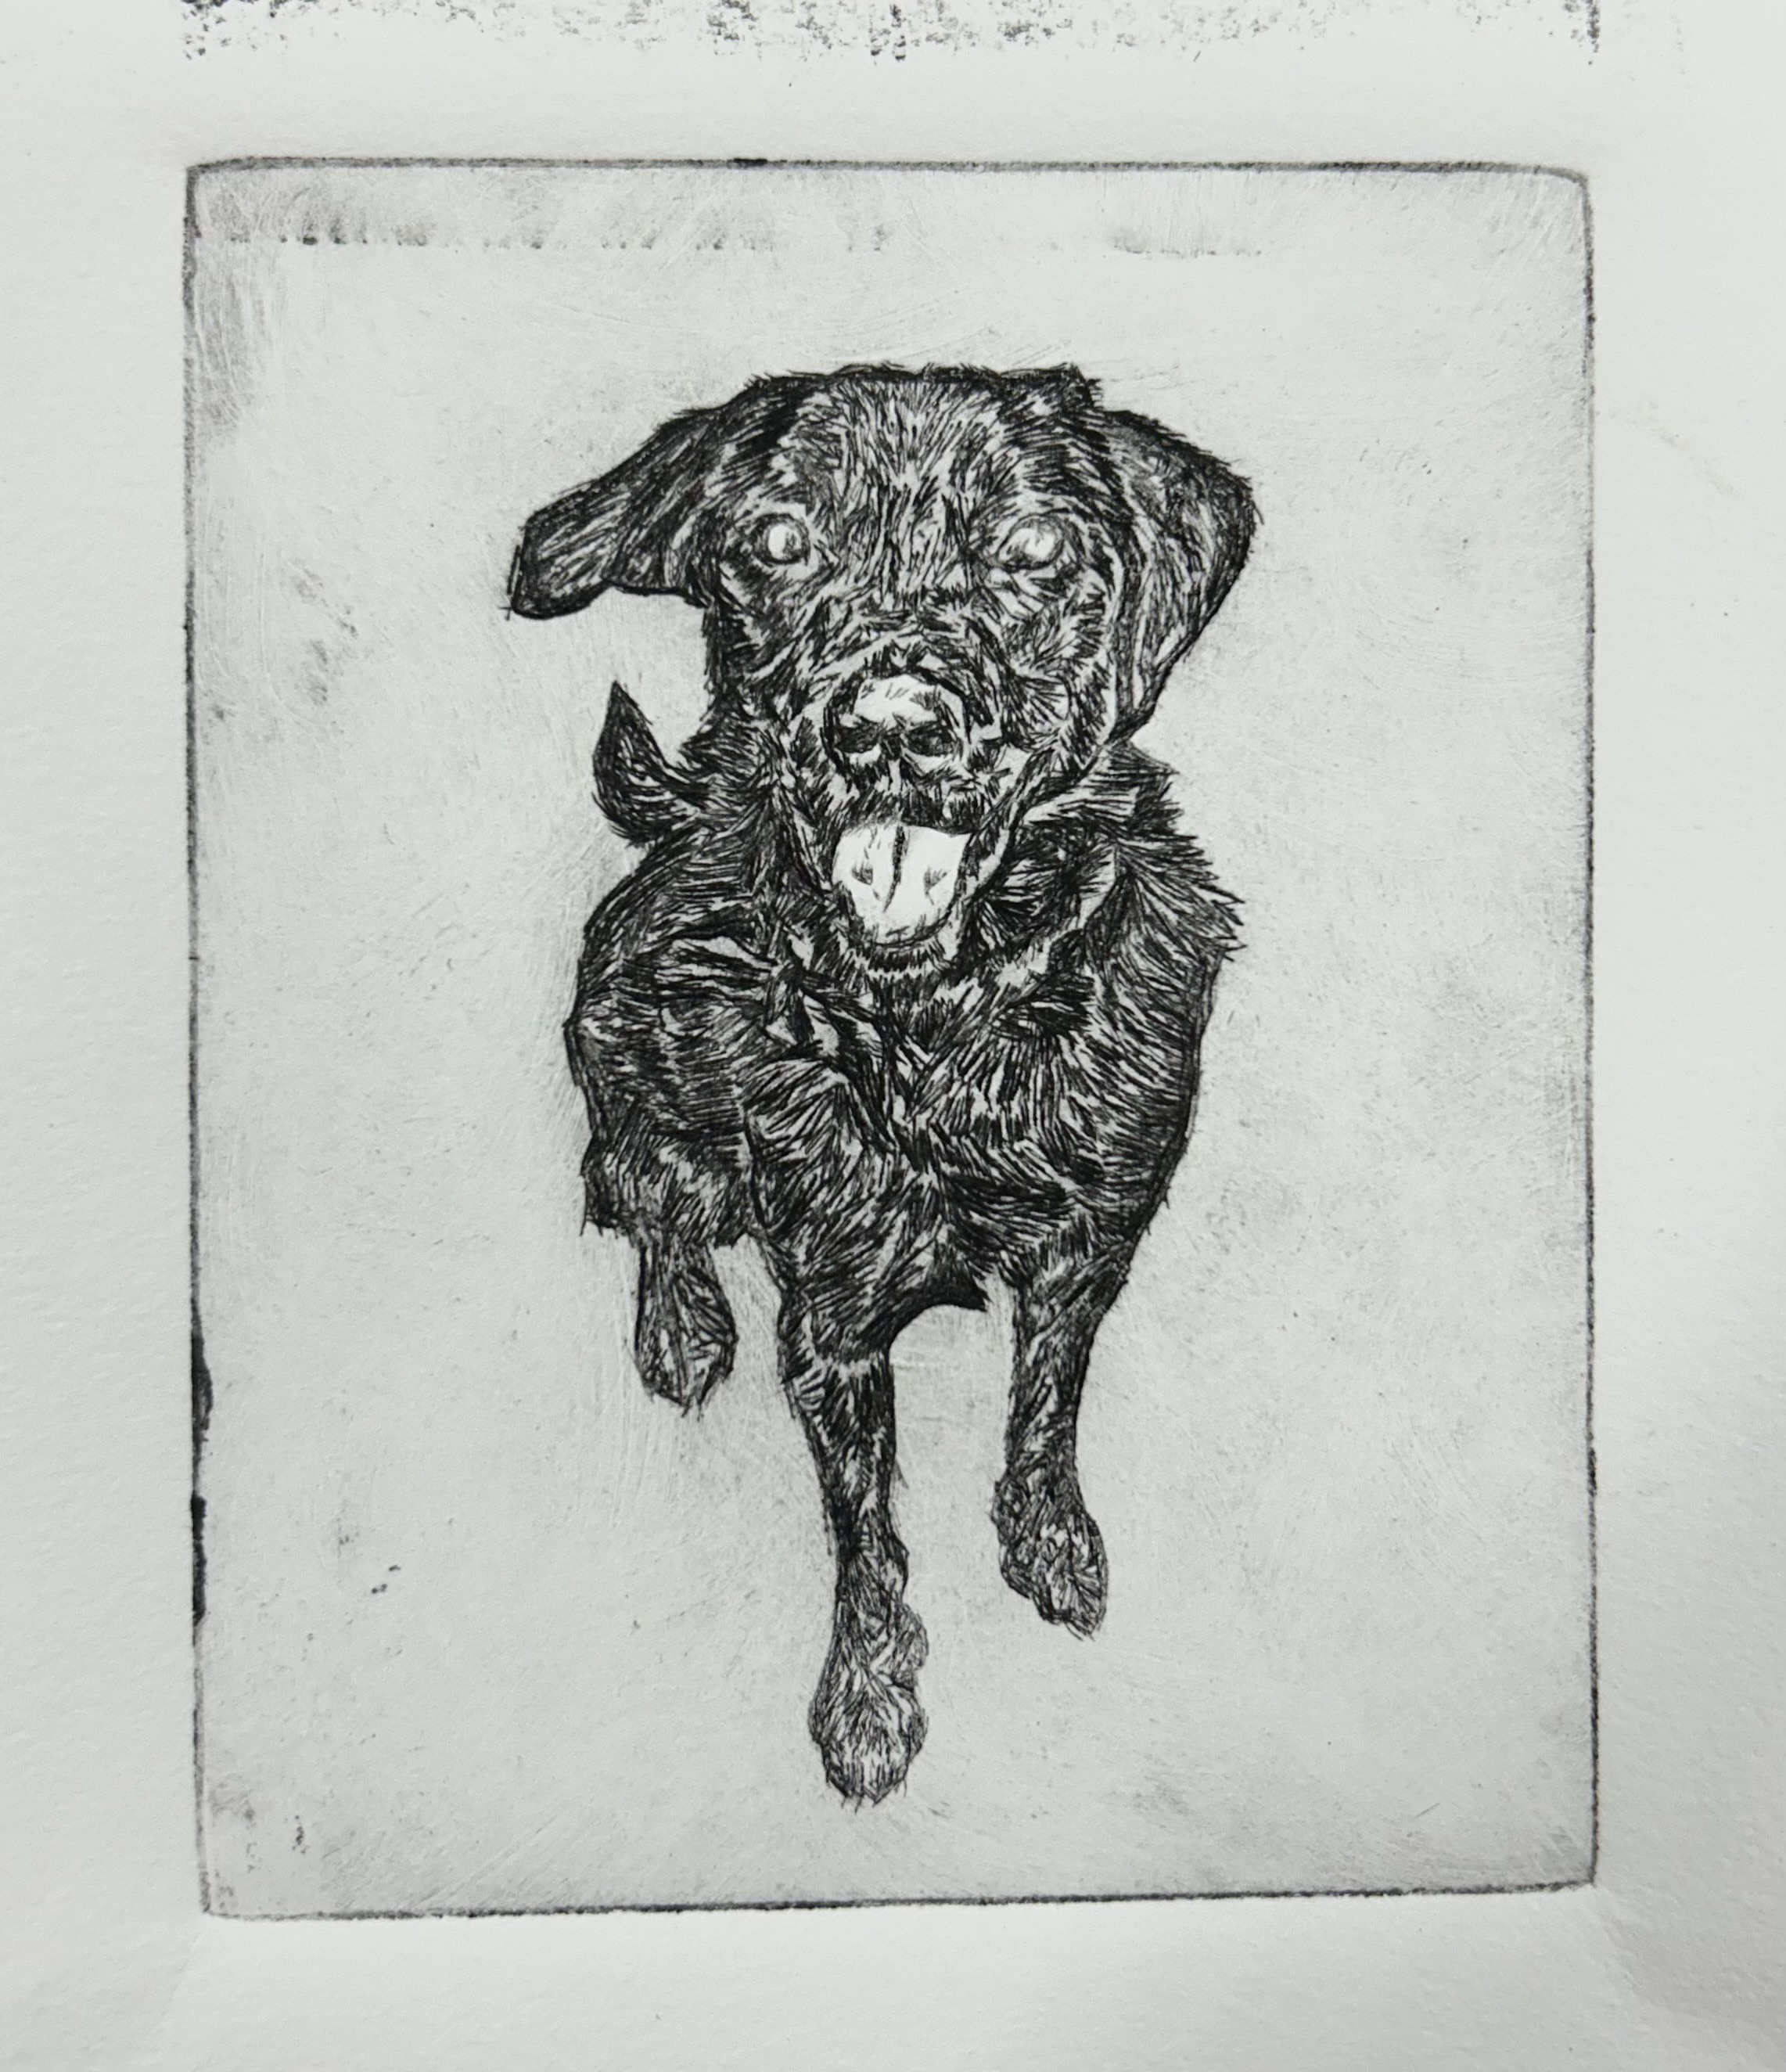
It’s a bit hard to explain the process in words without visuals, but I hope you understood! I am really happy with how this came out and the details held up so well. I can’t wait to keep trying different etching techniques!
Thanks for reading!
Ella