Hi everyone! Hope everyone’s week is going amazing. These last two weeks in the printmaking studio have been so much fun, and learning all the different ways to screen print makes me want to do something with this in my future so badly! Our first official project had to do with using drawing fluid and screen filler, and then we created 5 identical pieces that had at least 2 different colors in them.
The Process
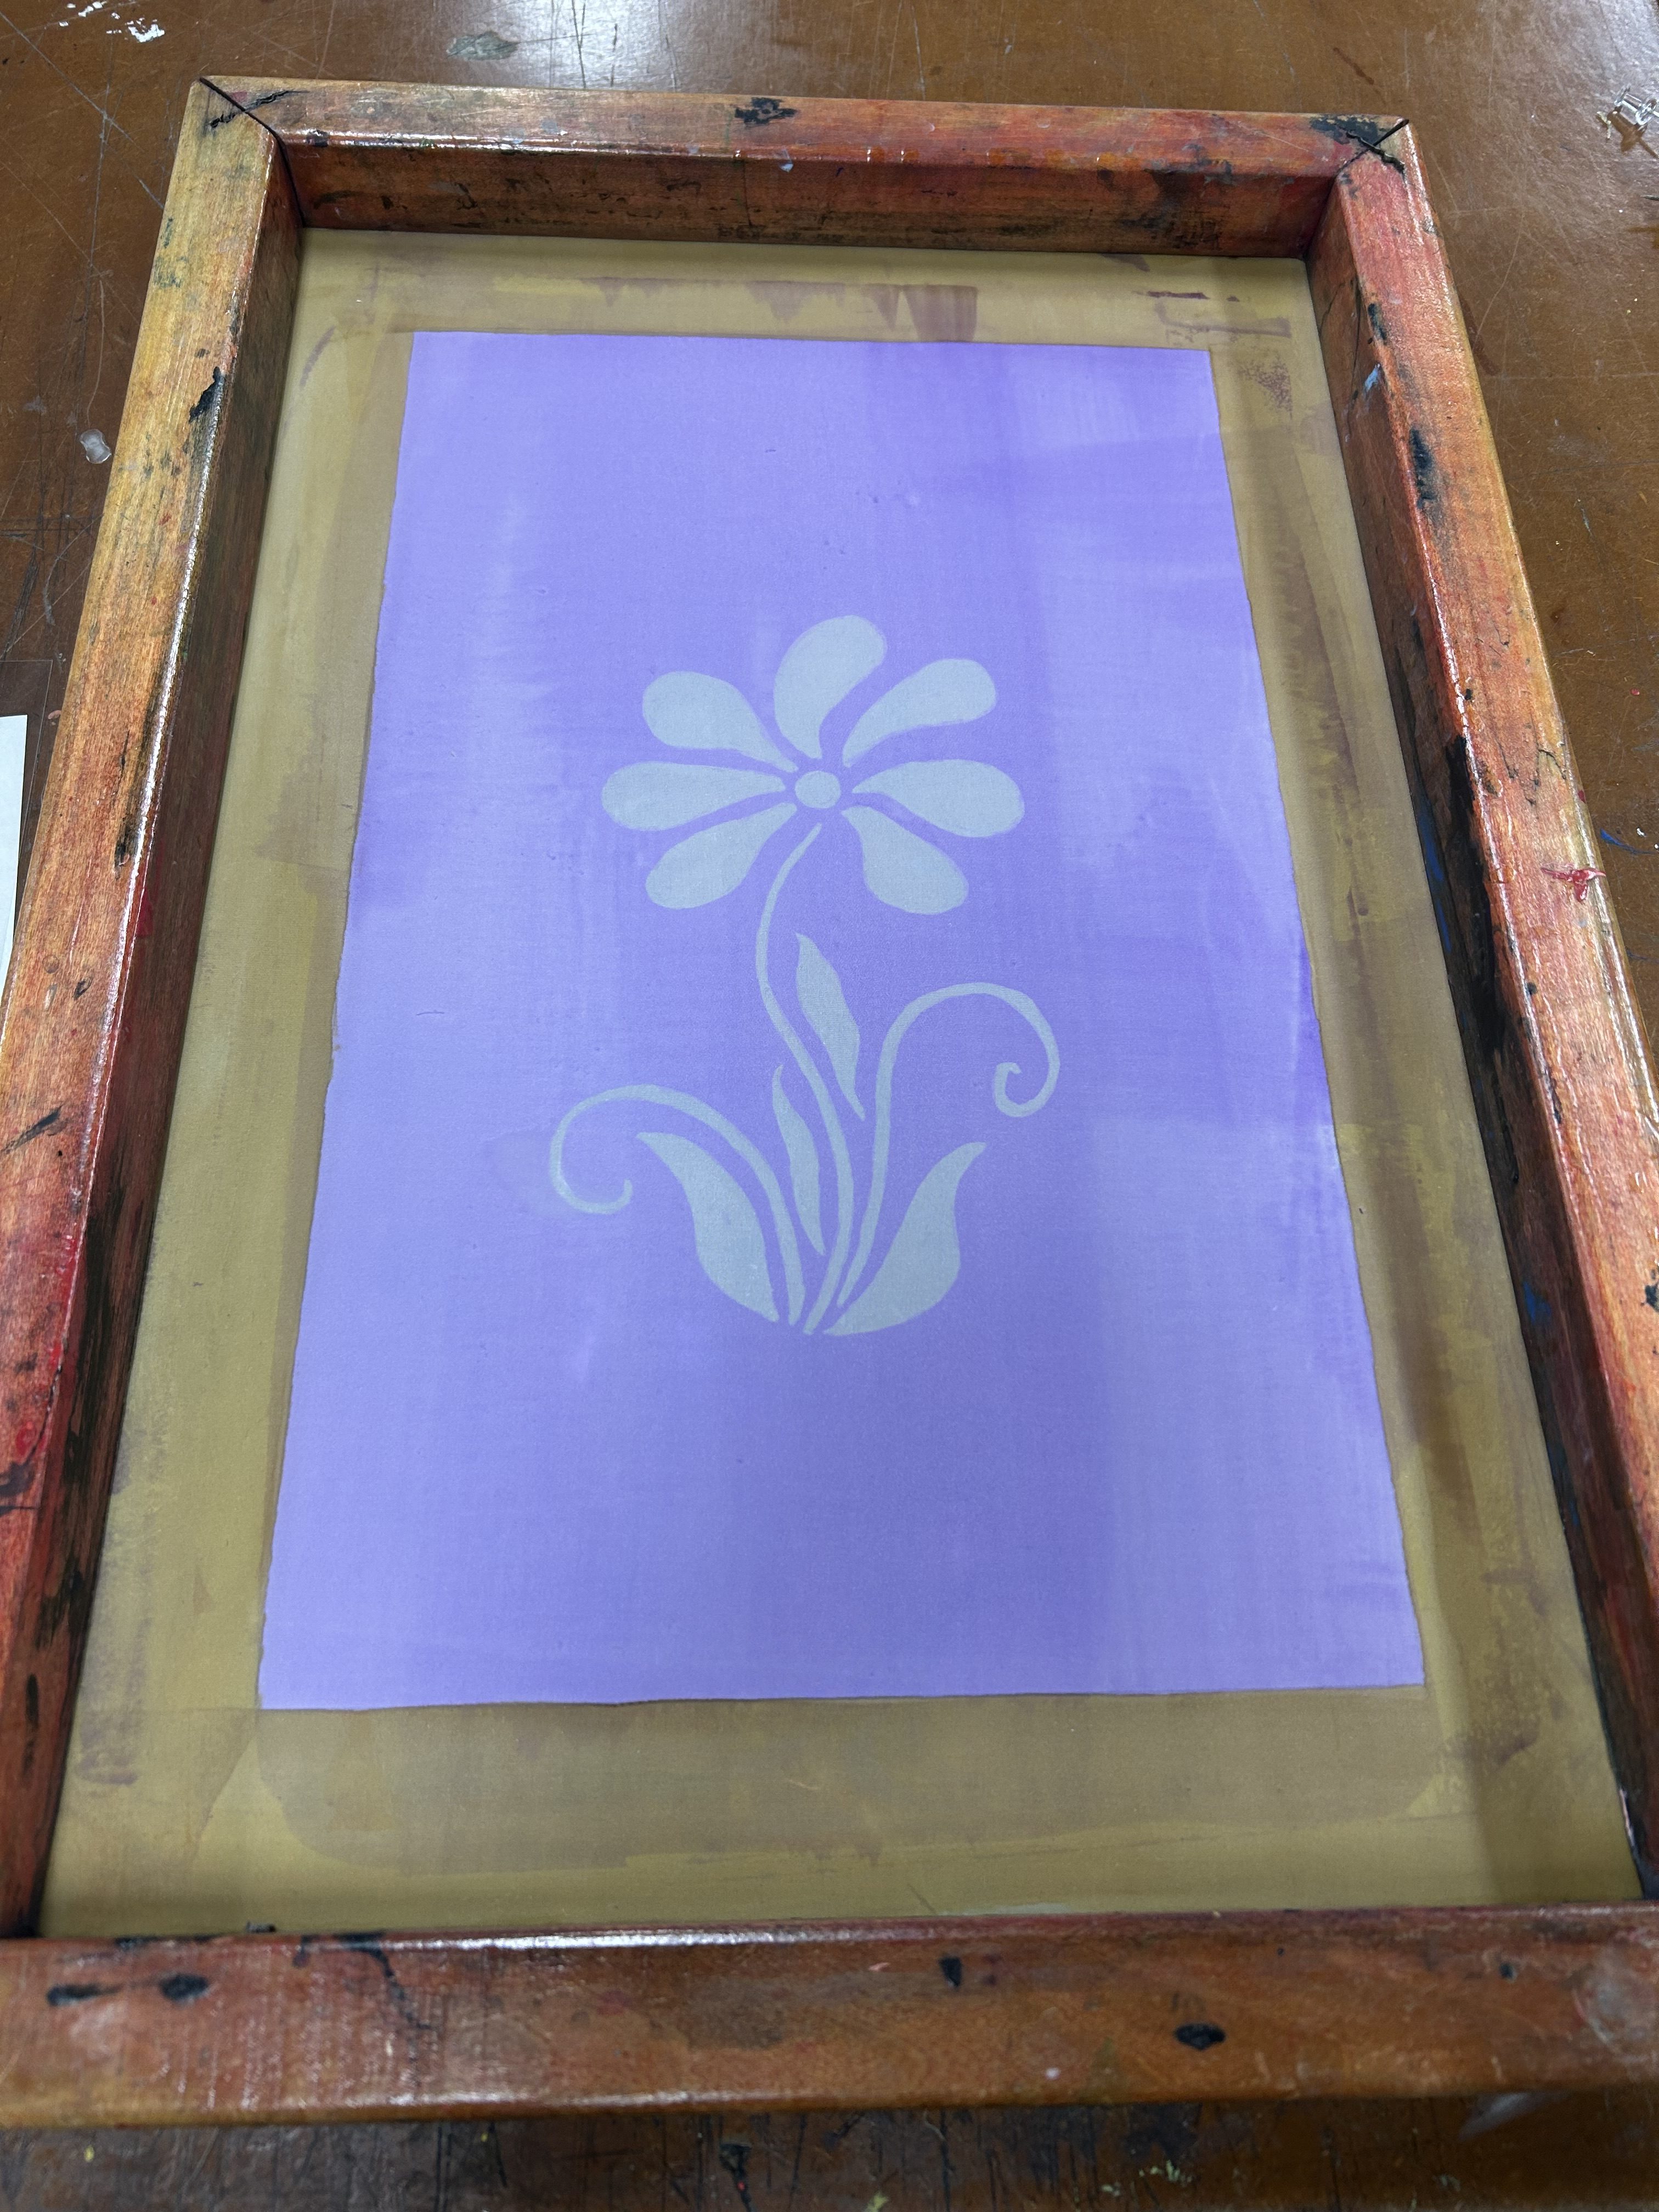
To get technical, drawing fluid is a viscous, water-soluble fluid that is used to create a stencil on the silk screens. We then took screen filler on top of that and covered the whole screen with it, so that it would block out the rest of the screen that we did not want printed. The screen filler dries to a water-resistant finish, so that nothing can ruin it or pass through it either. We washed/scrubbed out the drawing fluid on the area that we created a stencil, and now we have a printable stencil that we can push ink through to make a beautiful print! I chose to do a flower, specifically a flower from the month of August when I was born, a Gladiolus flower!
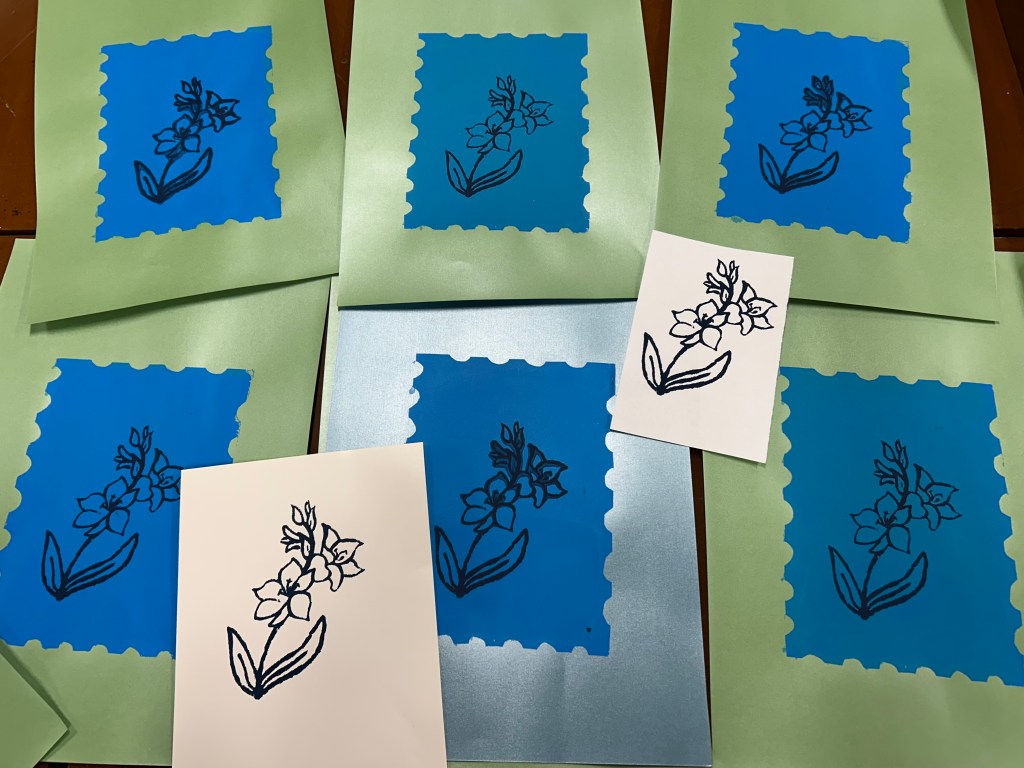
Then, on another screen I created a sort of postage stamp shape that I wanted to use for my second color in this project. I just used some painters tape for this and cut out the shape and stuck it right on the back of the screen, and it printed beautifully when I put a bright blue color through it onto some green paper. When that was dry, I printed my flower drawn stencil on top and I created some really cool prints! Here are some pictures of my process below.


Photo Emulsion
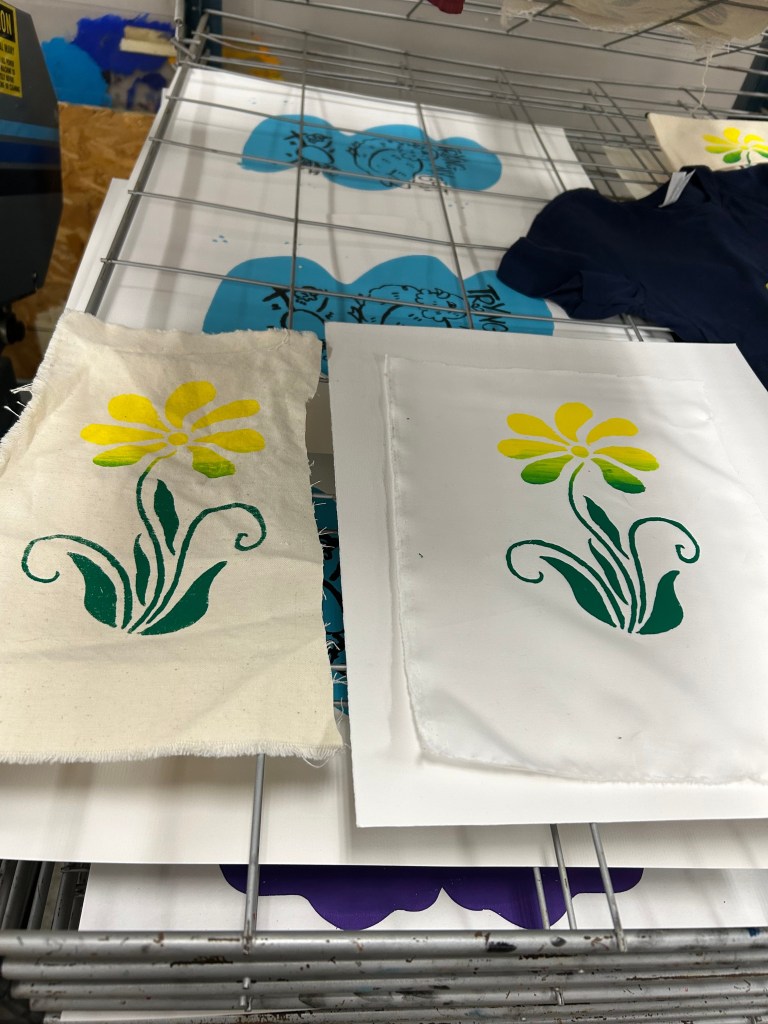
After this project was finished, we started learning about the photo emulsion screen printing process. The way that Prof. Chris Medley explained it was basically just exposing a blacked out image onto the screen using the big photo emulsion machine. First the screen is coated with photo emulsion ink, which then needs to dry in a dark place so that no UV rays from any outside light will start to expose the screen. Then we carefully brought the dried screen over to the photo emulsion machine with a blanket over it because it was across the room and we didn’t want any chance of it being exposed by light. Next I took the transparency film that I drew on my solid shape, another flower, and taped it onto the screen that then gets vacuum sealed and exposed in the machine. It only takes 3 seconds! Some photo emulsion ink takes longer, Chris explained that the last ink they had took up to 40 seconds, so she was shocked at how fast these exposed. Then right after exposing, we wash it under the high-pressure water sprayer and it immediately formed the shape of my flower.
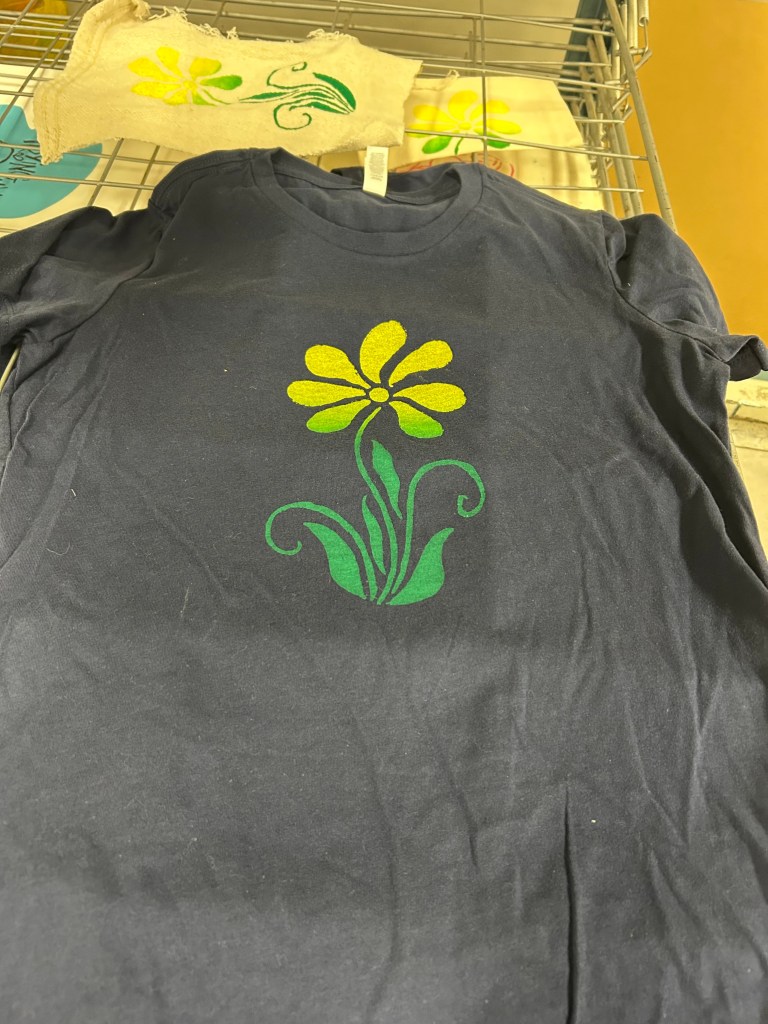
Every time I go to this class I learn something new and I am really enjoying everything we have being doing! Screen printing is really fascinating to me and overall just super fun, which is the most important part. With this print, I was able to create some really cool graphics on different textiles and fabrics. Chris wanted us to experiment for this project, and I learned how to do a gradient print and used yellow and green to print this flower on some different fabrics. I did a t-shirt and some silk and another grungy fabric. I think they came out super cool and I can’t wait to use photo emulsion again for more projects this semester!