Heya, in this week’s blog post, I’ll still be talking about the unicorn relief. The casting process and plaster casting in general is a bit of a production. The piece isn’t completely done yet, but I’ll show my plaster cast of the unicorn, the painting process, and talk about some things I’ve noticed about painting on plaster. At the end, I’ll also mention a new fun update, so stay ’til the end to find out more!
Unicorn Relief Progress
So, I left you off as I was doing undercuts on the plaster mould, shaving away any areas that might catch my cast upon removal. After I did that, I slathered Vaseline all over the mould. It’s a really goopy process, but it’s worth it. The Vaseline is there to allow the cast to come out of the mould (relatively) easily. I believe, especially because we are pouring plaster into a mould made of plaster, the mould would forever be stuck to my cast elsewise. The whole thing would just be a block of plaster, and that’s no good.
After I handled the Vaseline situation (and washed my hands of it thank god), I set up the box around the mould to hold the plaster, and filled any space around the edges with clay, thus getting clay all over my hands. I then mixed up some plaster with my hands- what I’m getting at is that this process is delightful, but boy is there always crap on your hands. Once the piece was poured, we gave it time to harden, and then released it. While it was still a little warm and not entirely set, I carved away imperfections and tried to solidify my vision. The piece was all bright white at this point, so it’s especially hard to see details. Luckily for you all, and me, I left the building as golden hour was in full swing! So there’s decent contrast in this picture, despite the monochromatic nature of plain plaster.

Once I was done with the carving process and I took the piece home, I let it sit for the rest of the night. Since I had just washed it off, it still needed time to dry off and harden fully. The next day, I started painting it. Since the project was to reference a well-known artist from the 20th century, I tried to paint it in the style of Julie Bell’s Good Fortune Unicorn piece, pictured below.

Painting on Plaster
As I started painting on the plaster, I realized that it was very porous. It slurped up my acrylic paint, and gave it almost a fresco look. I also realized that I didn’t need to use too much white, as the plaster accounts for that.

I started off with this basic baseline. It needed a little help. Over a few more hours, I ended up with this:

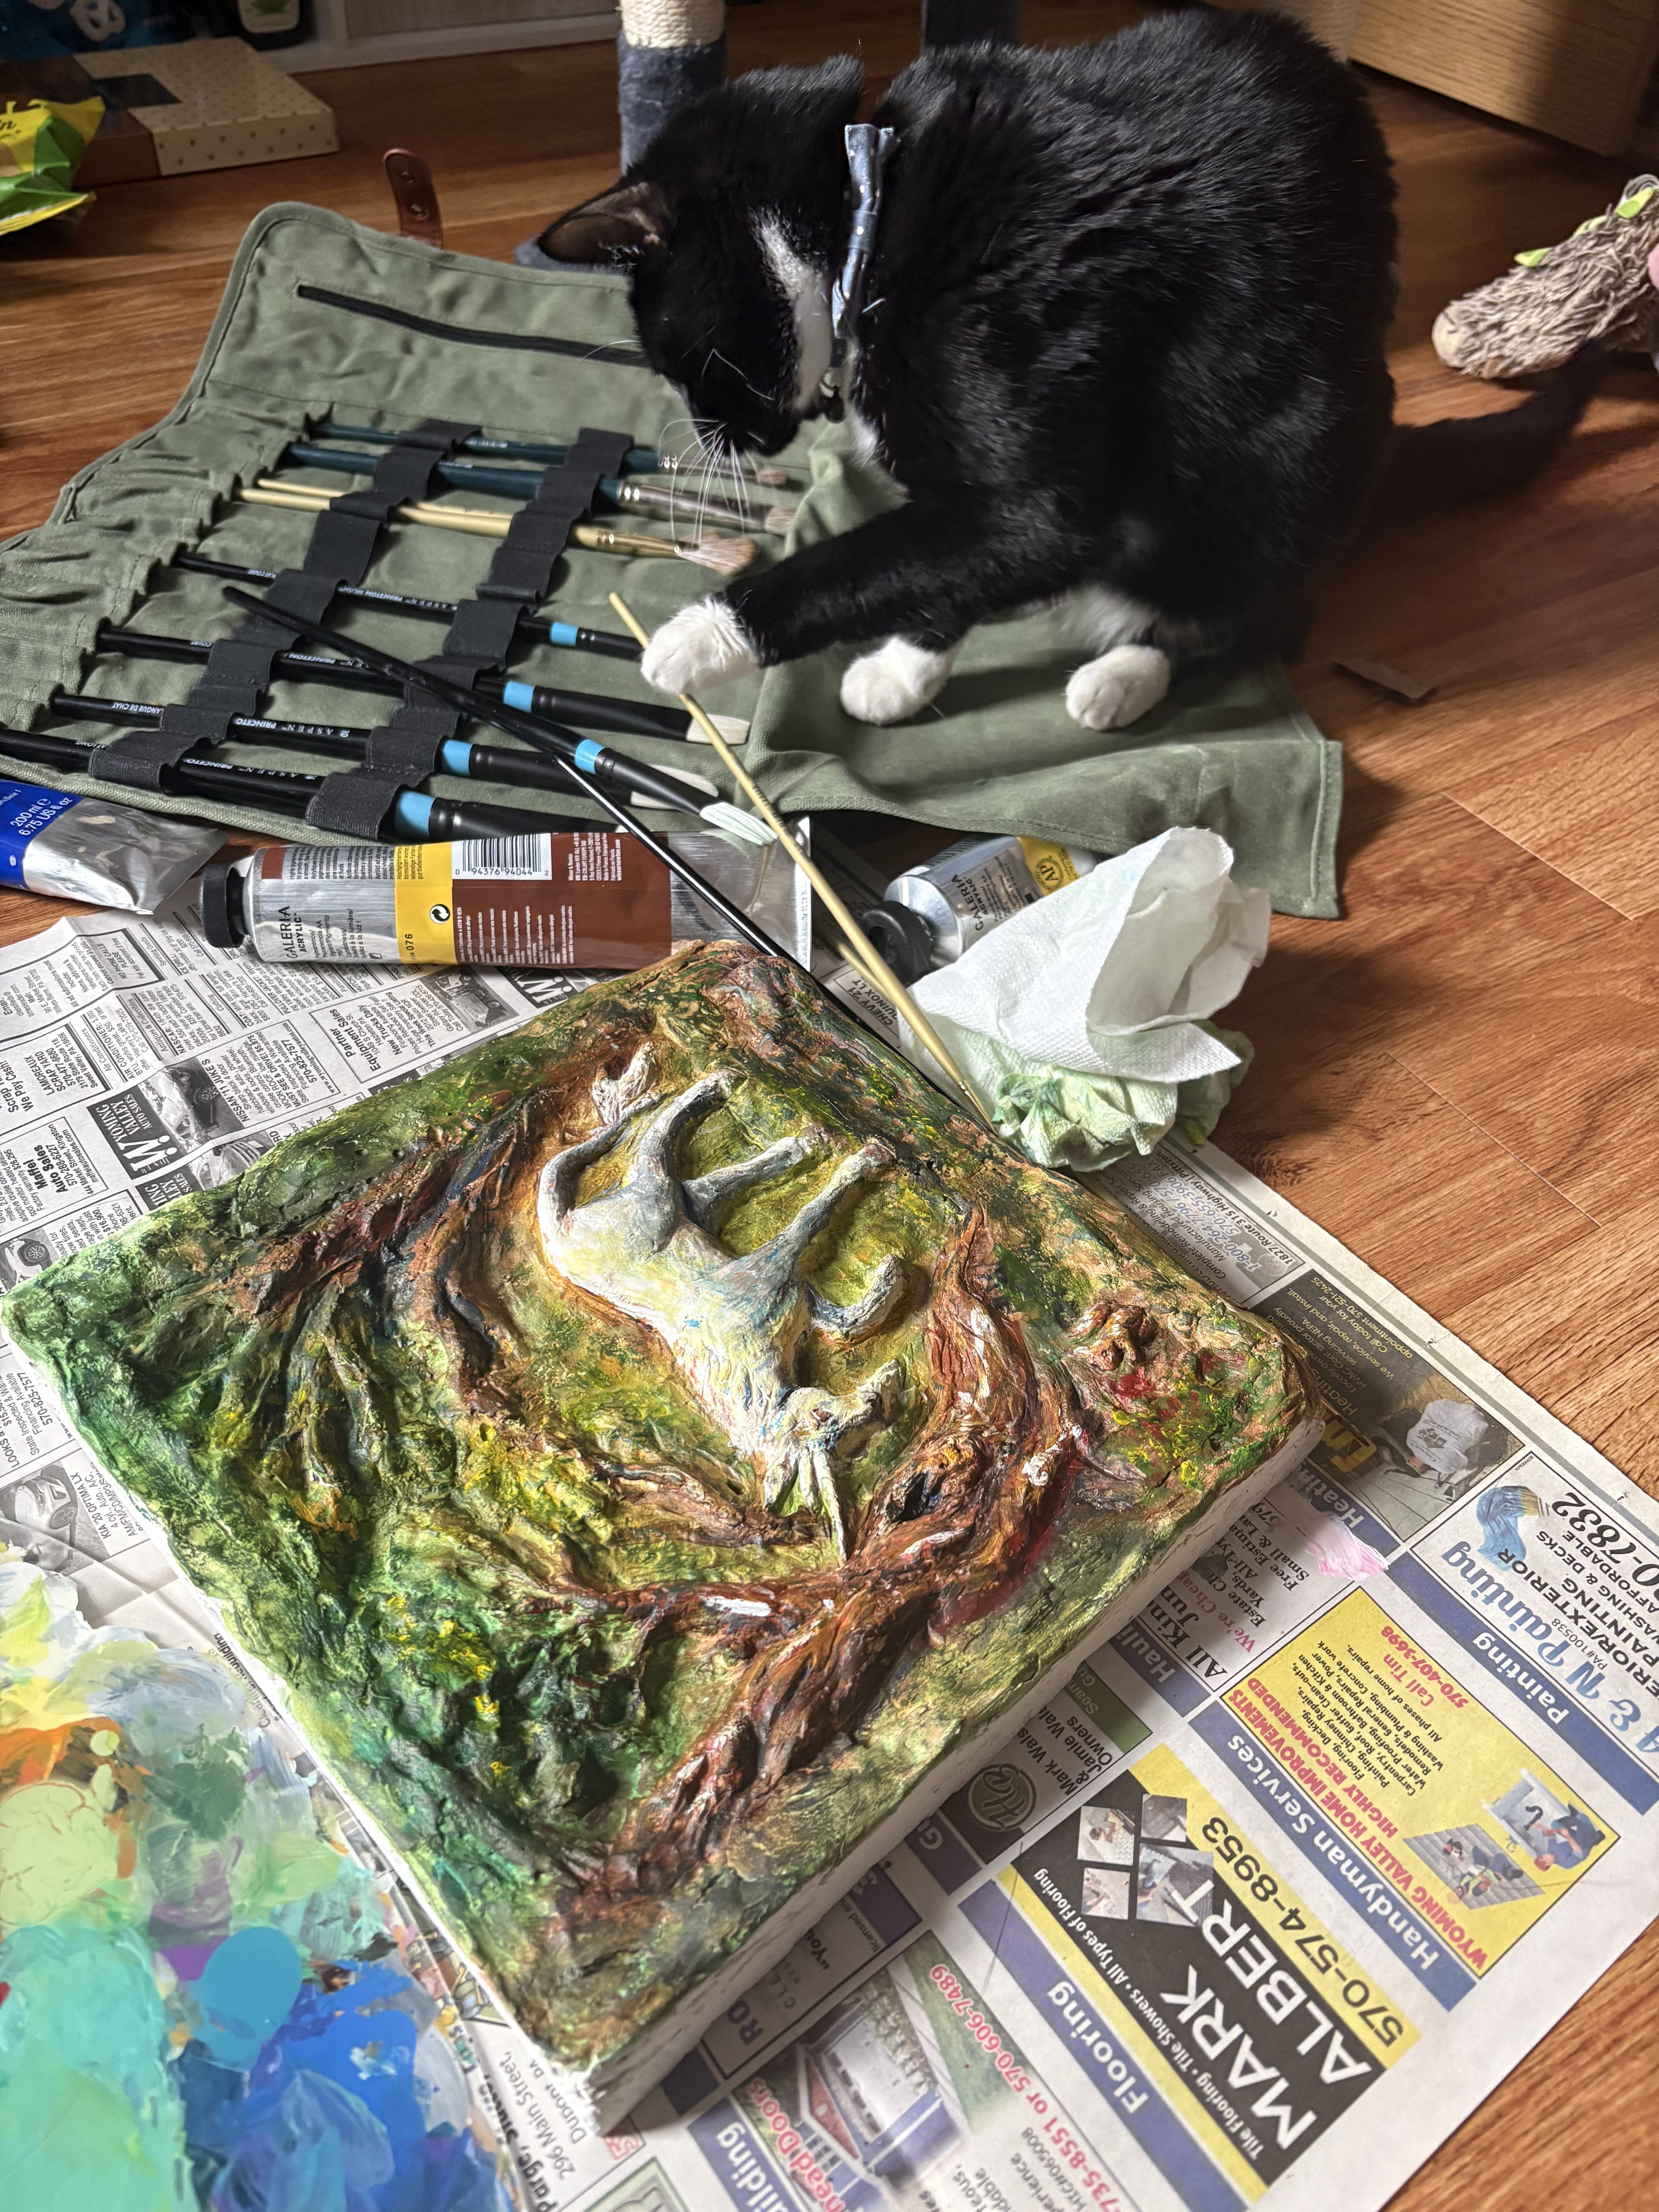
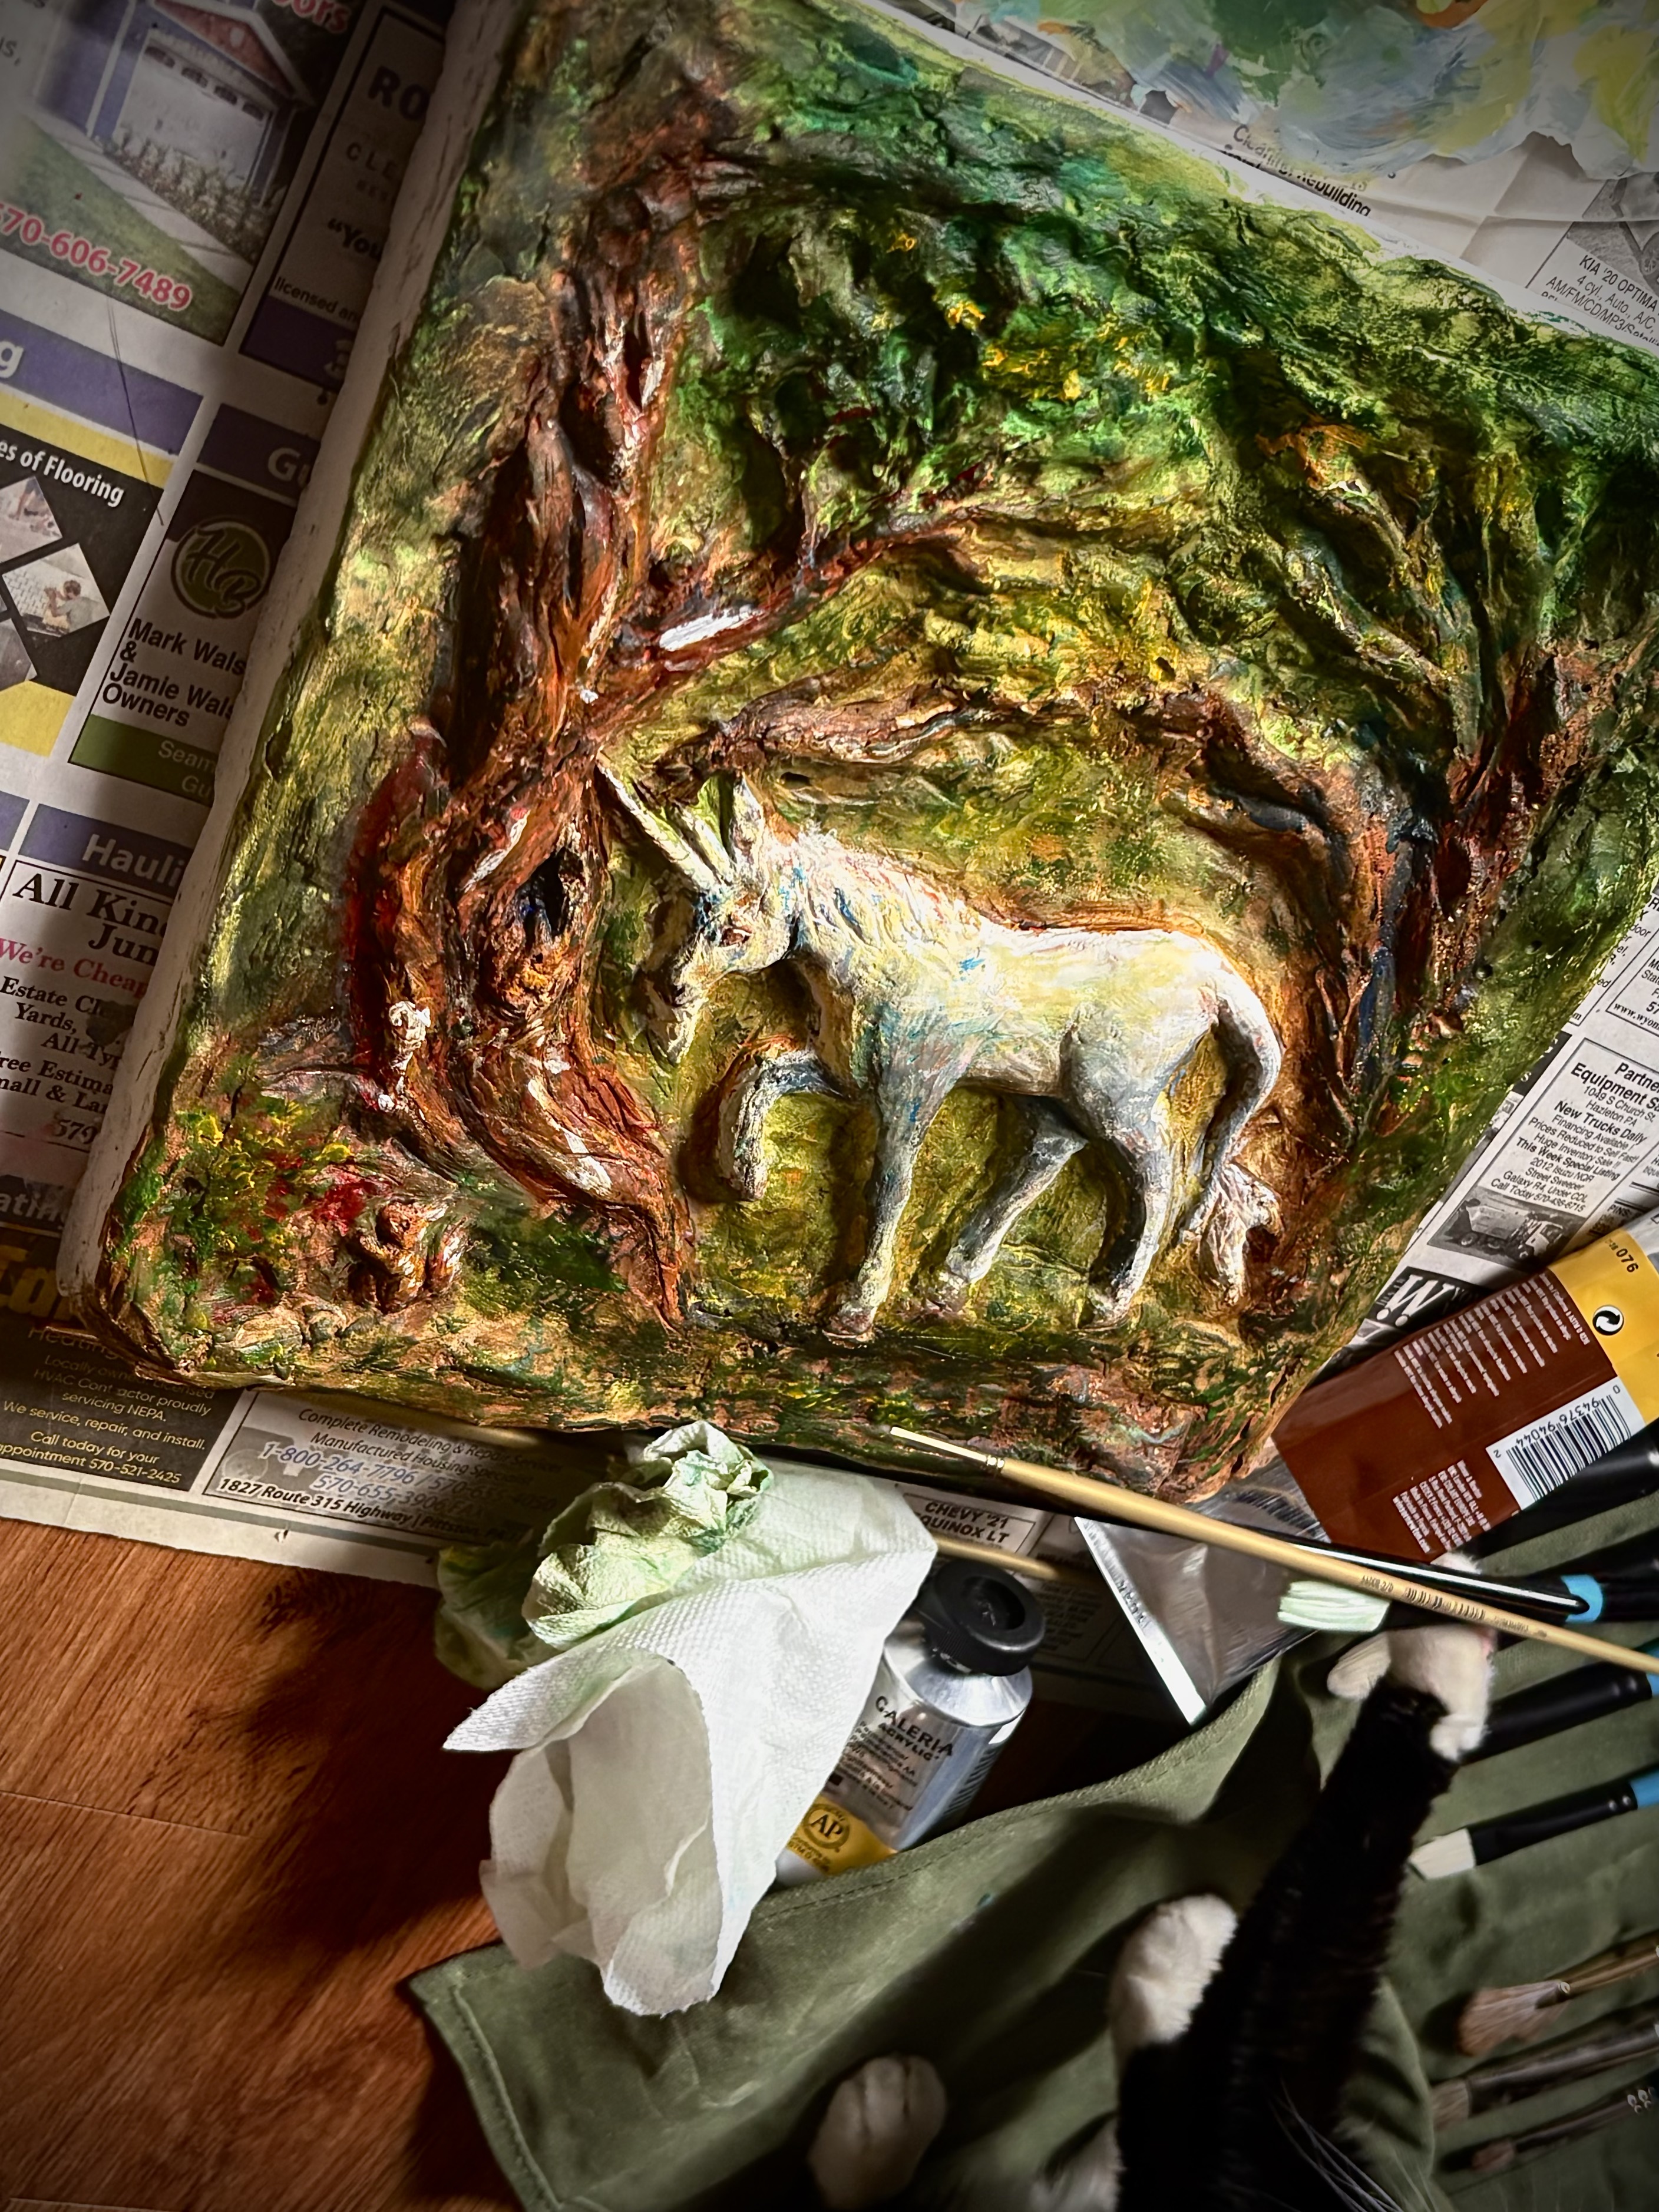
I’m still not happy with it. I think it needs more contrast. Even with my helpful assistant adding some contrast for me, I think I’ll take some time over the next week to get it to a point where I’m satisfied.
As 3D work goes, this is all I really have to share. I have been working on a pigeon mural on the side of the stairwell, though. It’s just painters tape and masking tape, and I’m having a lot of fun with it. I hope to be able to make more of these, once I’m done with the first 🙂 I already have been given some suggestions from some faculty and students, so I’m really excited about that!
More to come!
~Marissa