History
The Moravian star is also known as the Froebel star or German star. It was named after a German educationist, Friedrich Frobel. Frobel founded the kindergarden concept. He encouraged the use of paper folding in pre-primary education which taught simple mathematical concepts to children. The Froebel star dates back to the 19th century. The star is traditionally used to decorate Christmas trees and wreaths. Garlands and mobiles are usually made out of the stars as well.
how I learned
My junior year of high school I took a decorative art class as an elective. I enjoyed the class a lot because of my teacher, she let us branch out on our own projects as long as we got our assignments done. One of the projects was a Moravian star. I had seen them before and I was excited to learn how to make one.
How to
Step 1: Four Strips and Fold
First you need to cut four even strips of paper. The thinner the strips of paper the smaller it will be, the thicker the strips of paper the bigger it will be. unfortunately, if the strips of paper are thicker then they need to be longer because you won’t have enough to finish the star. You’re then going to fold each strip of paper in half.

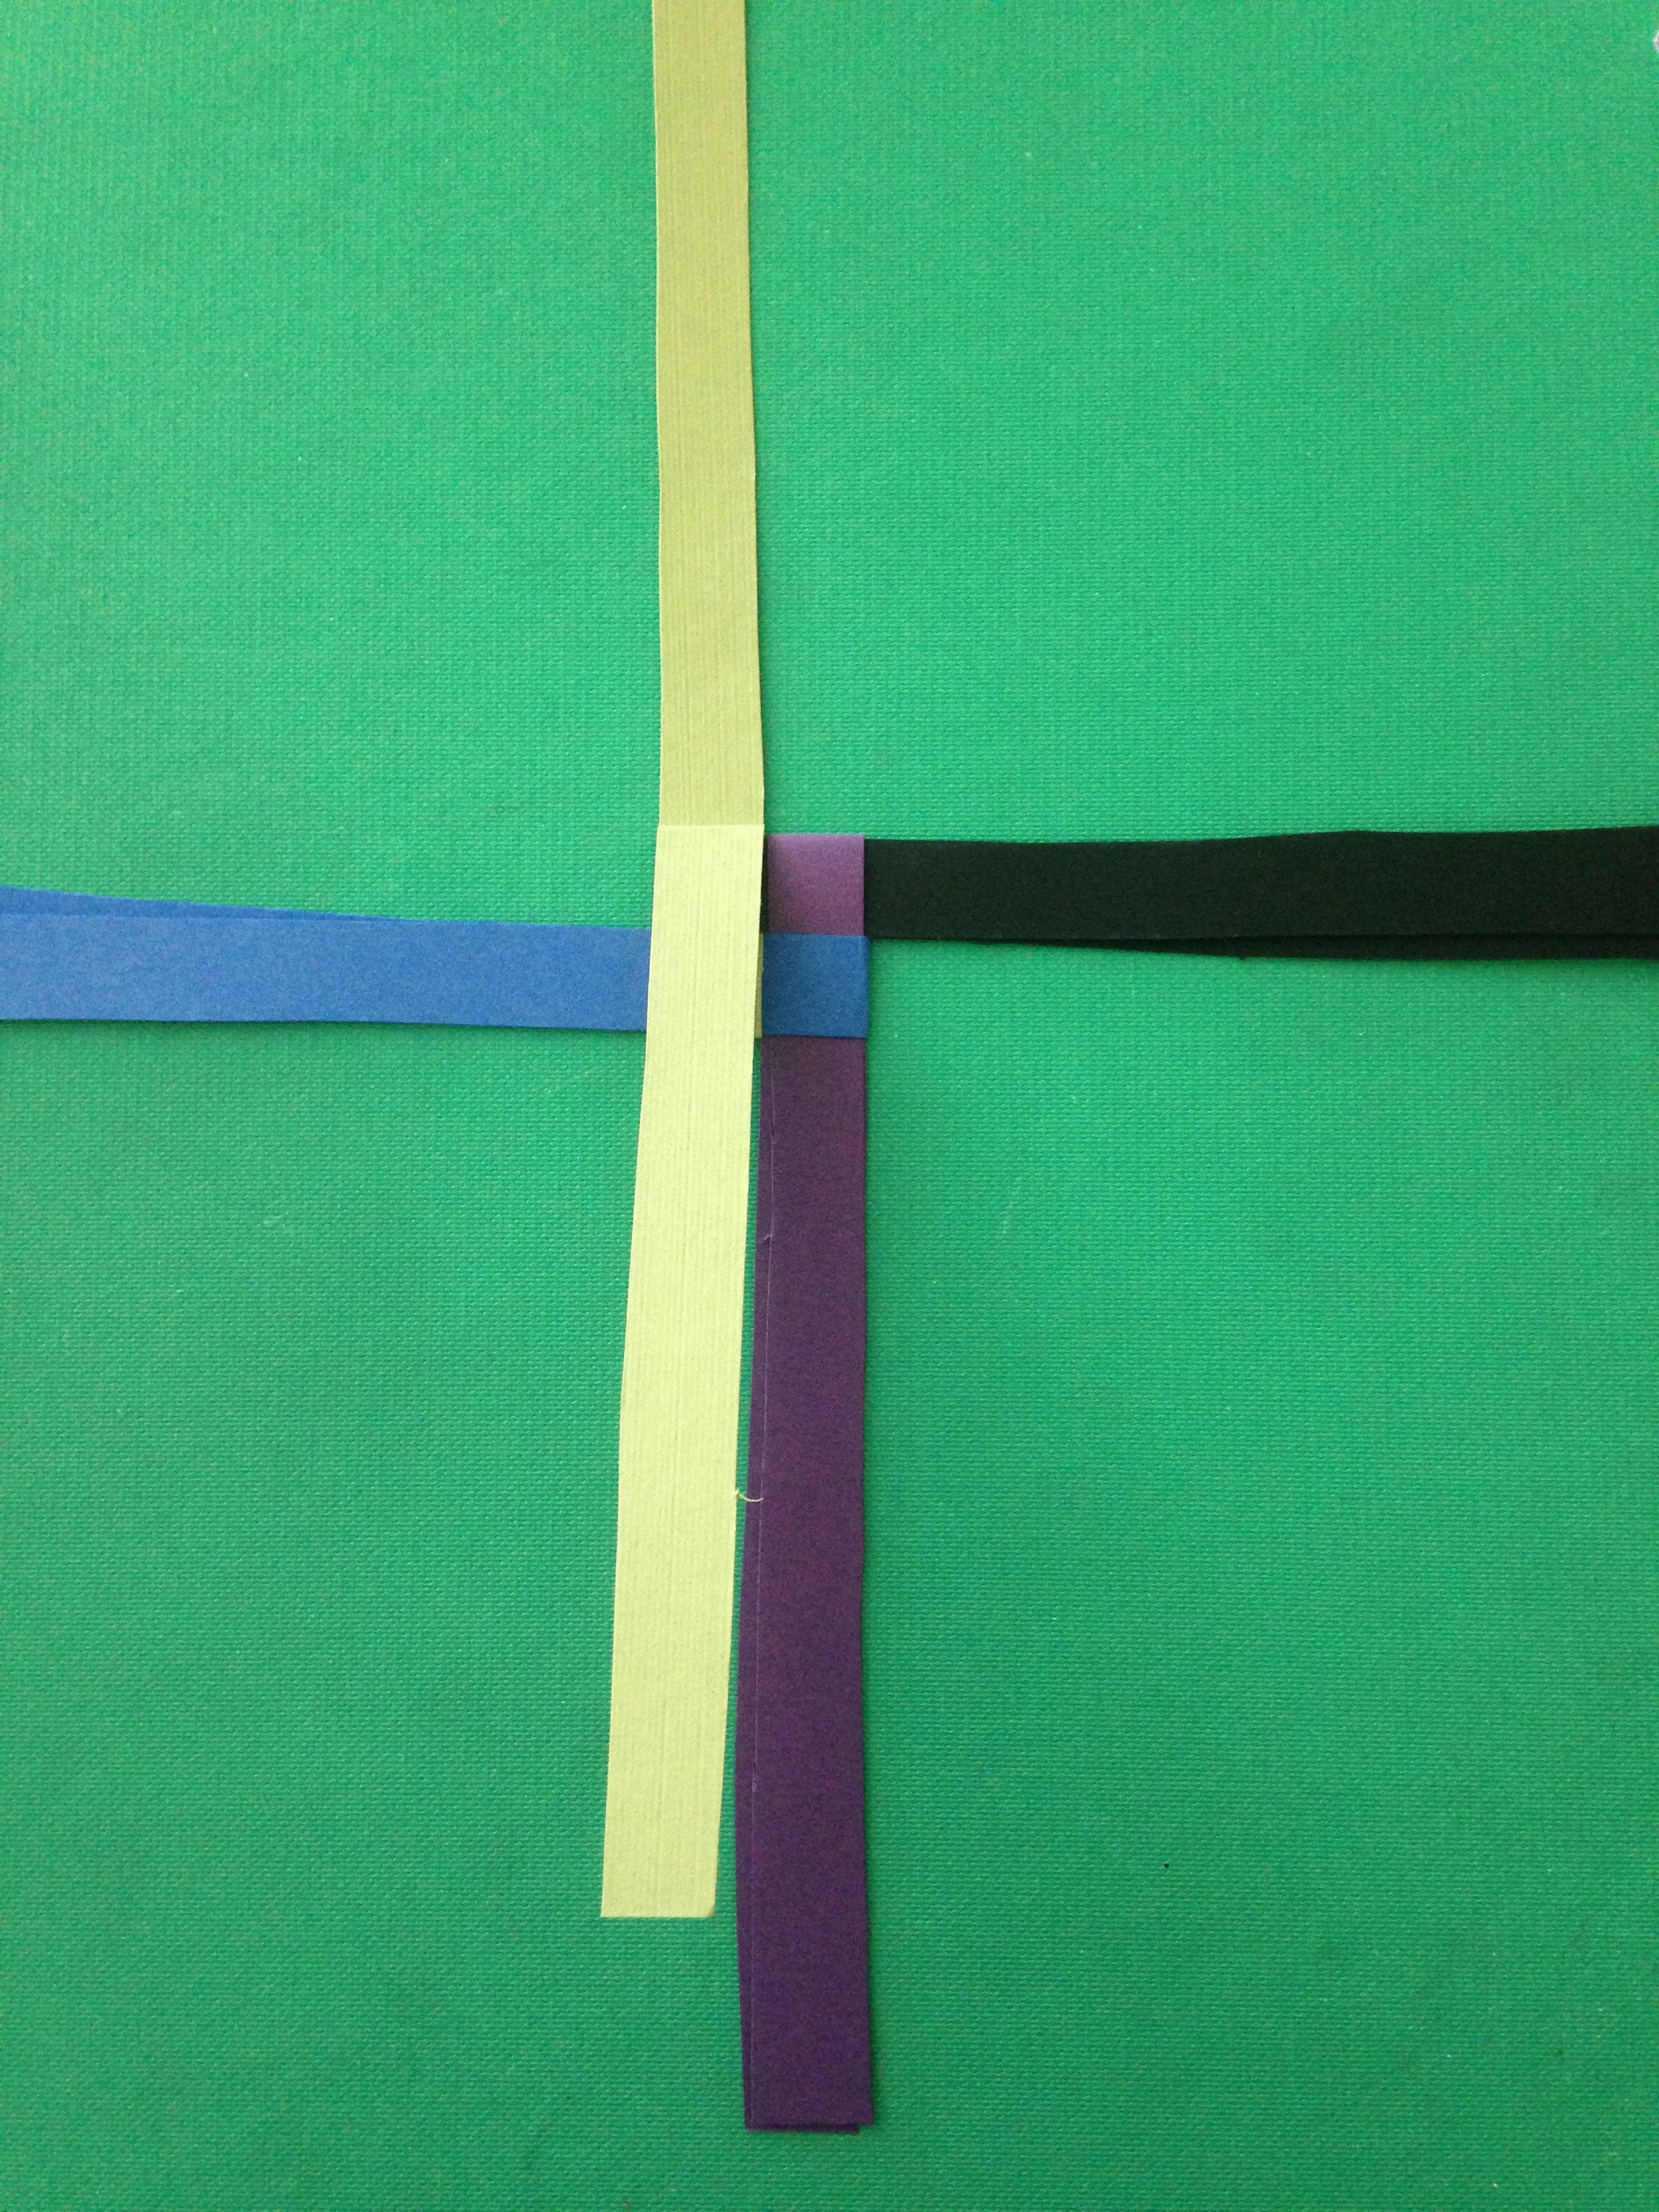
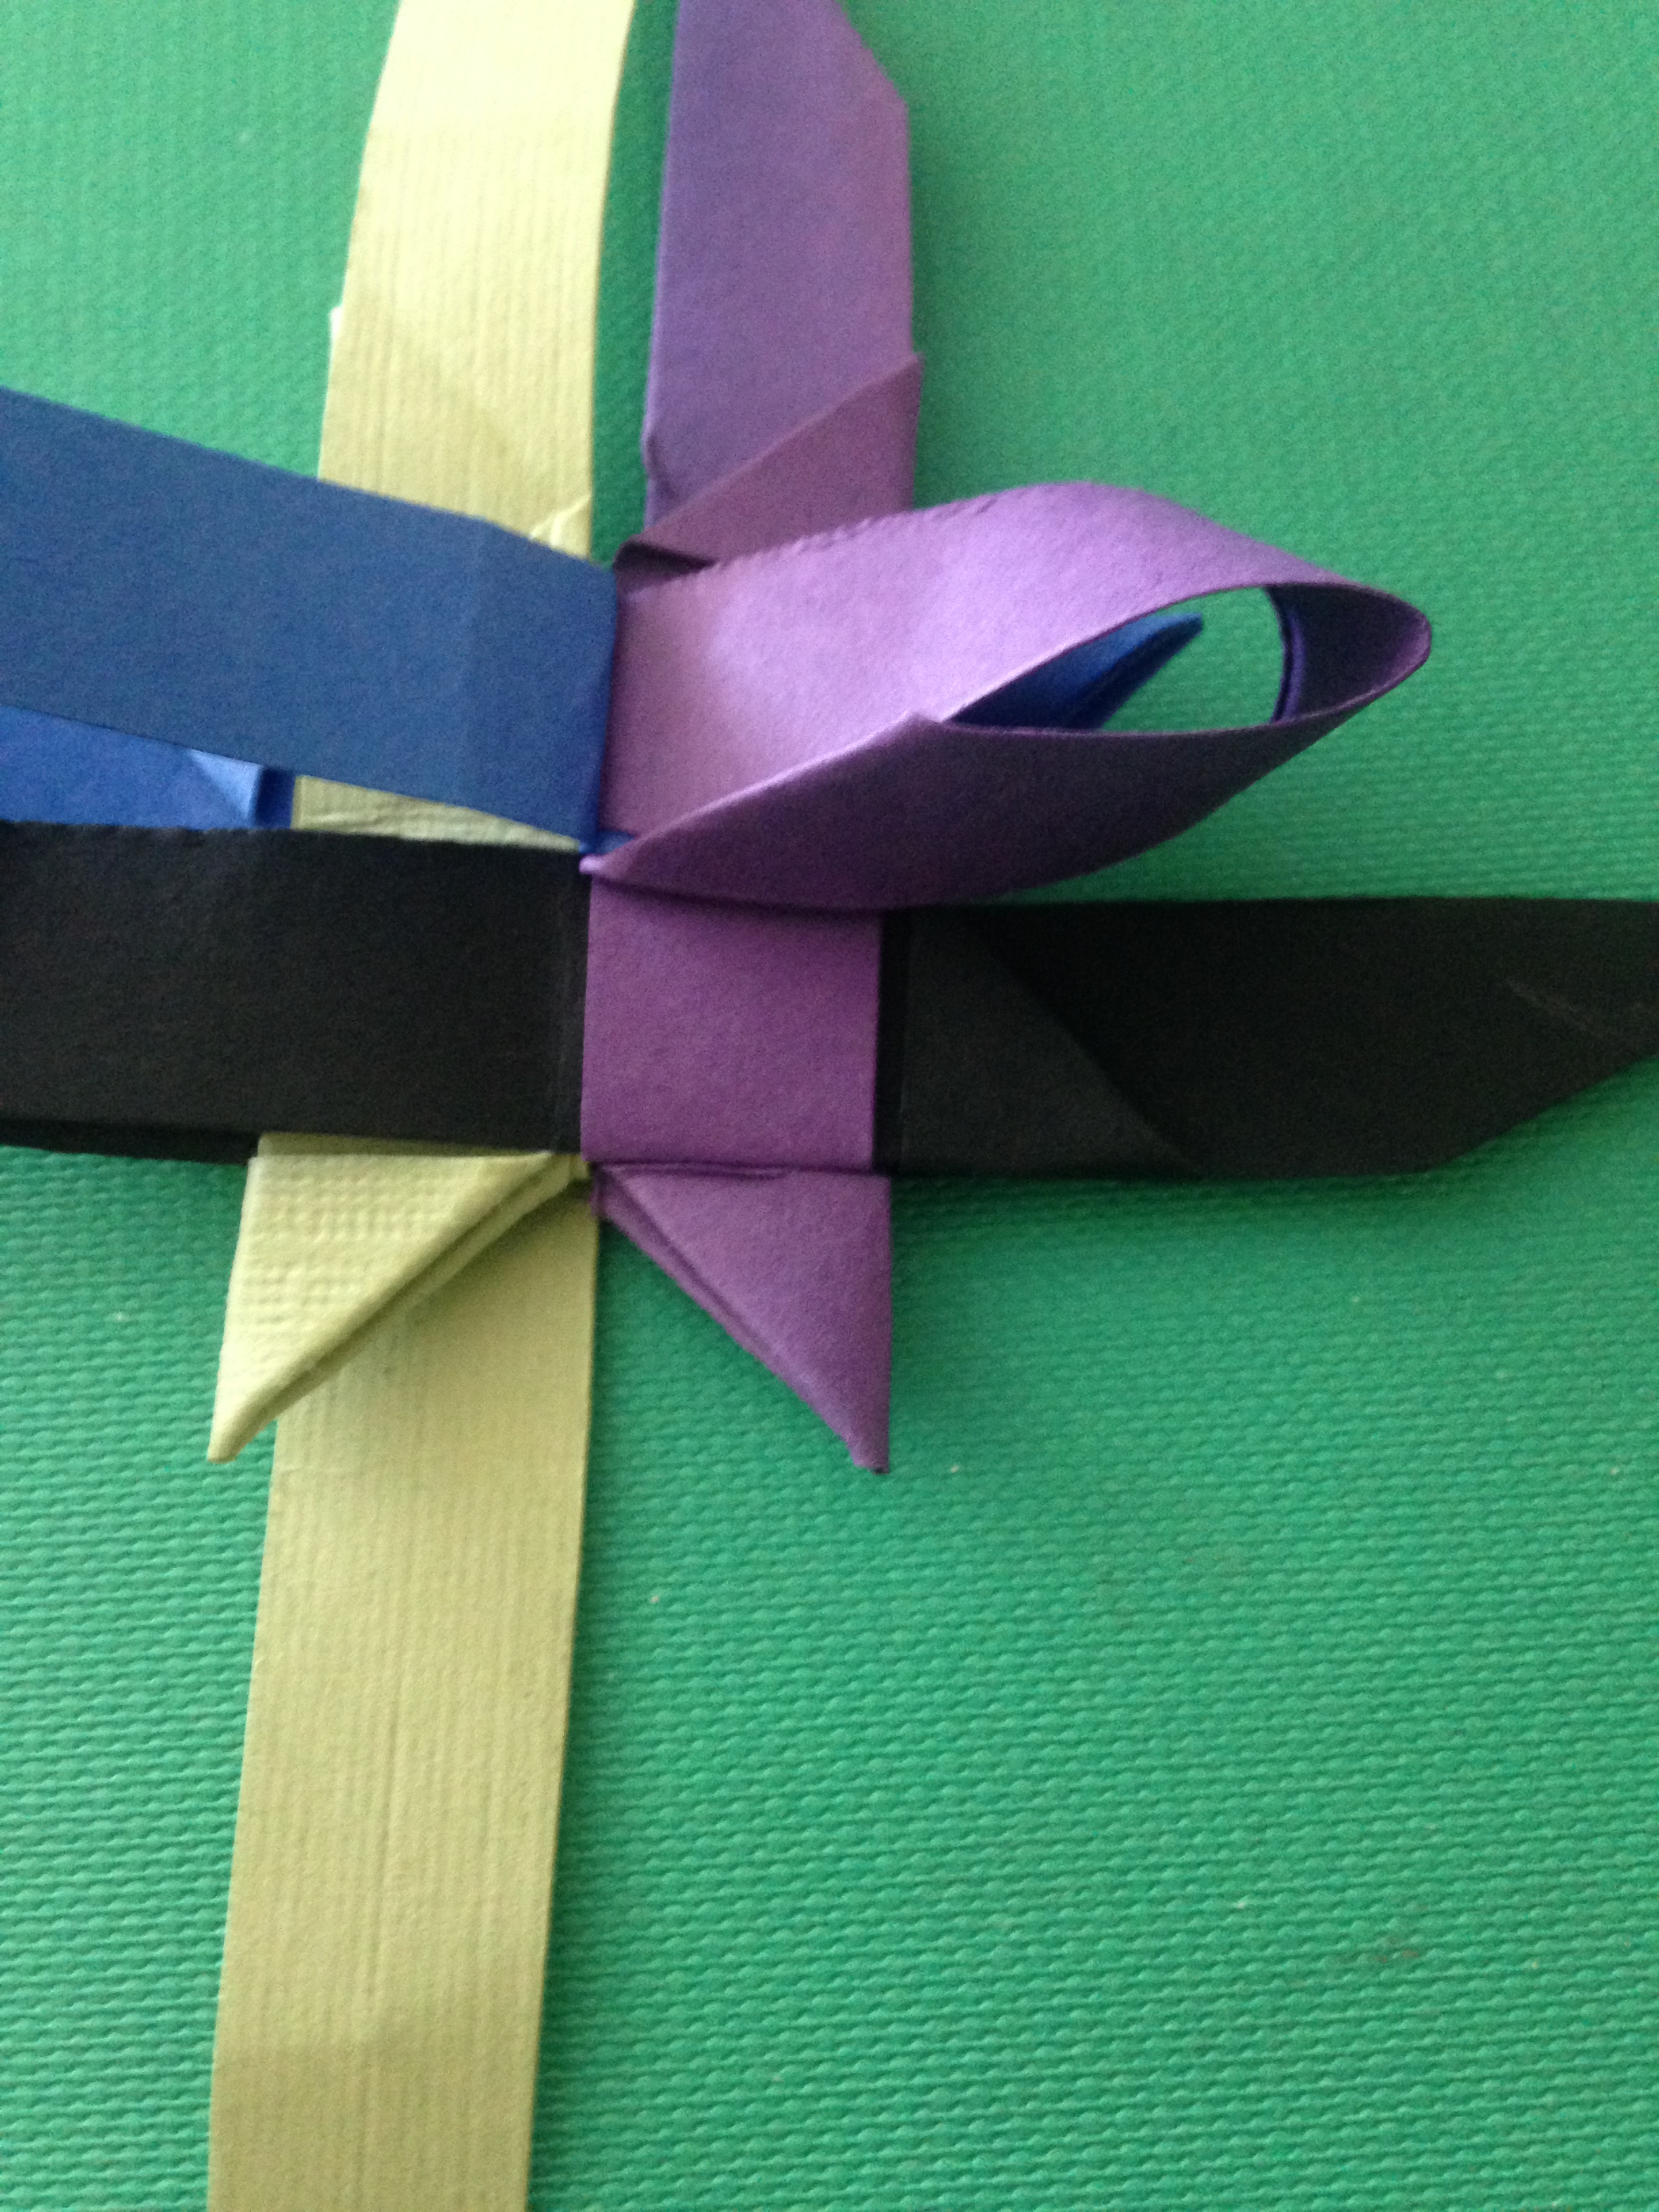
Step 2: Hashtag and Pull
This step may take a few tries but I like to look at it as a hashtag. I tried to take the picture at an angle where you can see the way the strips are assembled. The folded pieces are opposite to each other and should almost be like a weave. When you pull on the strips of paper they should lock together to make a small square in the center. The long strip of paper coming from the square should be on the left side if not just flip it over to look like the picture.


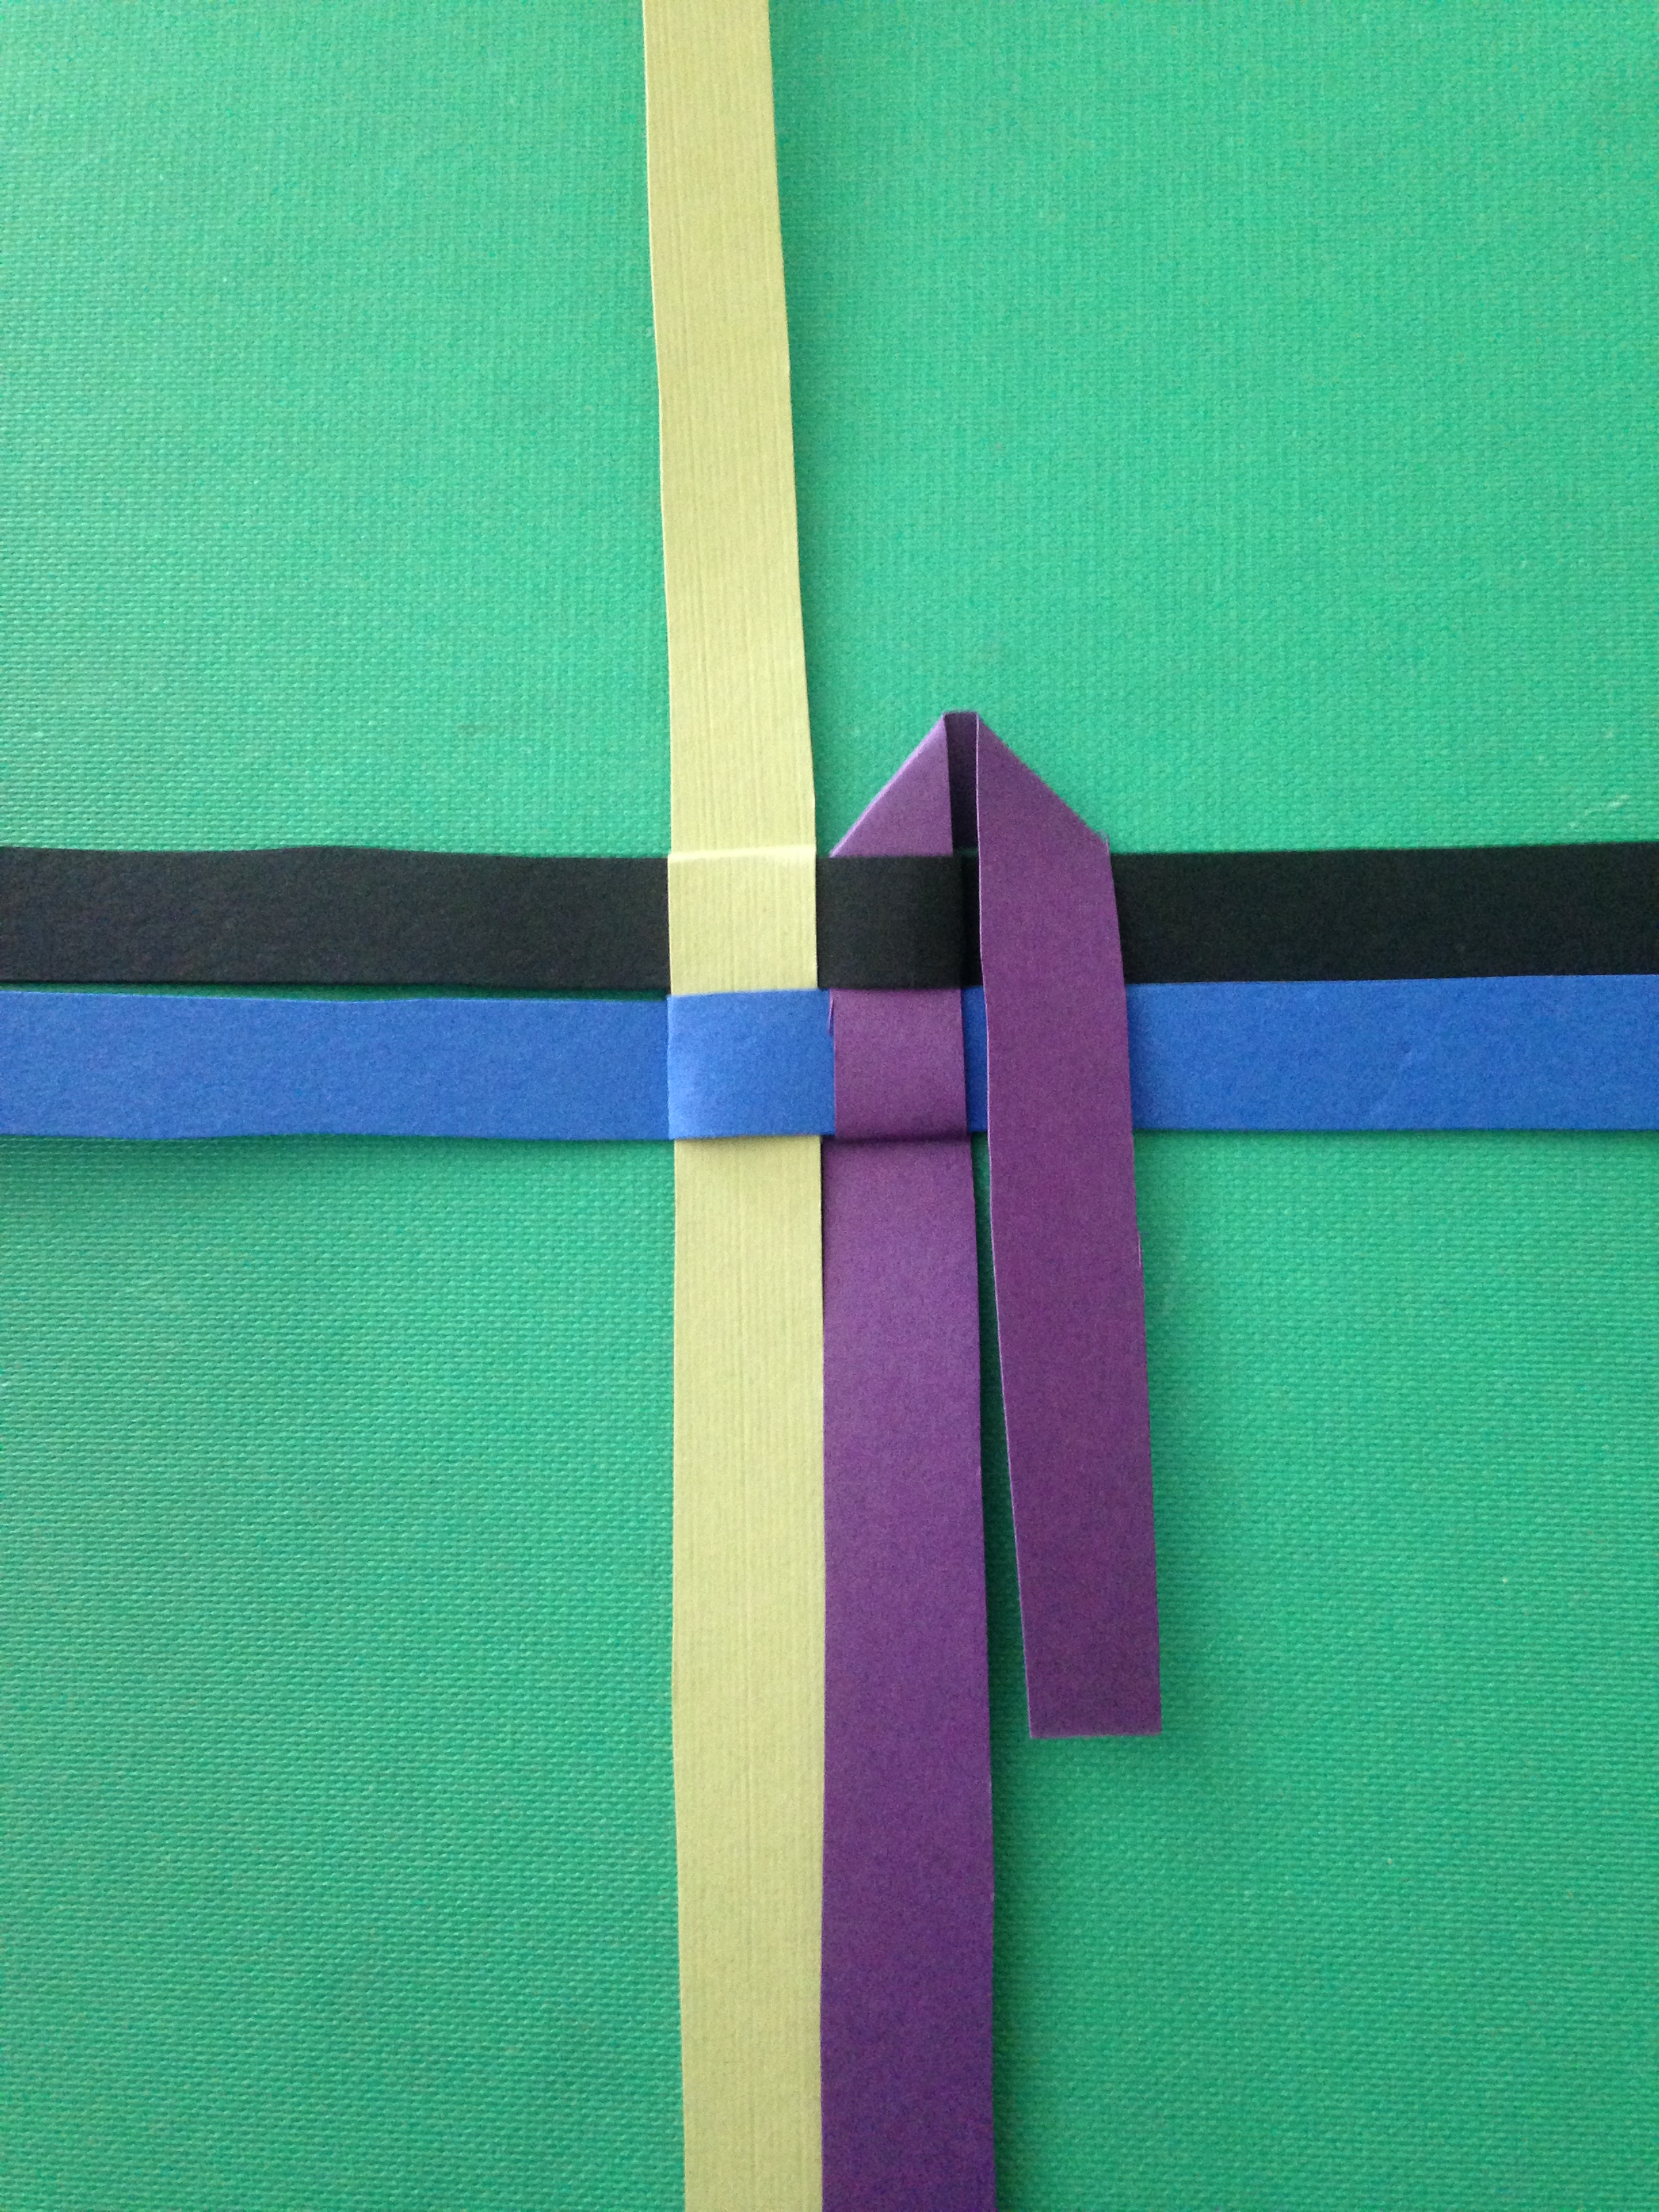
Step 3: Fold and Tuck
Next you’re going to fold the first piece of paper over counter clockwise starting with the top piece to your left. The last piece of paper on your right is going to be tucked under the first piece of paper that you folded and then pulled through. I find it easier to pull the strips of paper through by cutting them on a diagonal.


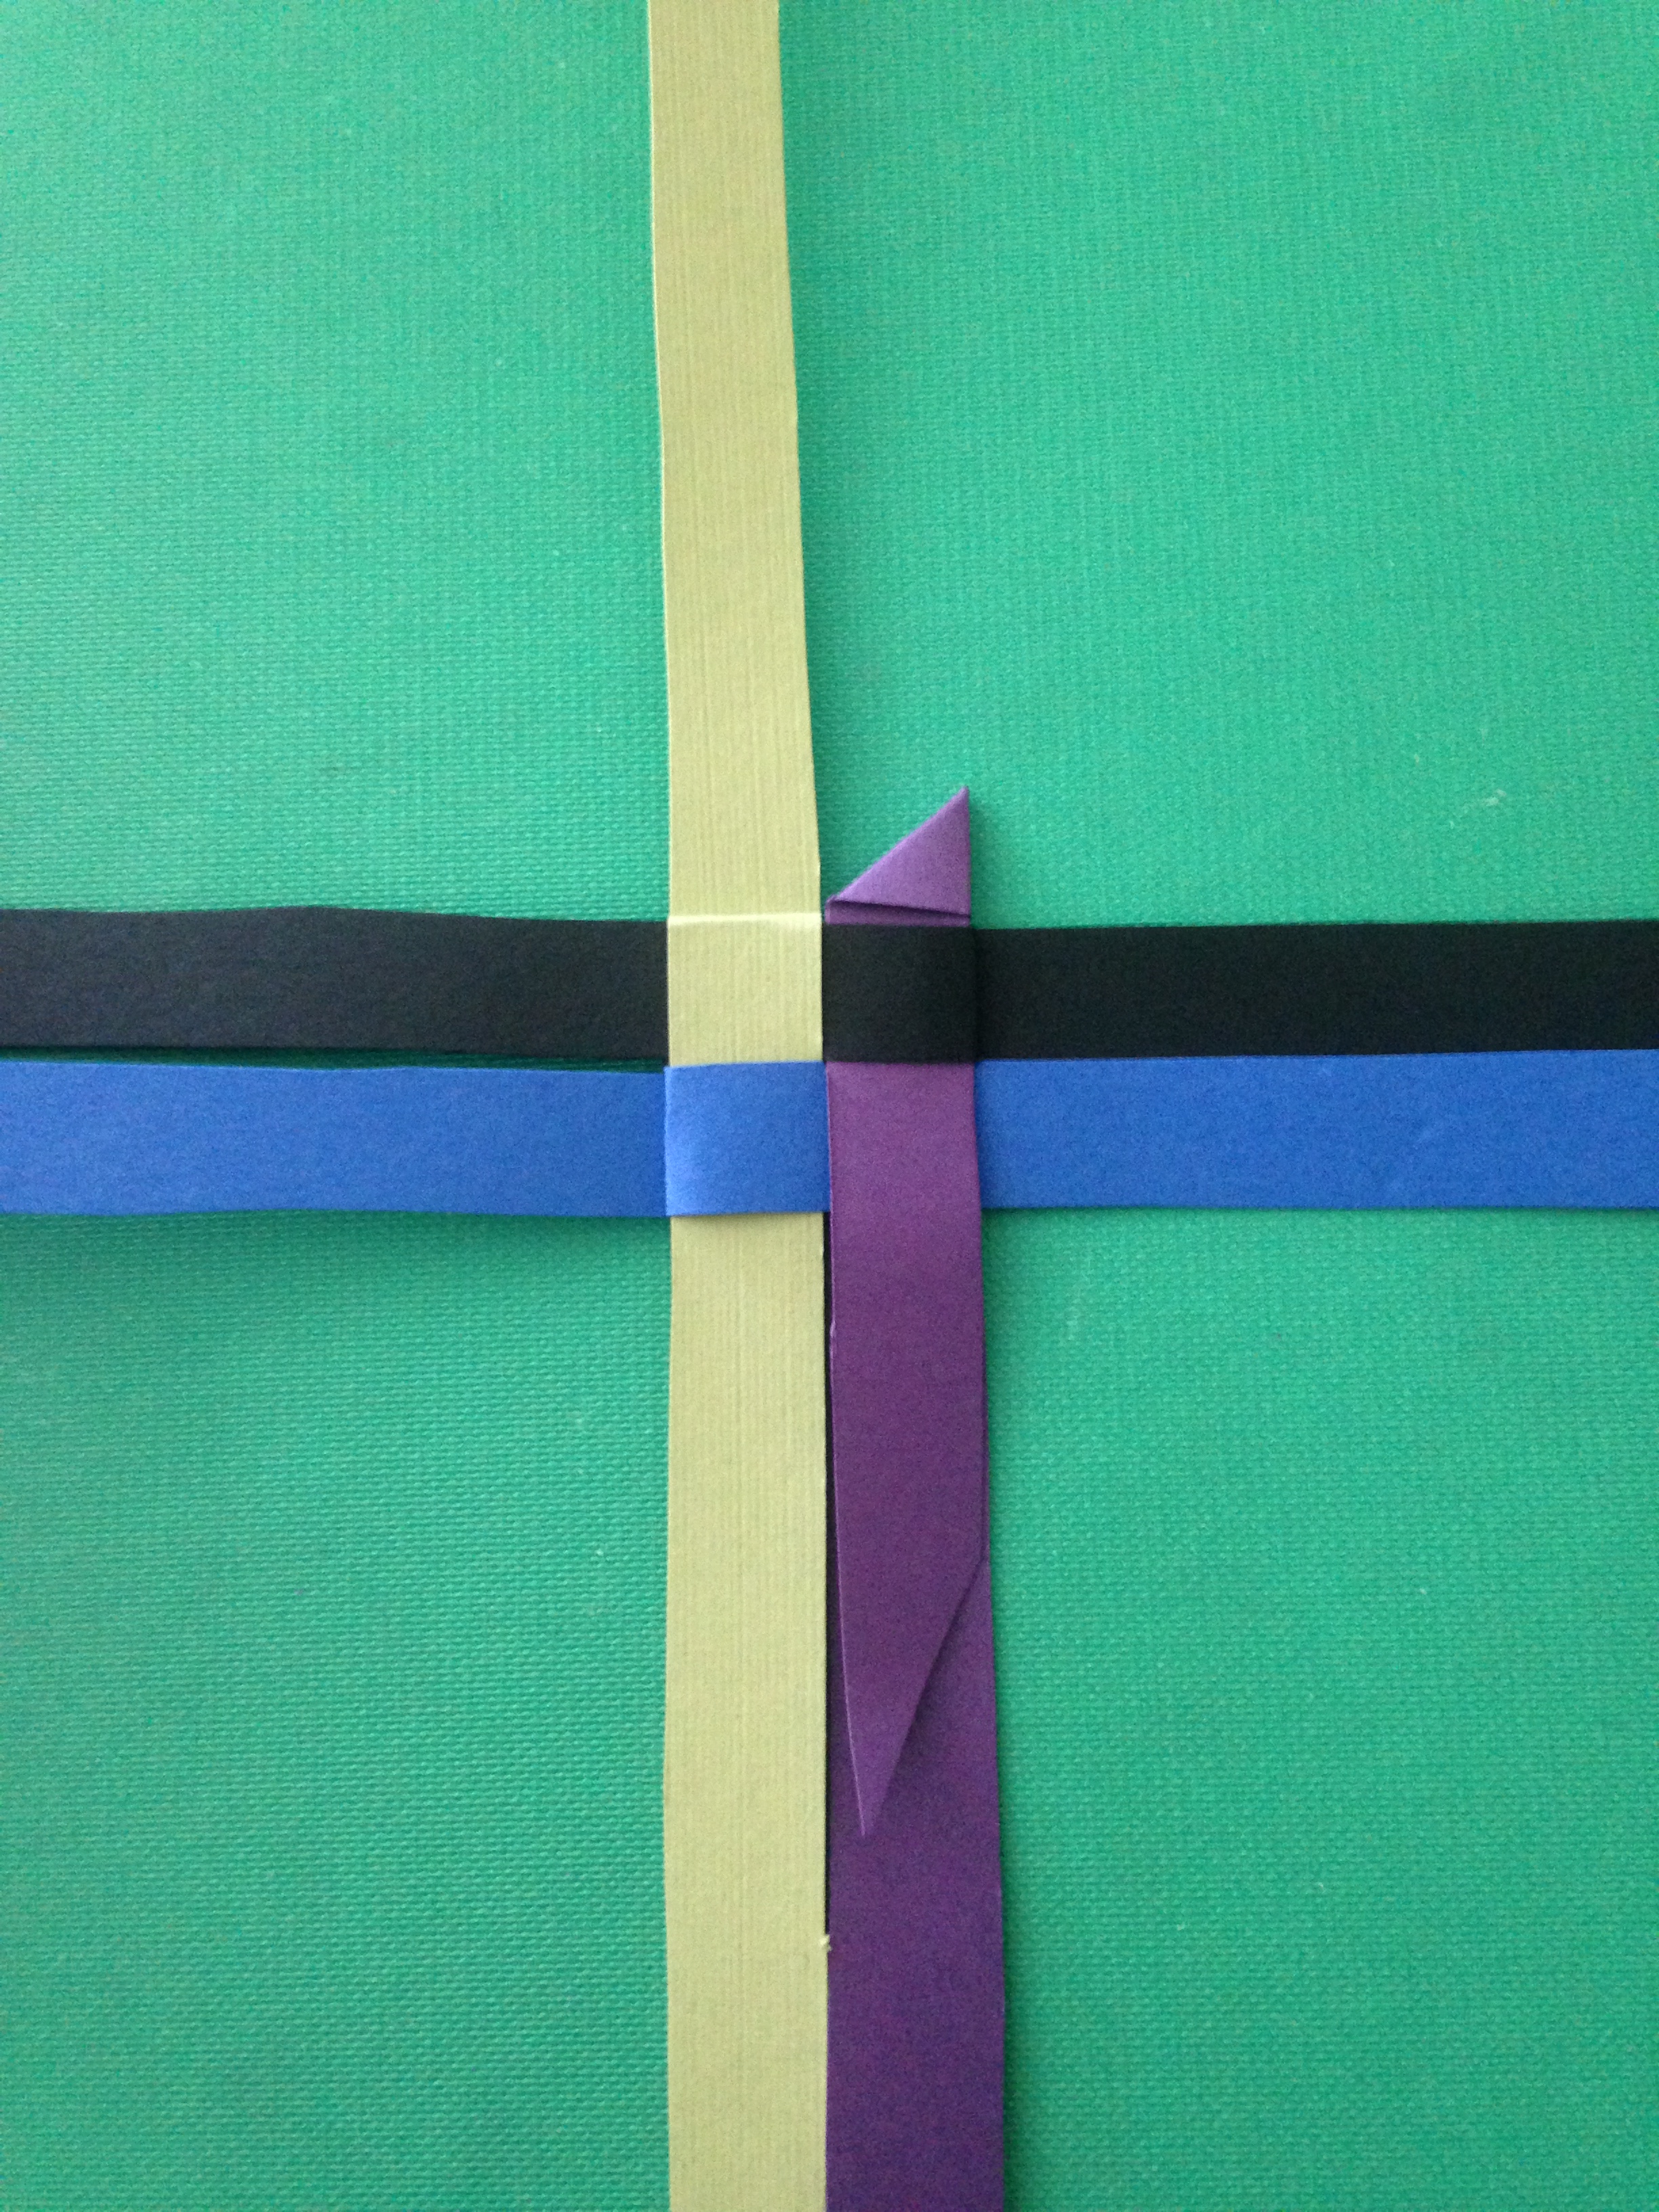
Step 4: Triangles
For this part you are going to start on the top right part of the square. Fold the paper behind or away from you. It should look like a little sail from a boat and be parallel with the other strips on the right. Now fold the paper toward you and leave a small space between the two triangles. The space between the two triangles will allow you to fold them in half onto each other. Next fold the triangles back or away from you so that you can tuck the strip of paper under the square directly underneath them. Keep rotating the square to the right and repeat the triangle folds. Once you finish the four on that side you are going to flip the square over and repeat.


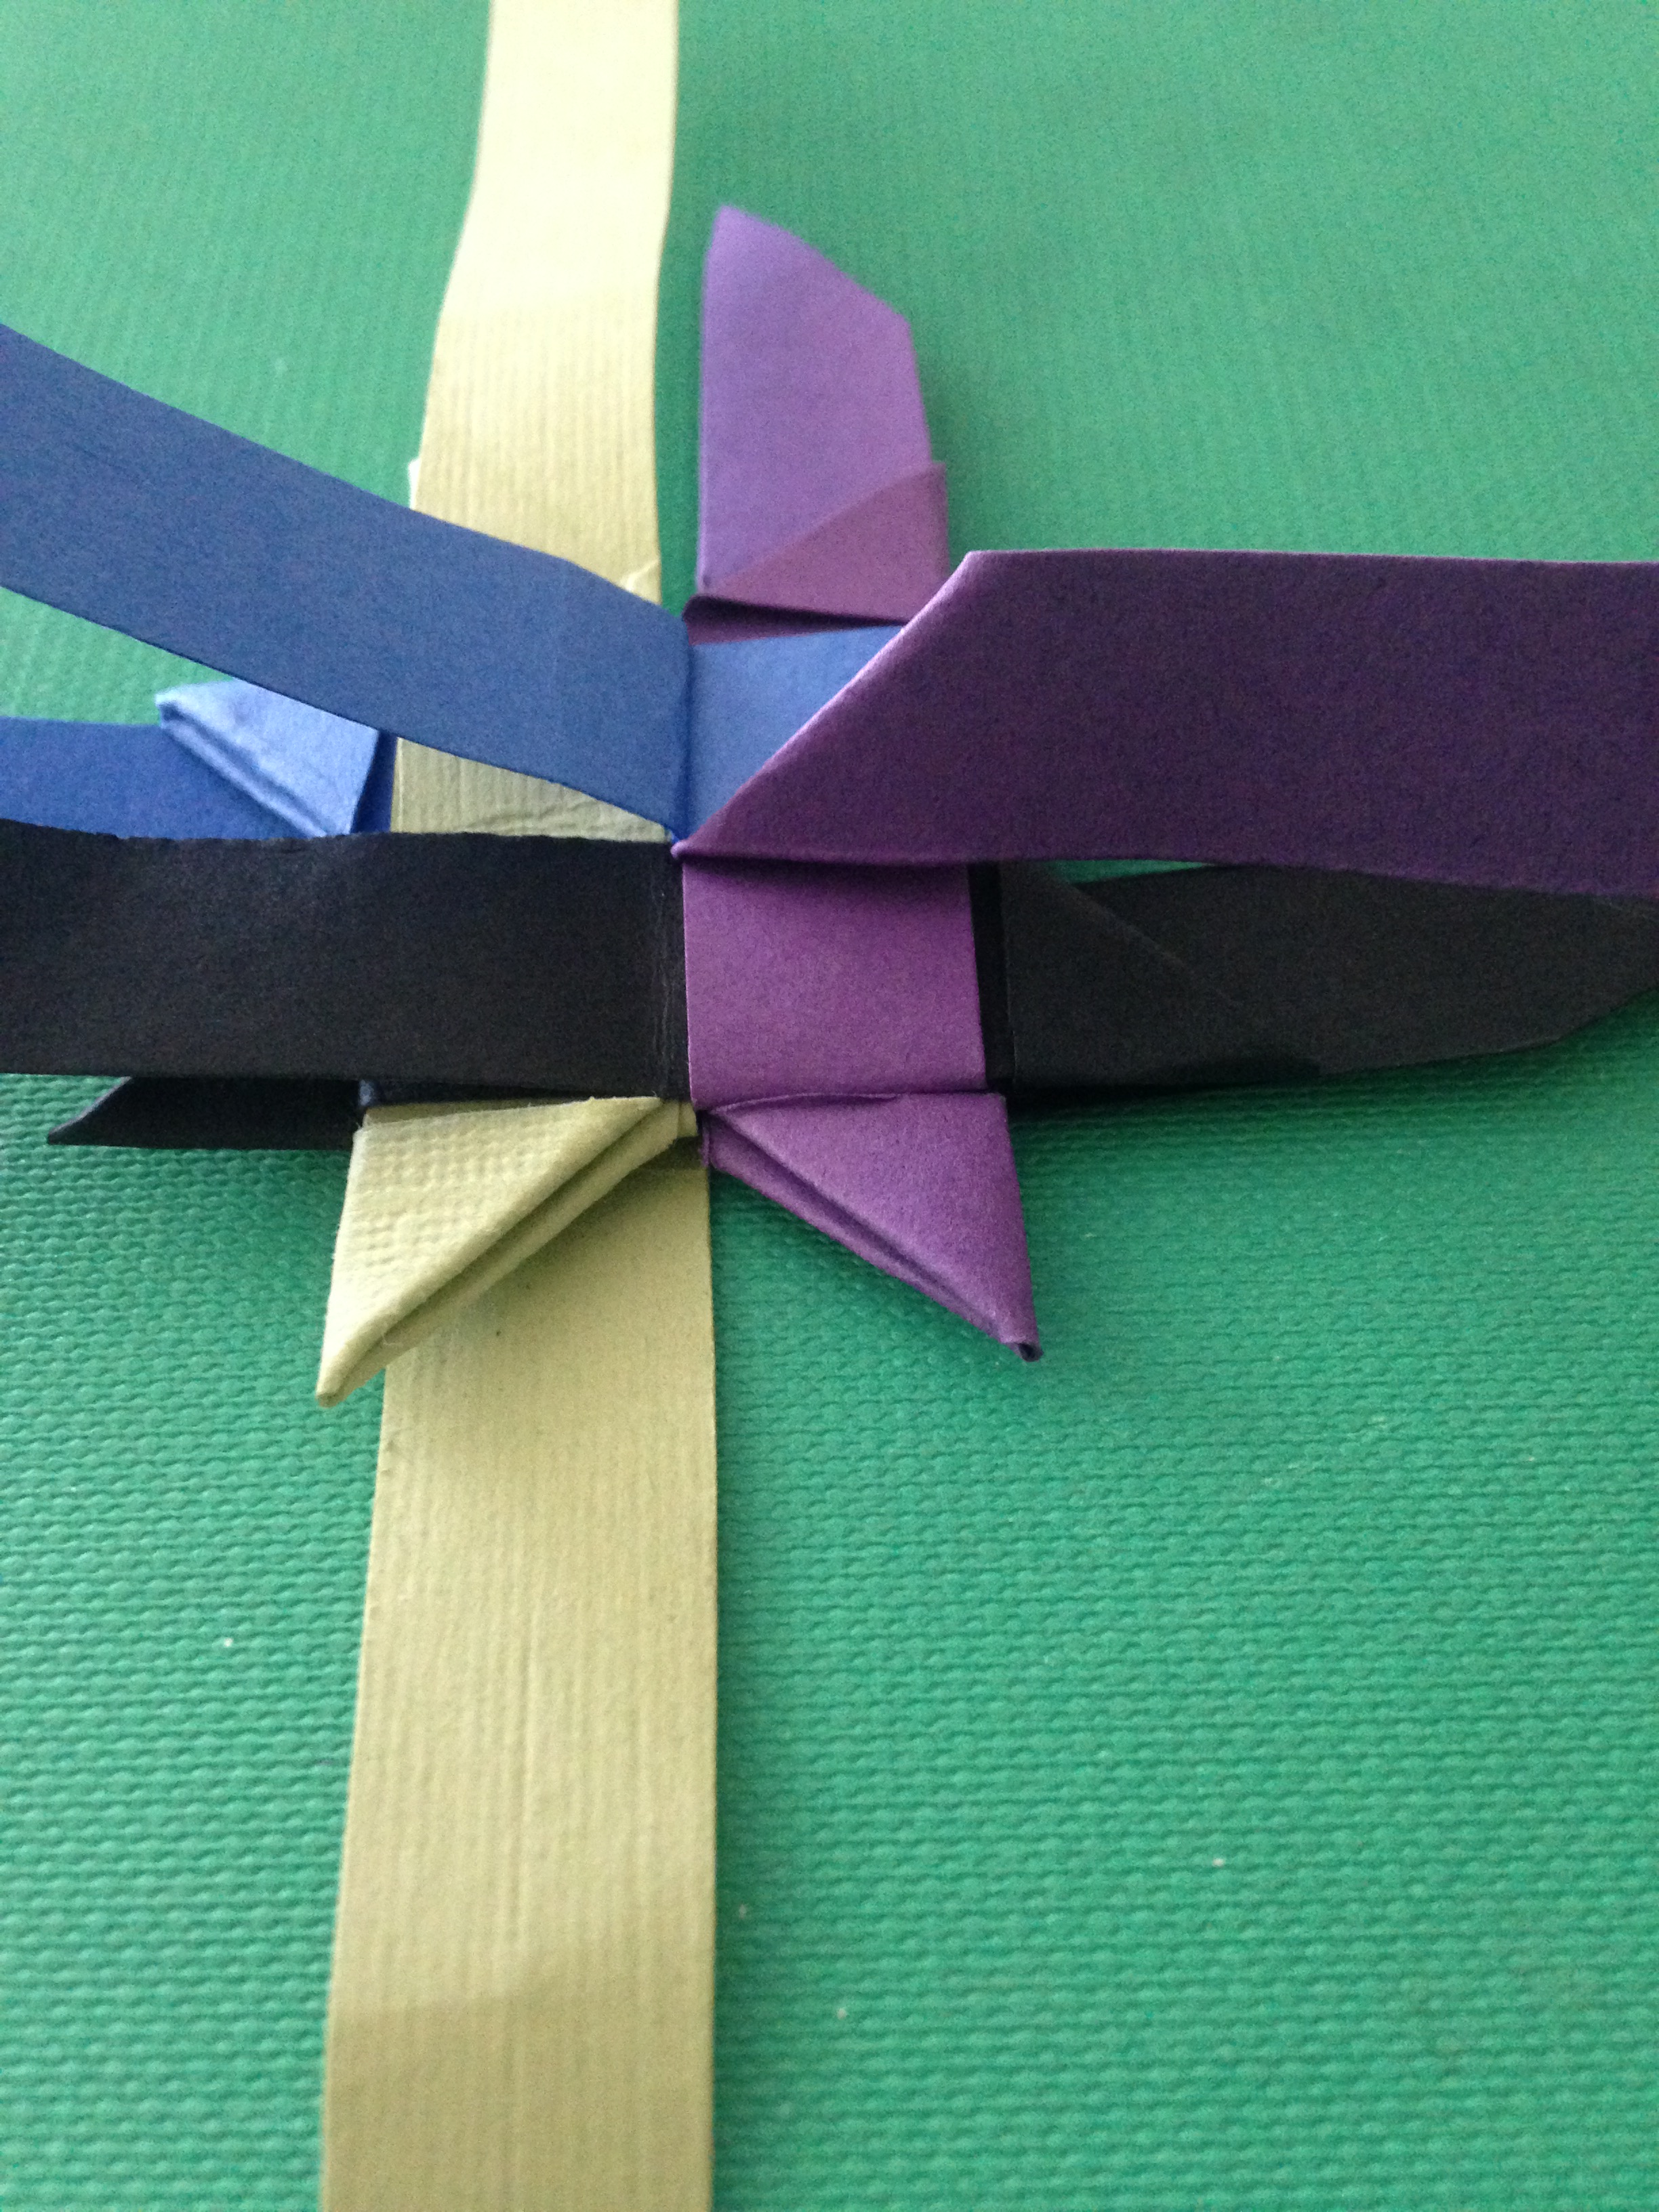
Step 5: Triangles and Turn
Guess what? More triangles! Only this time, instead of folding the paper away from you, you’re going to fold it toward yourself. Its easier if you fold back the strip of paper in the way that way you can see what you’re doing. Next you’re going to turn the strip of paper and tuck it underneath the square to the left of the triangle. The strip of paper should come out of the triangle to the left of the square. Once you see it sticking out, pull it through. Continue until that side is done then flip and repeat on the other side.

Step 6: Trim
The end product will have extra pieces of paper sticking out of the triangles surrounding the square. You’re going to cut those pieces following the diagonal lines of the triangles. After that its up to you on what you want to do with them. The possibilities are endless!


Learned a lot from this blog! i enjoyed the background imfo….and the step by step pics , made it so easy to follow! i tried making one myself! 😉
Thank you 🙂