Howdy, friends! While my day job involves my hands in Adobe Photoshop and Illustrator, I thoroughly enjoy disconnecting from my devices after a long day of work. I have found it difficult to design for 8+ hours a day only to come home, open my laptop, and work freelance design projects, I have become a big advocate for work-life balance. It is super important to put aside time to recharge your creative battery to ensure quality work when you are designing. When my creative battery is strained, it directly affects the quality of the graphics I am producing. However, that doesn’t mean I can’t create art in my free time, that the life-balance side can be other mediums of expression.
When people ask if I do freelance on the side, I usually tell them, no, I already design 40 hours a week and I want to spend time with my friends and family when I get home. However, I do have some exceptions: I will take on a freelance project if it doesn’t involve spending most of my time in a computer or if my brother asks me to design something for his volunteer firehouse. While projects like that don’t come around often, last year a colleague of mine referred me to a company that was looking for a mural artist for a project they were working on and I was commissioned to design and paint a very unique installation with them.
The Consultation
Within a few days and a few emails, I hopped on the call with an engineer at Isolite Corp., a lighting company that specializes in emergency lighting and inverter systems. Knowing nothing about lights or engineering, I was curious to know what exactly their purpose for a mural was for.
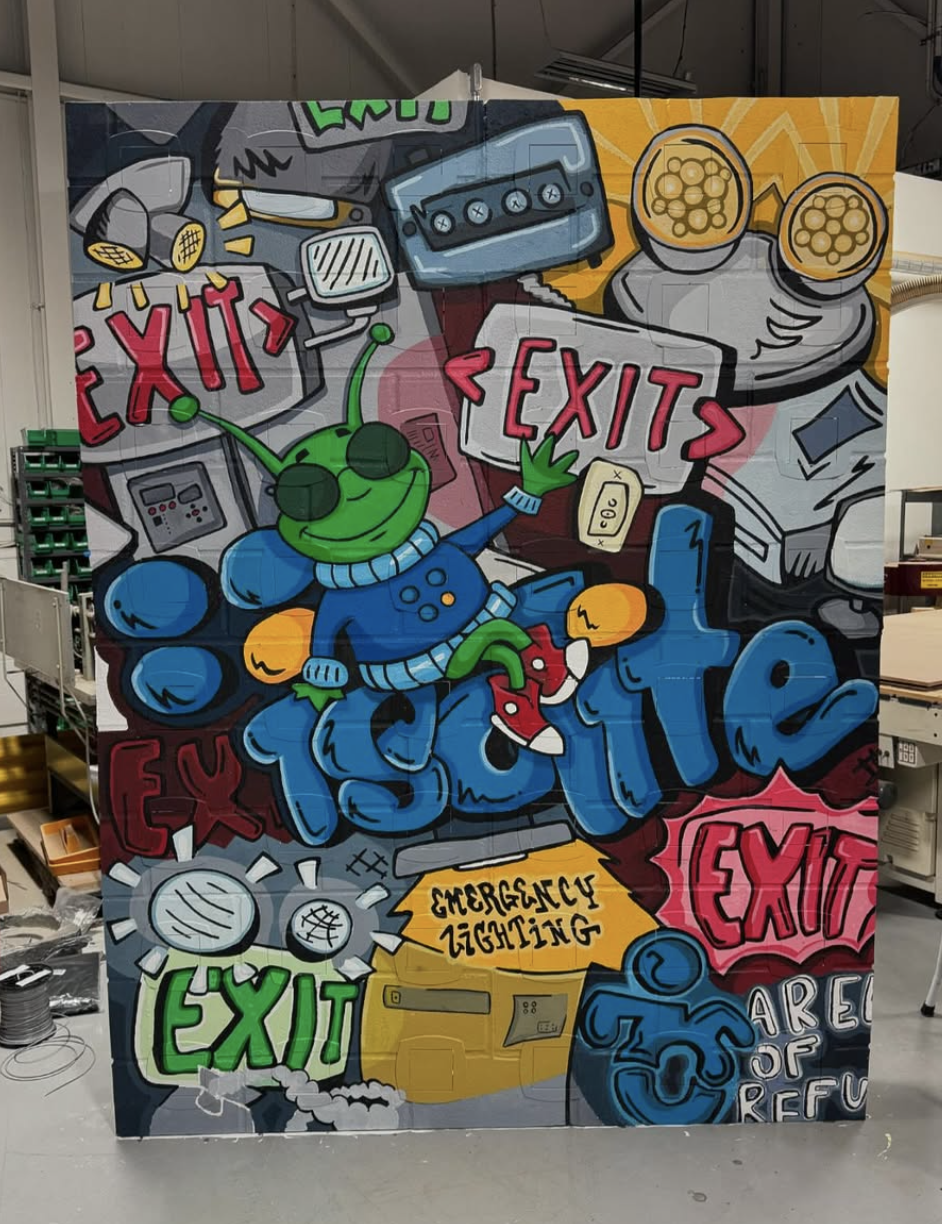
I found out that Isolite, last year, was attending the 2024 LEDucation Exhibition, where the lead engineer was bringing his latest project. To sum it up in non-engineer terms, the engineer created and programmed a grid of lights into a wall that would flip open and shut in a dance-routine fashion, in order to demonstrate how well these LED lights could be concealed. While the lights lay flush on the wall, you could still see the contrast of the gray, faux, cinderblock wall and the white light covers. Well, thats where I come in! The engineer mentioned he wanted a graffiti style mural, full of their products, their company name and their mascot, Lumi. Lumi? A mascot? I’m so intrigued, excited and can’t wait to see this little bugger… literally. Lumi is a kelly green lightning bug, dressed to any occasion and accessorized with red sneakers and sunglasses. He is a jack-of-all-trades and is frequently seen on Isolite’s Instagram page.
The inclusion of Lumi changes everything for me as a designer, I now have a key piece of art I can use to dictate look, colors, line weight and overall feel for the mural. It’s like striking gold for a freelance artist, the more info and resources I have, the better. With this, I felt I had enough to get started. I told the engineer my process of production to make sure it would line up with their timeline, since they still had to build the 6ft by 8ft wall with transporting it from Northeast Philly to New York in mind.
Planning It Out
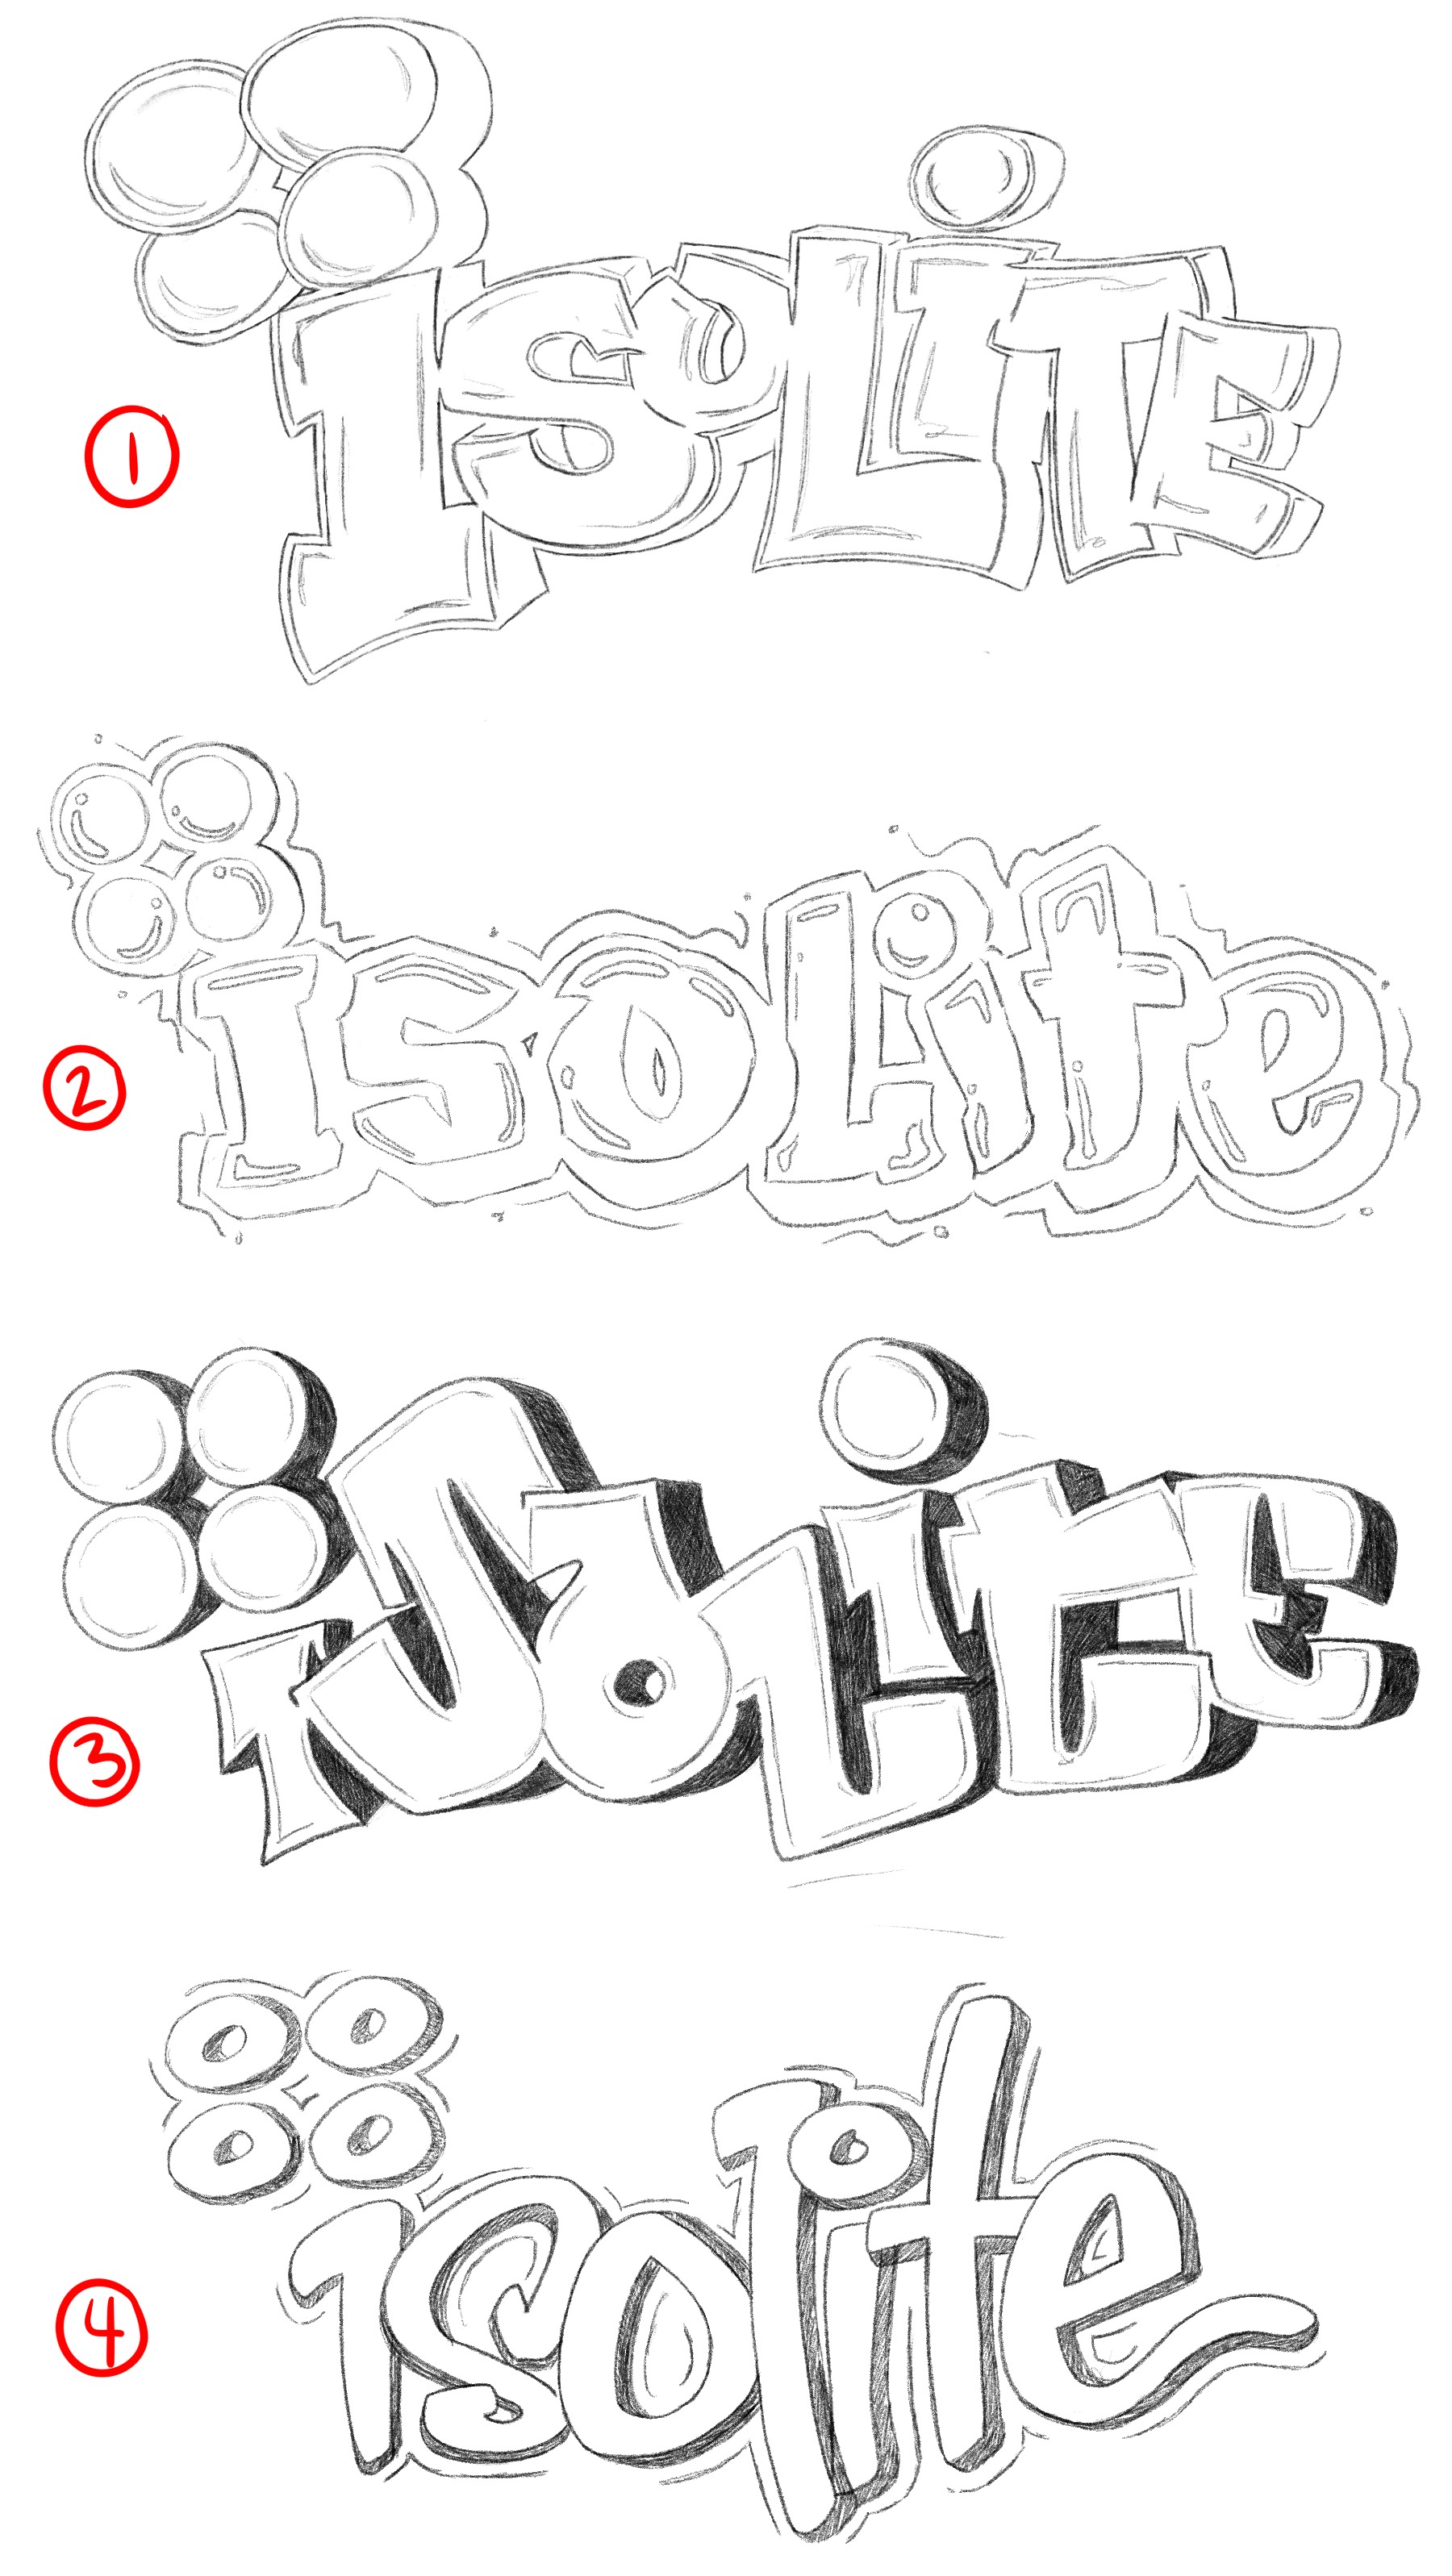
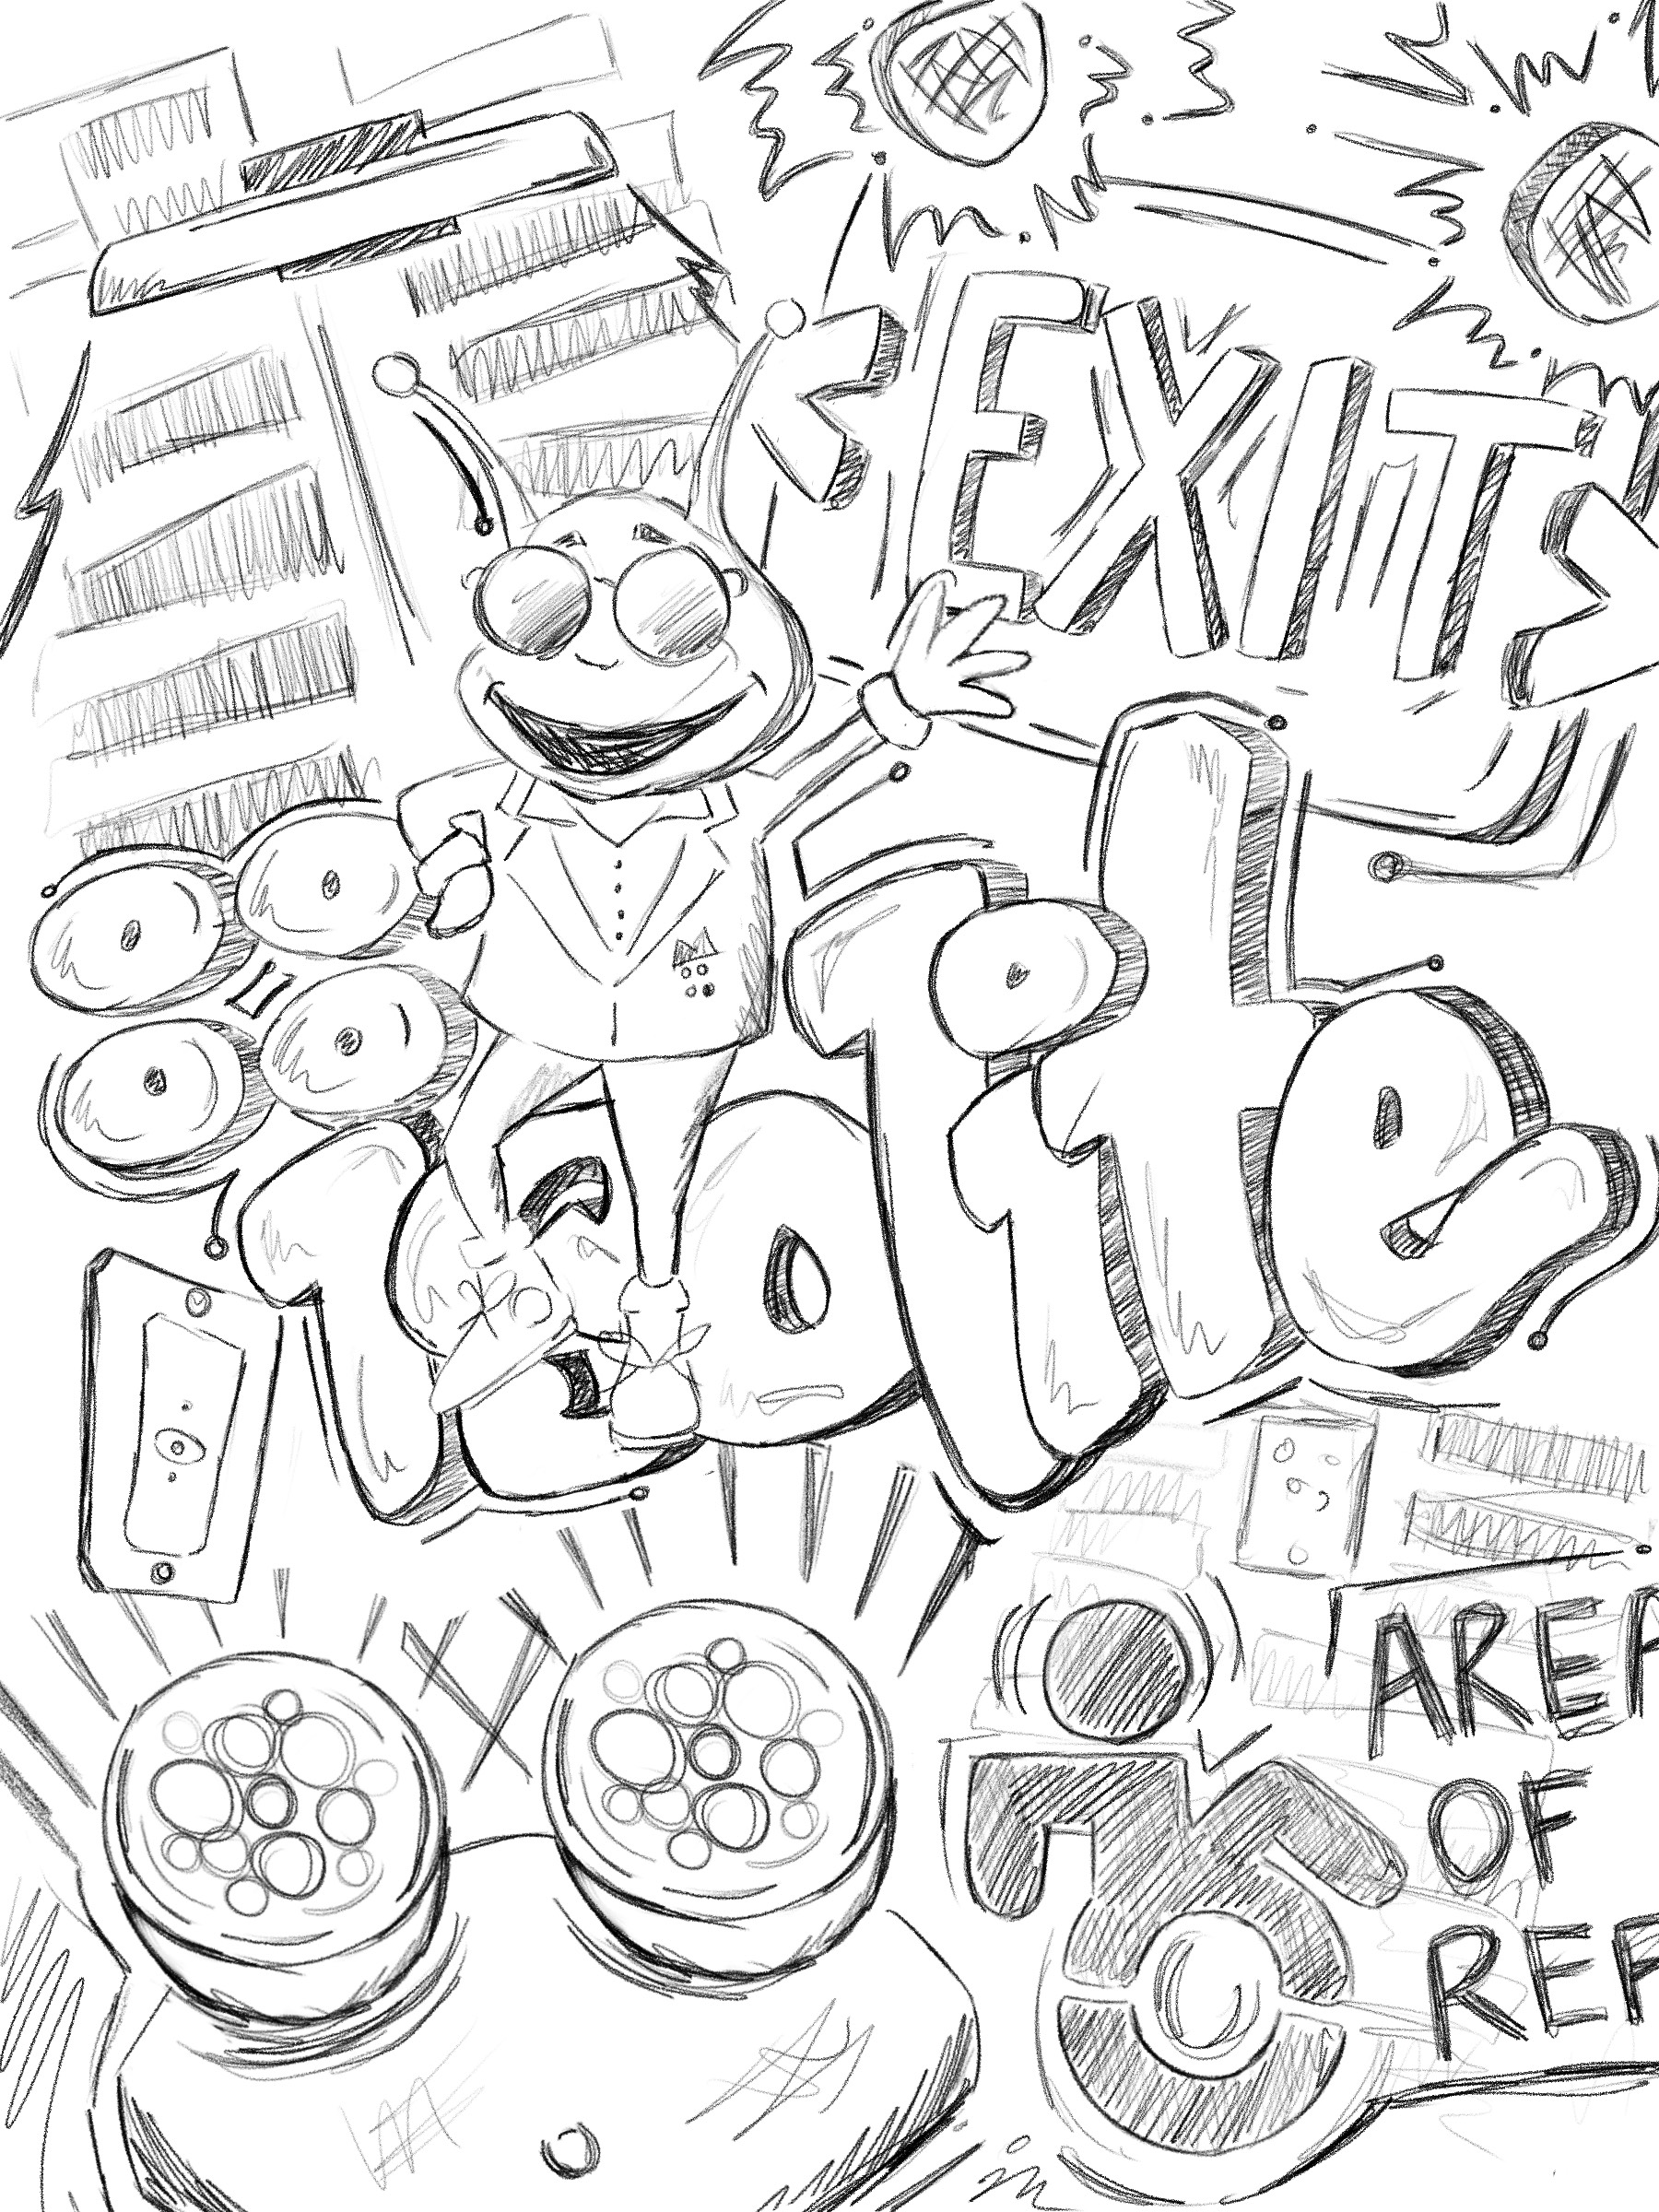
As I’ve established, I’ve never painted a mural before, so where does one start? With paint and materials in mind, I decided to start with designing what the mural would look like. I gave Isolite a rough timeline including dates they can expect rough/first drafts and what that would entail. The first draft would be narrowing in on a graffiti style for their logo wordmark, “Isolite,” I gave them 4 different options to choose from, they liked option 4 but wanted it to have the thickness of the others.
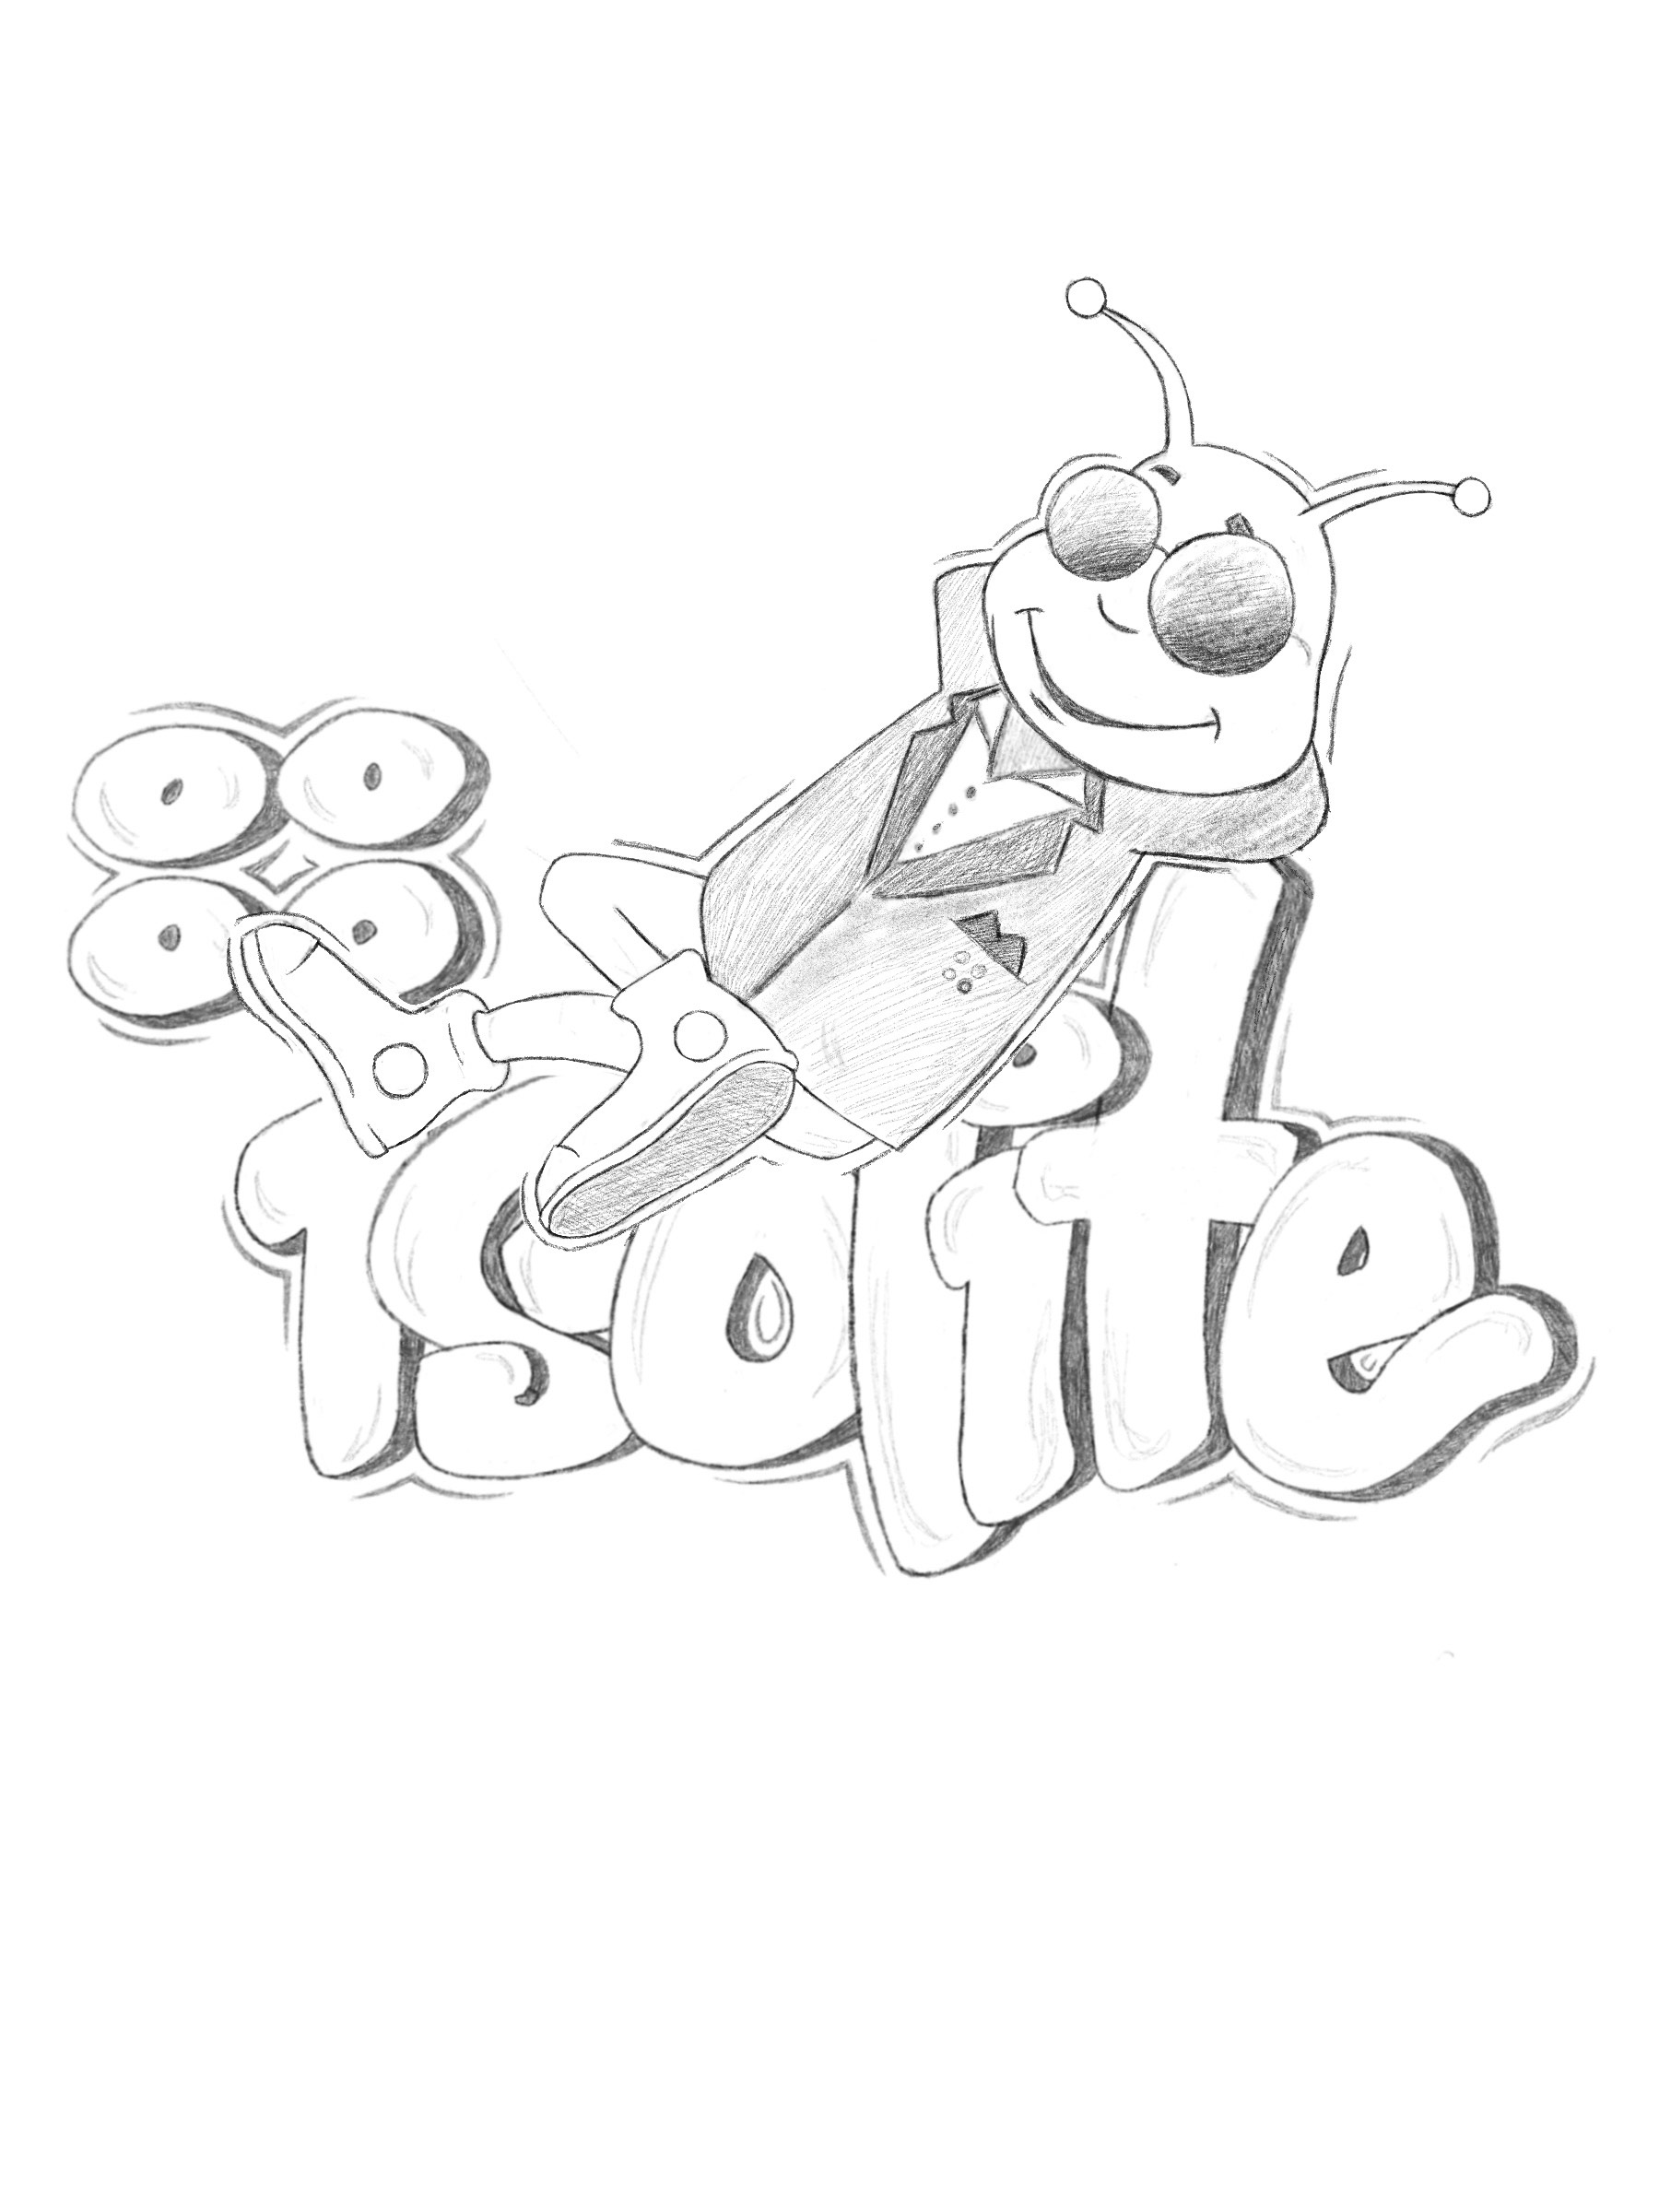
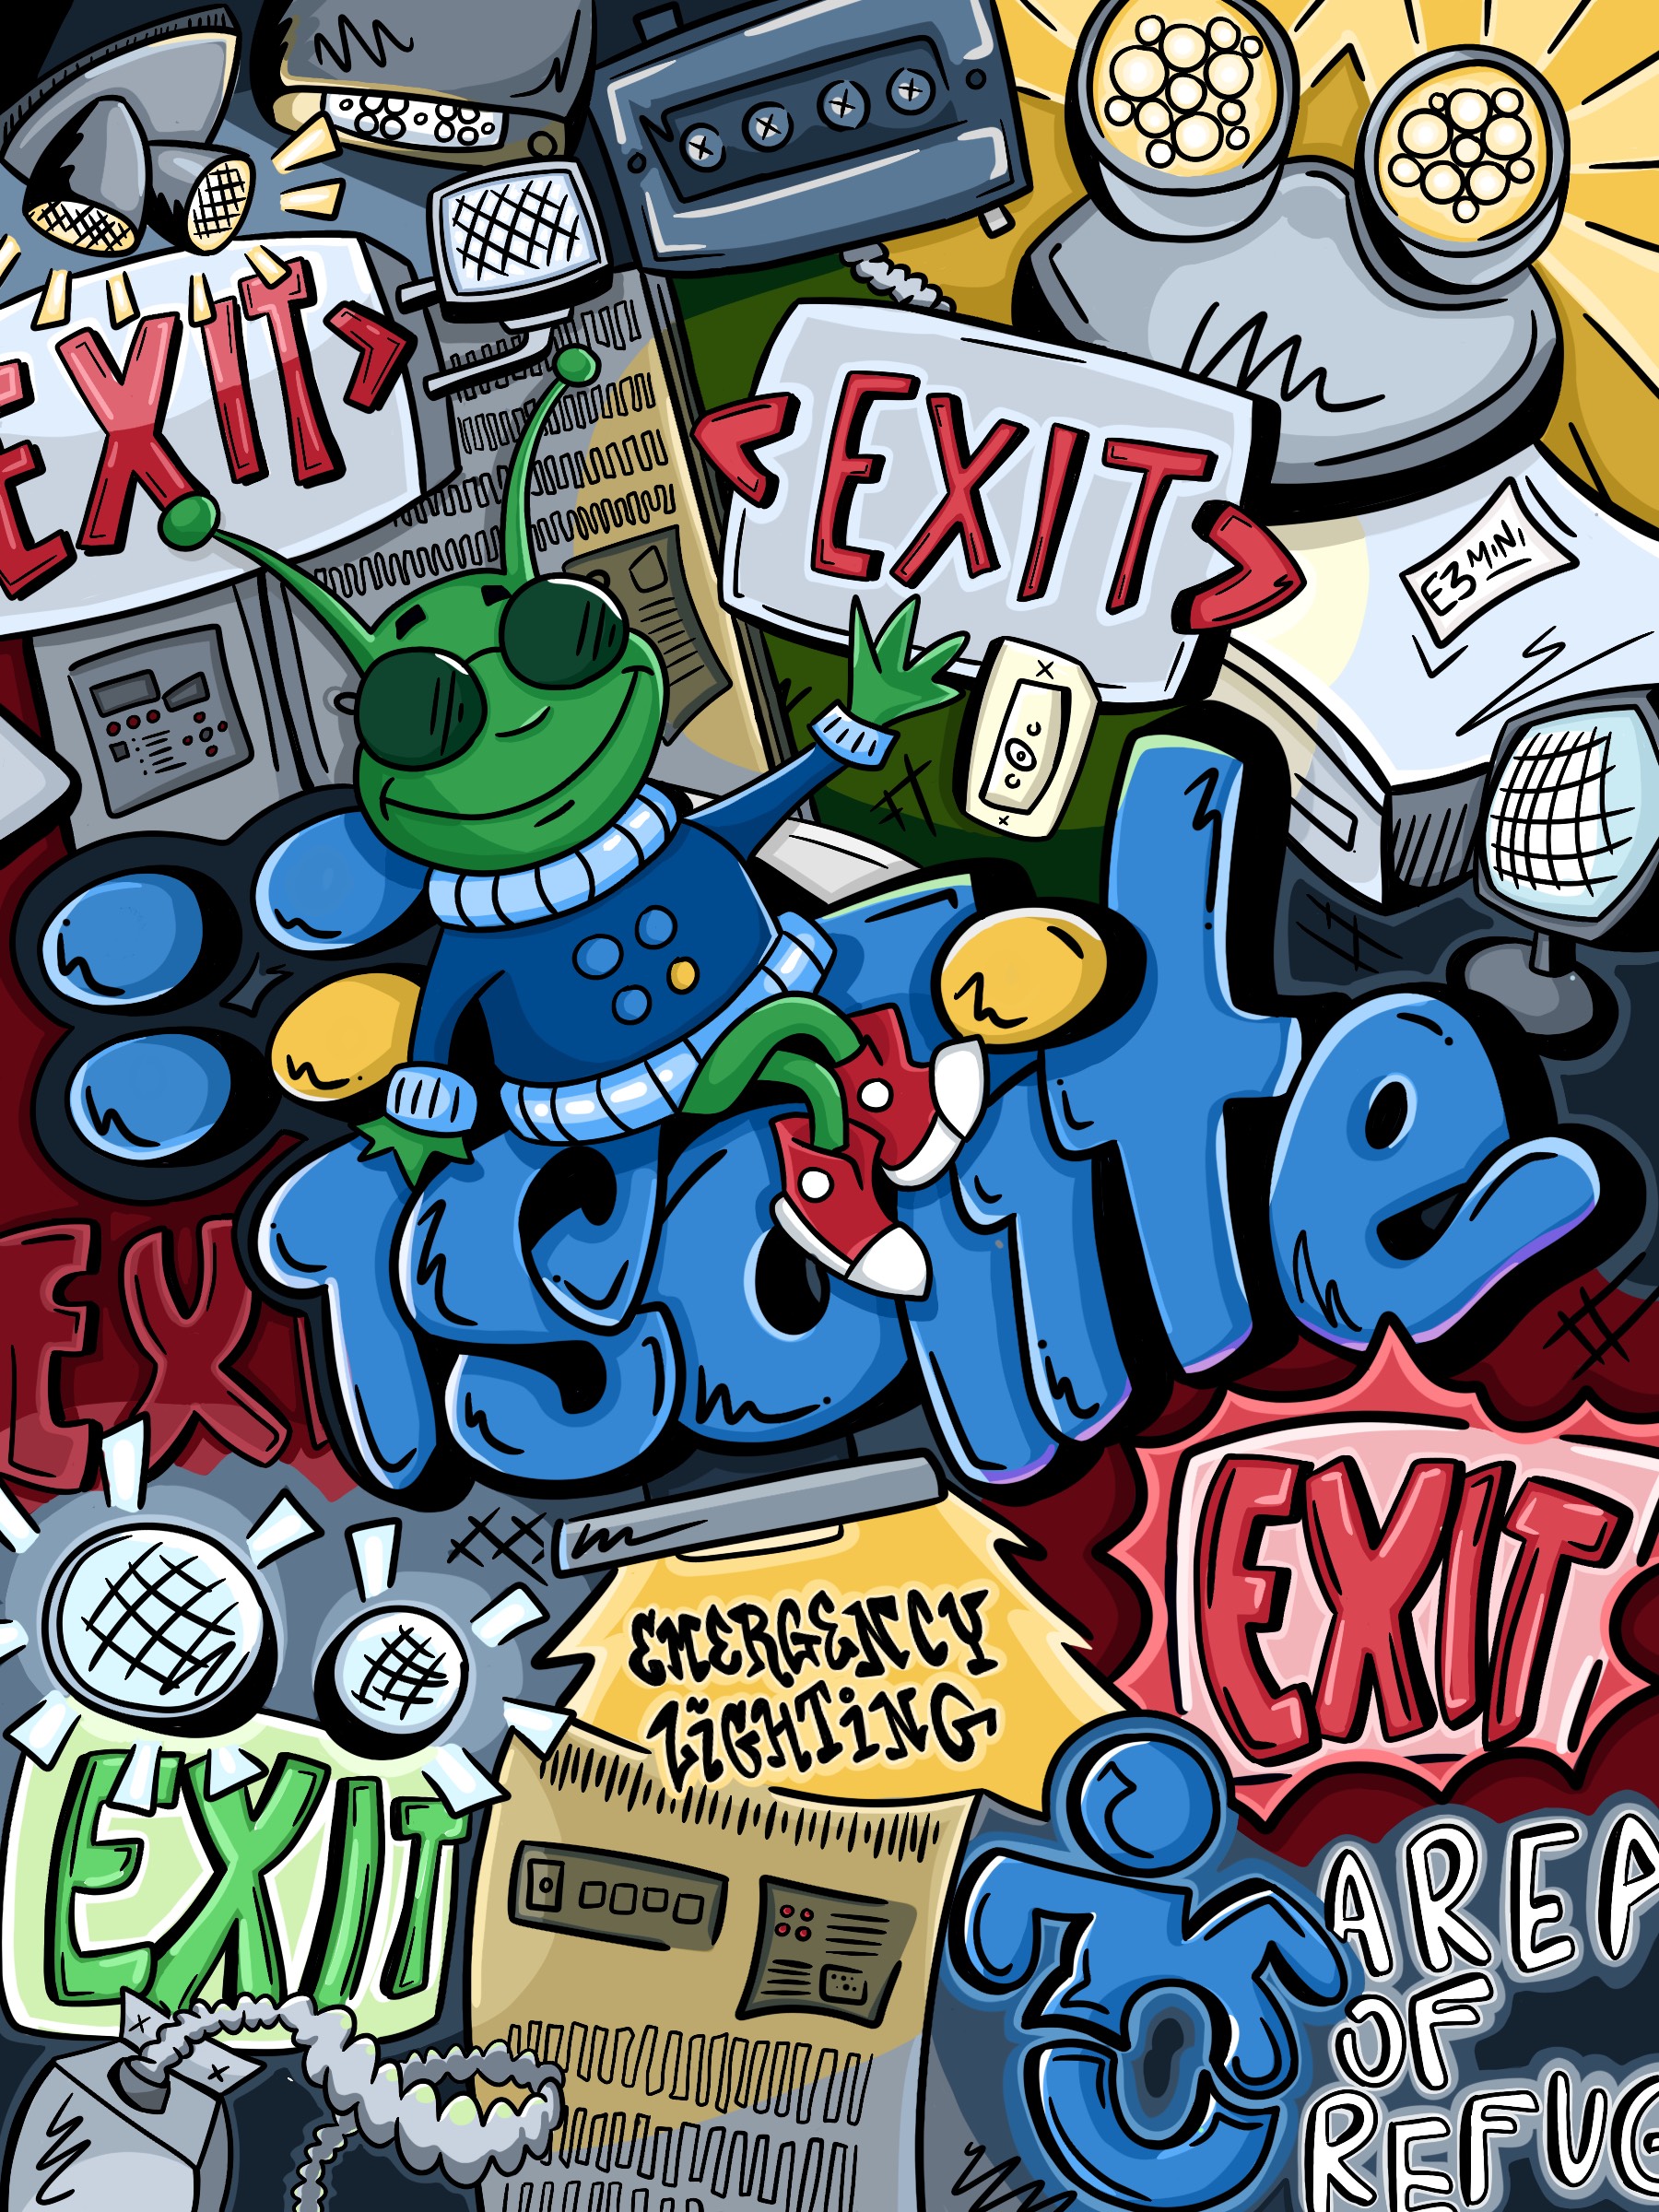
From there, I started sketching out the rest of the design on Procreate. I then presented a developed sketch to Isolite to get their final feedback on the products I chose and the layout of things. Once that was finalized, I started outlining, coloring and shading using colors that were dictated by Lumi’s physical make-up. I really wanted to make it fun, bold and colorful to really bring some visual interest to what might be considered simple, muted shells of light fixtures and inverters. At the same time, there are colors that can be produced digitally but might be hard to find when it comes to painting them on a wall, so I made sure to visit a paint store and get swatches once I found a palette I liked.
At this point, consider Phase 1 finished! Isolite loved the final design and I was very proud of myself, seeing a final version of your work always gives a profound feeling of accomplishment. The next steps were on the engineers part to design and produce the lighting wall, this would take place over the next two months.
The Production
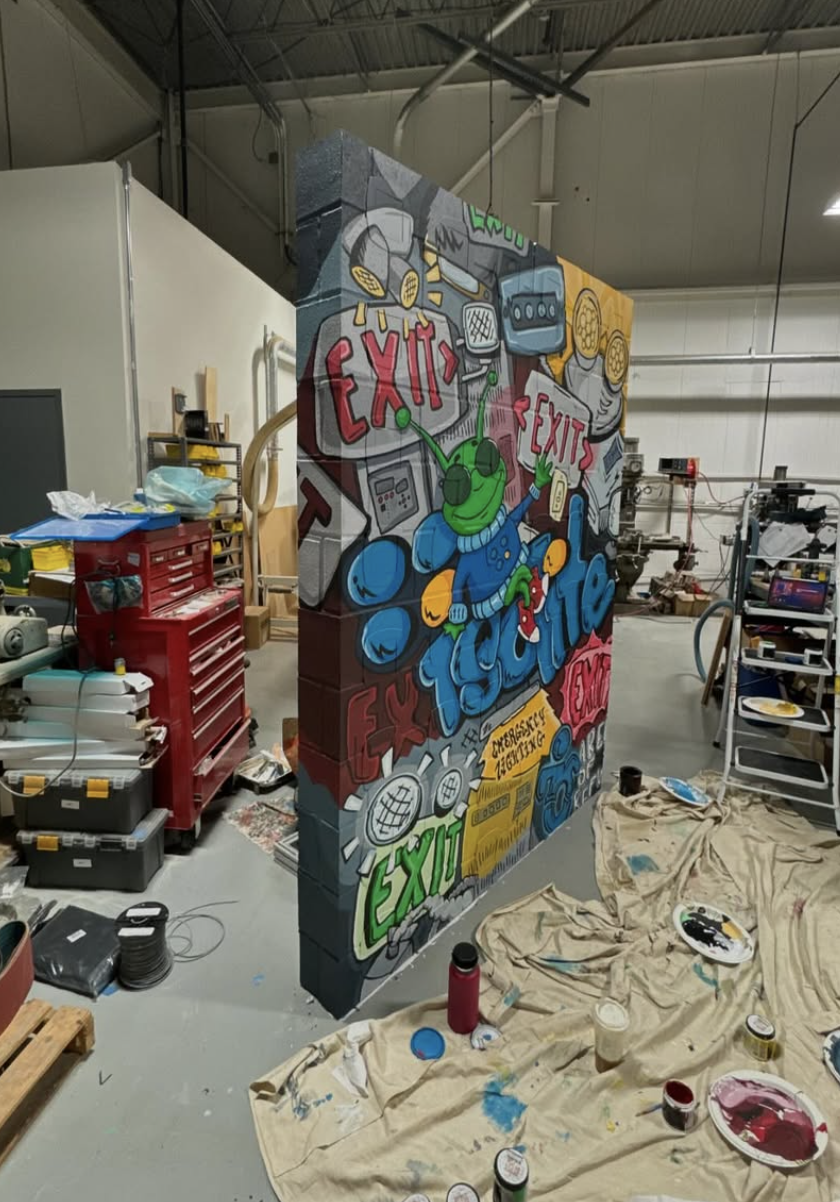
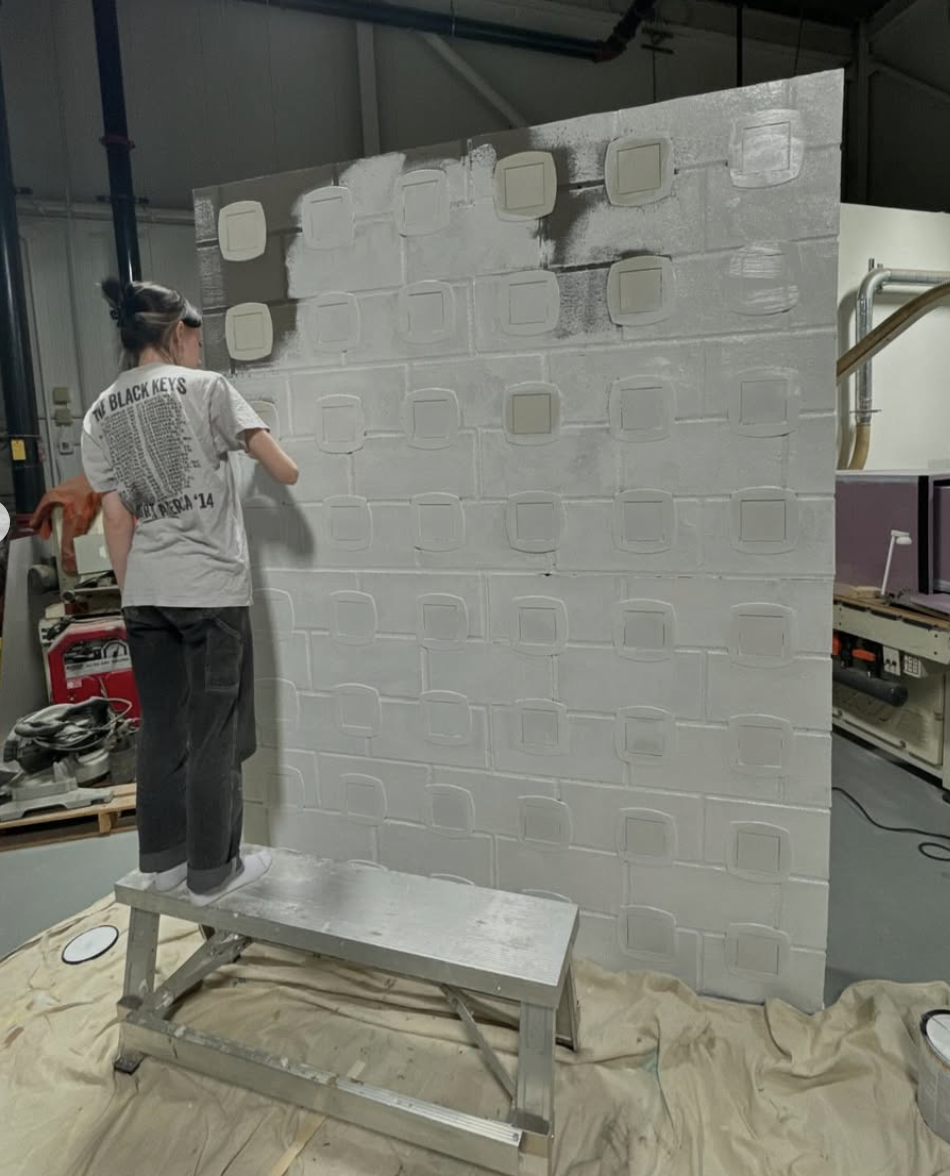
After a few weeks, I got an email from the enthusiastic engineer that the wall had been completed and it was up and running! He decided to go with a faux-cinderblock front to bring a bit more texture and concealment to the light fixtures. While I agree with his decision there, it did provide another challenge for me, painting on a heavily textured wall instead of something flat and smooth. In addition to that, I was facing some other concerns on my end, the biggest worry being I only had one week to get it painted and finished on top of my 9-5 job.
Regardless, it was time to get started! With primer and a projector in hand, I recruited help from a fellow artist and friend to get the ball rolling. On day one, we started with painting the wall white to provide ourselves a fresh blank canvas, it took about 2 hours with the two of us, paintbrushes in hand.
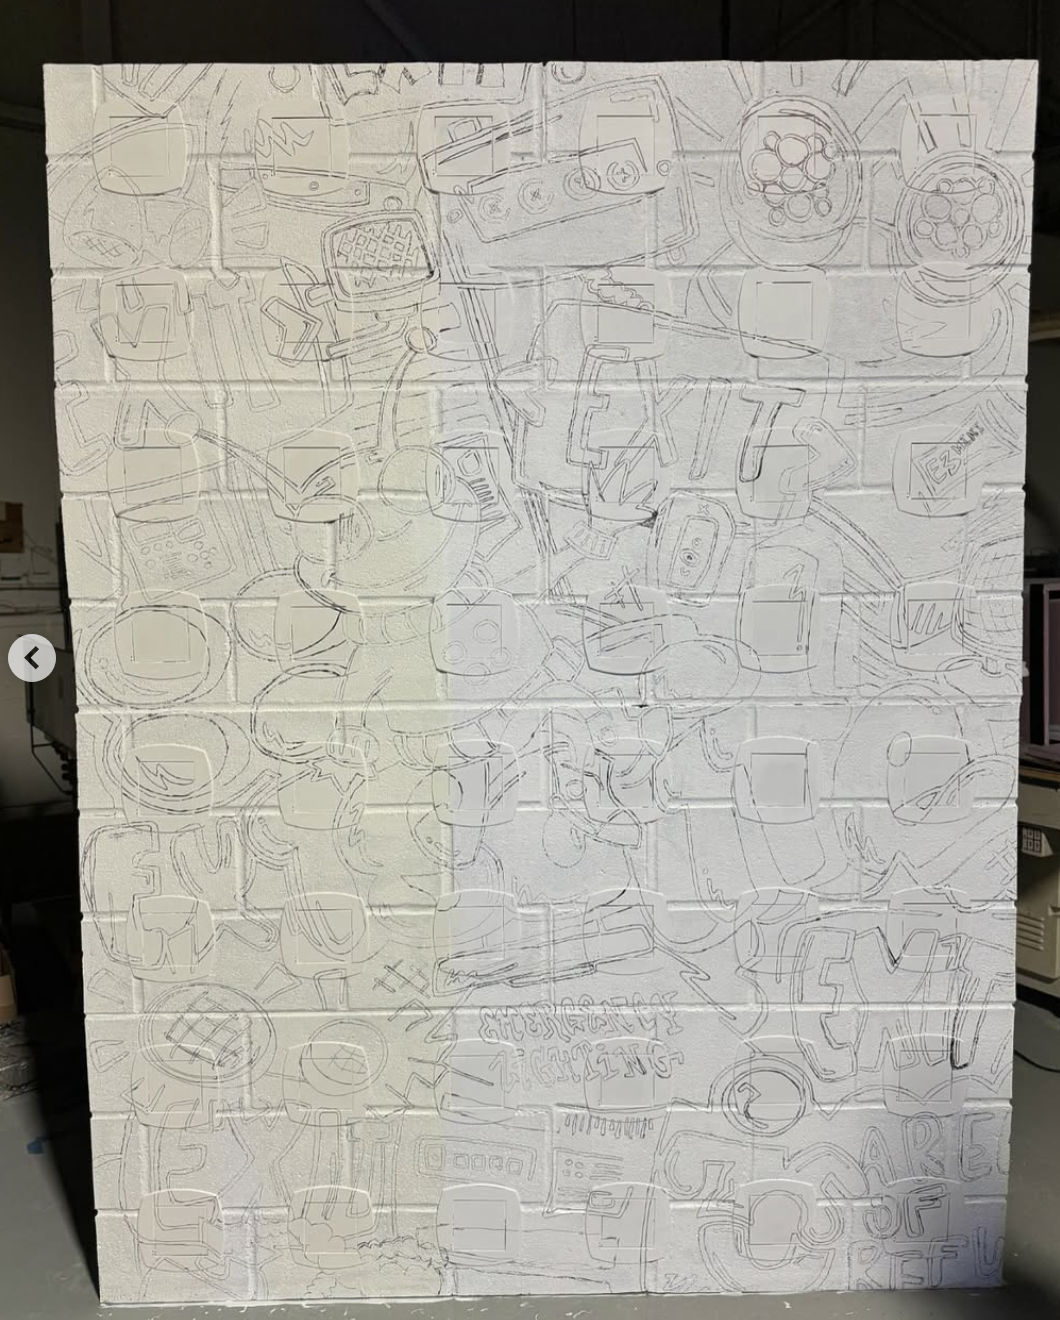
Day 2 brought the challenge of setting up the projector and tracing the outlined design onto the wall with sharpies. I was using a cheap, dull projector that was rigged onto a ladder, sitting on boxes, and held in place by duct tape and it was still shifting. We traced as quick as we could knowing their purpose was to be guidelines and they that they don’t have to look pretty. Tracing day was approximately 4 hours.
Honestly, at this point the hard part was over and it was time to put on a true crime podcast (shoutout And Thats Why We Drink) and get to painting. We had a palette of 8 colors in addition to black and white, our total after buying paint and supplies was about $120 which would be reimbursed. I will say $120 is a lot cheaper than I thought I’d be spending on material costs when you’re talking about a 6ft by 8ft mural.
Over the next 5 days, I was pretty much back to being on my own for painting, my extra set of hands had to get back to the real world. Although nights were long, the painting was super relaxing and the engineers in the warehouse were lovely and would make me tea every night before they headed out. From what help I was able to get, paired with the hours I put in, it took a total of 96 man hours to get it done.
Boy, I thought I felt a sense of accomplishment once the design was done, you can probably imagine what I felt to stand back and look at a finished mural! My job here was finished and what was left was for the engineer to disassemble it into 3 parts, load it on a truck, ship it to New York, and then unload and set it up again. He sent me pictures and videos of what the whole final product looked like, lights and all, and you can check it out here. I also documented my entire process, making a time-lapse of almost everyday painting which I have on my creative Instagram account (corrgraphic).
The Final Product
While I wasn’t at the LEDucation Expo, I am happy to share some images of the final product here. I think my first take-away after stepping back and looking at it was how good the colors came out. I was surprised to see how vibrant they looked in person. If I could change one thing for next time, I wouldn’t even open the black paint until it was time to put the final outlines on it. I kept getting it everywhere! I think I would also invest in bigger and better paintbrushes, something in between my canvas brushes and thick wall paint brushes.