Hi Everyone! I hope everyone is finding ways to stay cool in this heat and enjoying their summer! Like I said in my last blog post, I picked up some materials to start experimenting with linocut block printing at home, using the Speedball Speedy Carve rubber blocks and the Speedball starter carving kit, so I made my first linocut relief print!
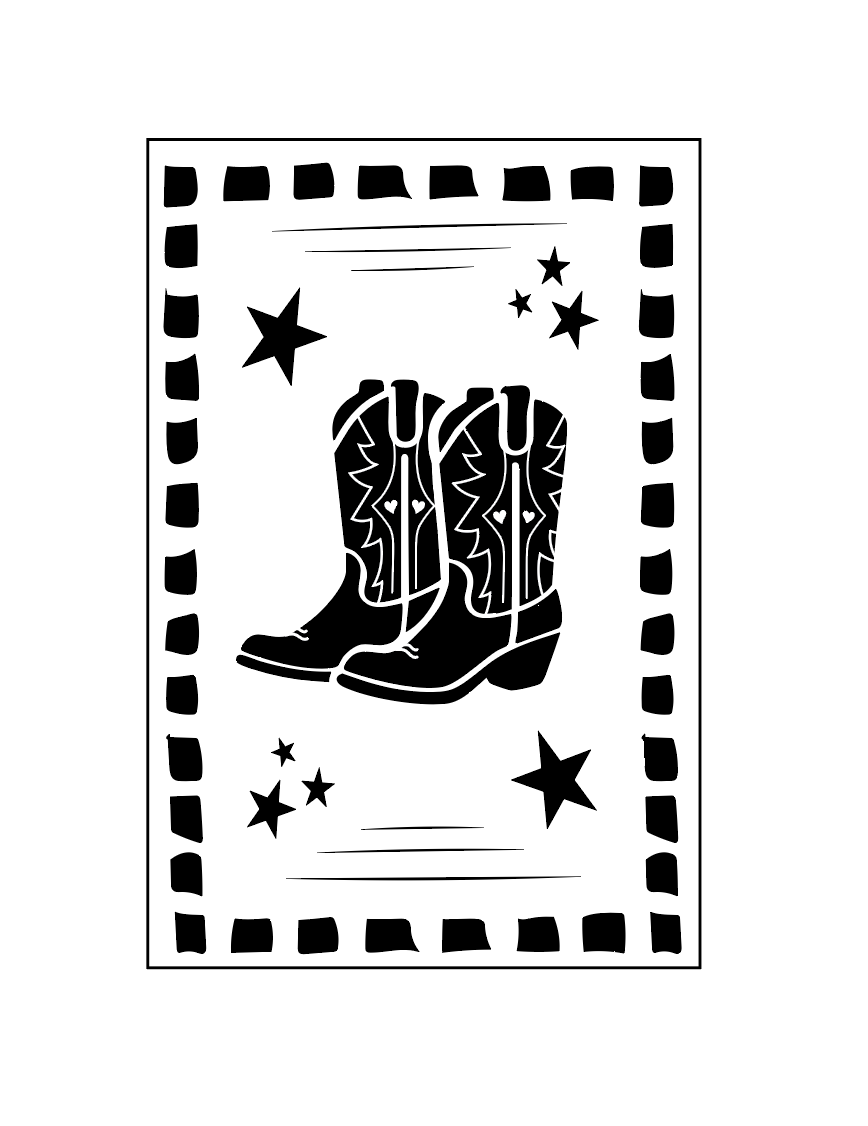
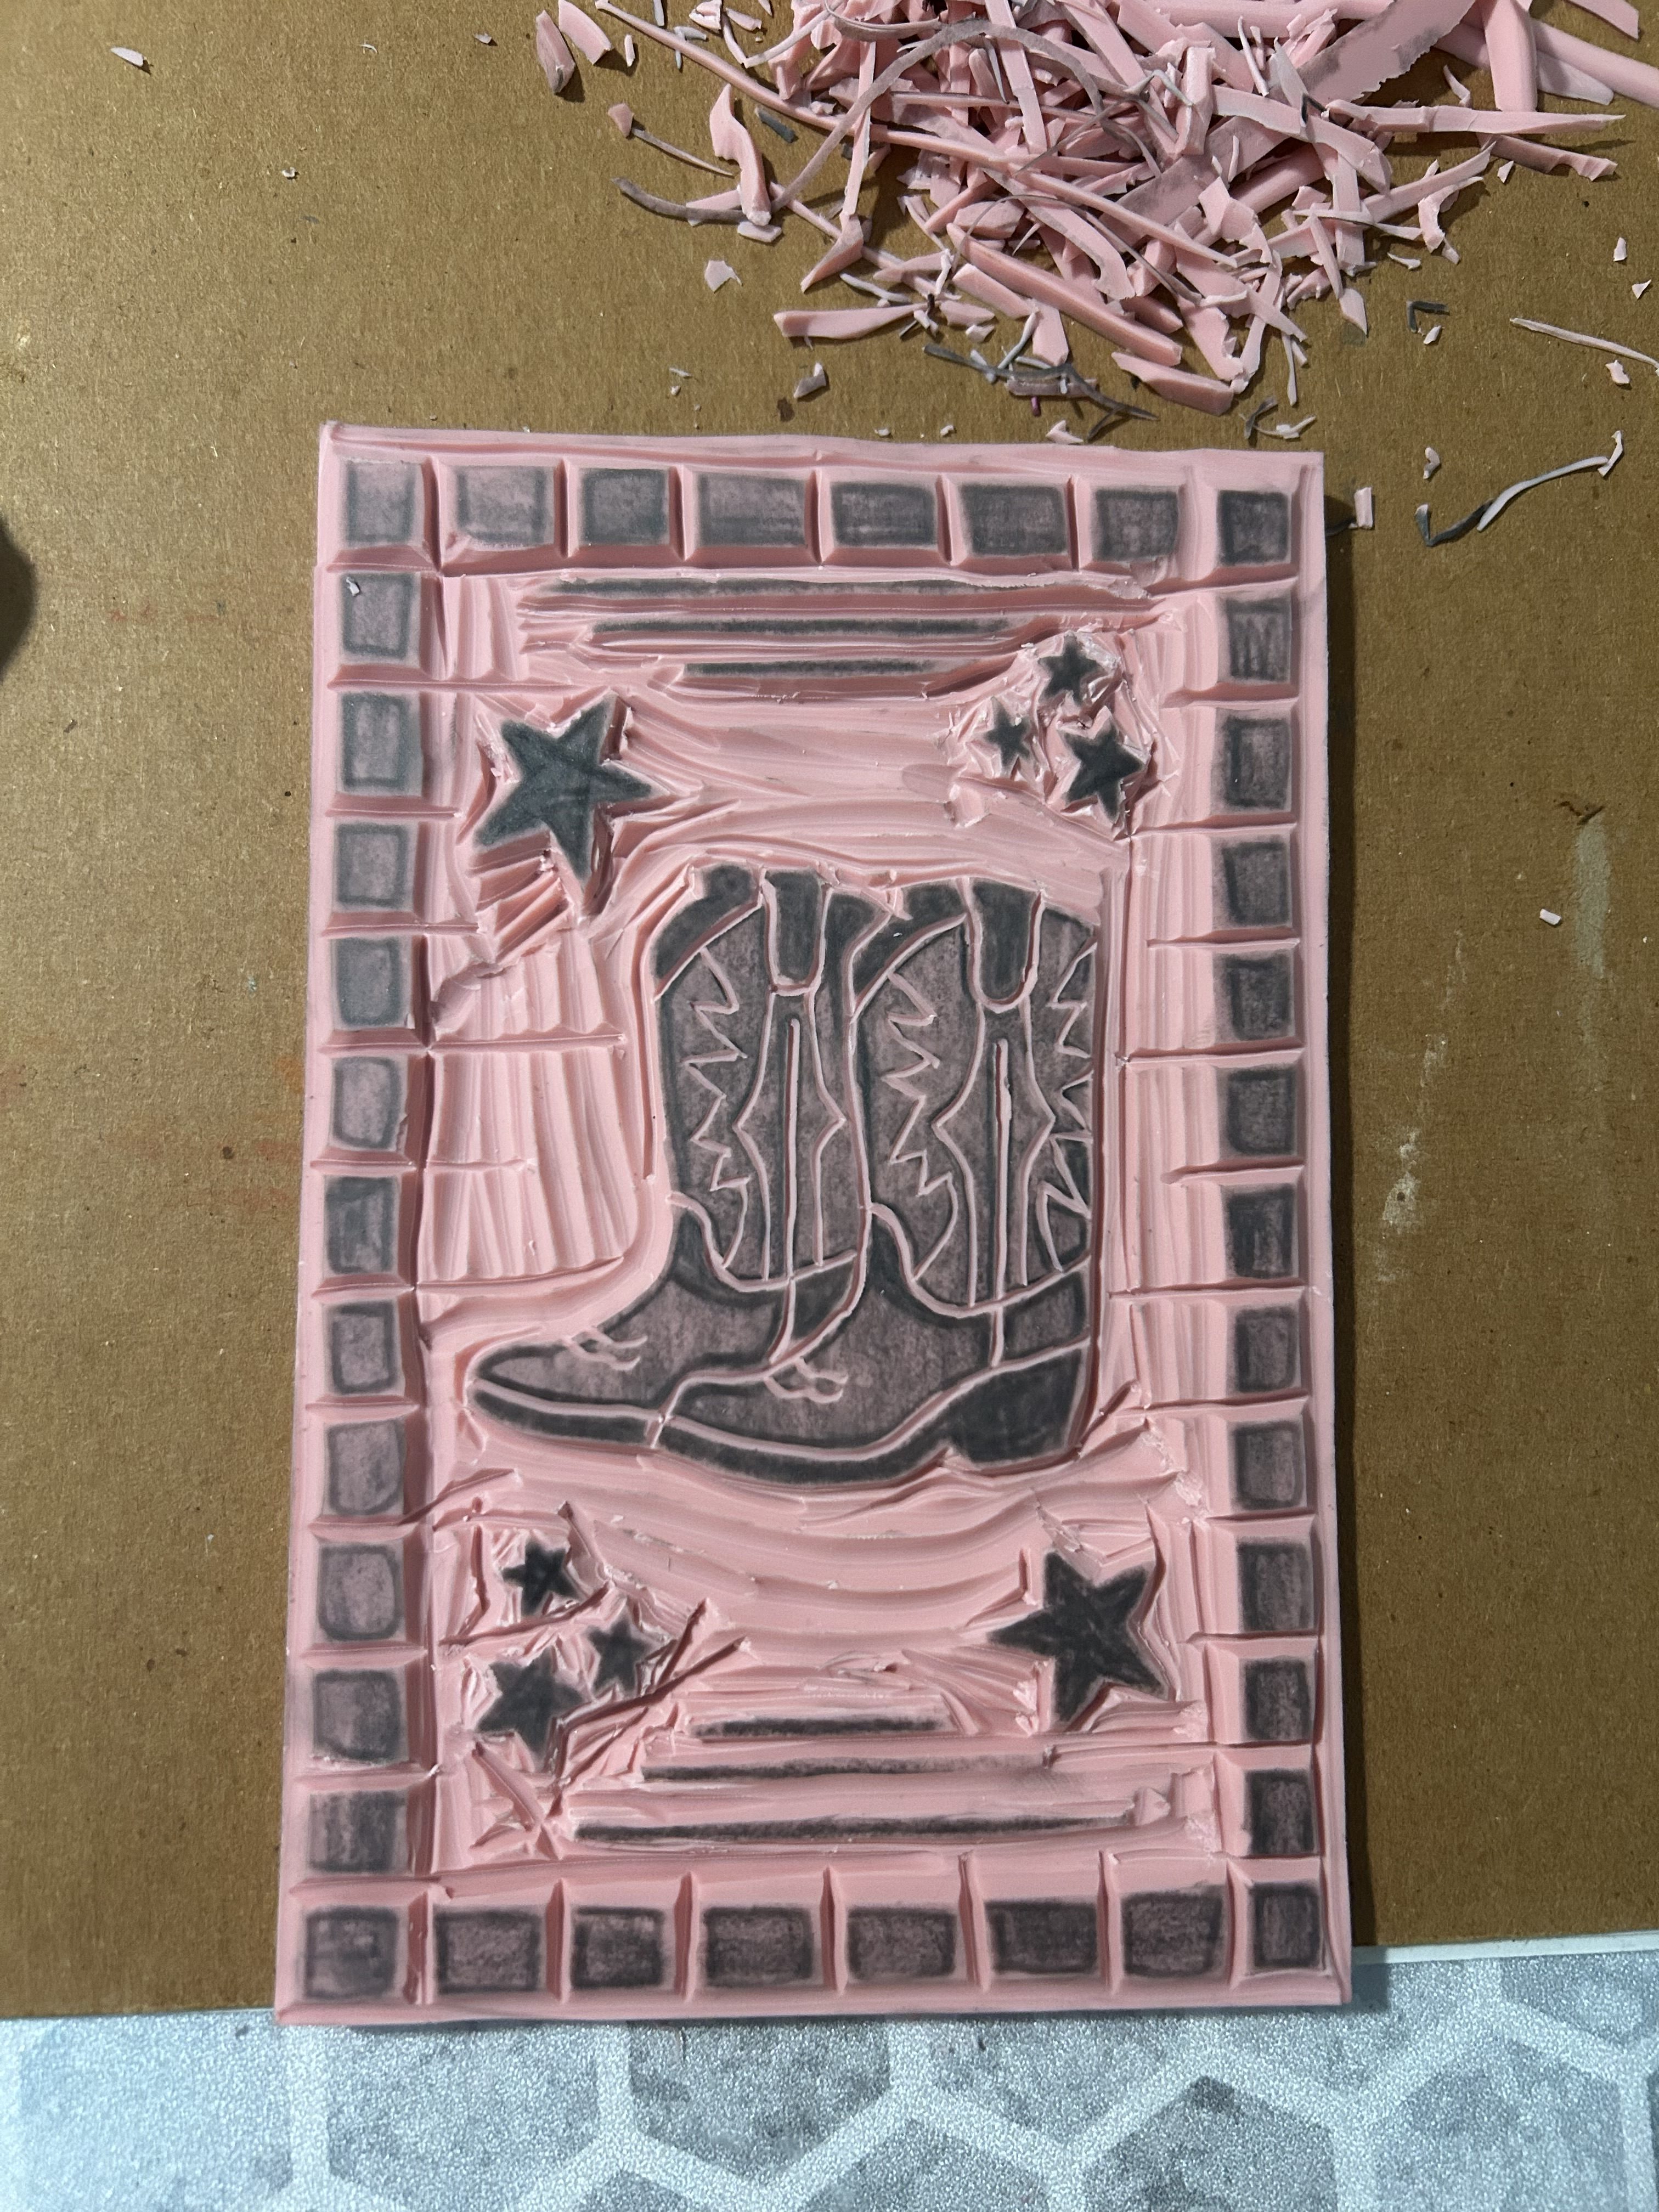
To start, I drew my design digitally on my iPad on Adobe Illustrator, and I went for a little cowboy boot graphic with some stars and a fun border. If you’ve seen my other work, of course my first print had to involve cowboy boots again, lol. I remembered to flip it the opposite way that I wanted it to print, and then I printed it out and transferred it onto the rubber block by covering the back of it in graphite and tracing over the lines. This method did not work as well as I wanted it to, next time I’m just going to draw the sketch on paper with pencil and flip it over and place it on the block, and then press down with graphite on the side facing me. The way I did it left way too many graphite marks and the details did not come through so I had to go over it again with pencil on the block itself.
I then started the carving process, I was a little scared because it was my first time using the tools, but I watched some videos and went for it. It was surprisingly really easy, just a little time consuming! It was really satisfying to carve into the rubber, but it did get a little difficult with the small details, but I made sure to use the smallest carving tool I had. The stars were probably the most difficult part, the details on the boot were surprisingly easy, but I think it came out pretty good. Here is my original design, and then what was sketched on the block, and then the final carving! There were a lot of scraps as you can see, its a messy project!

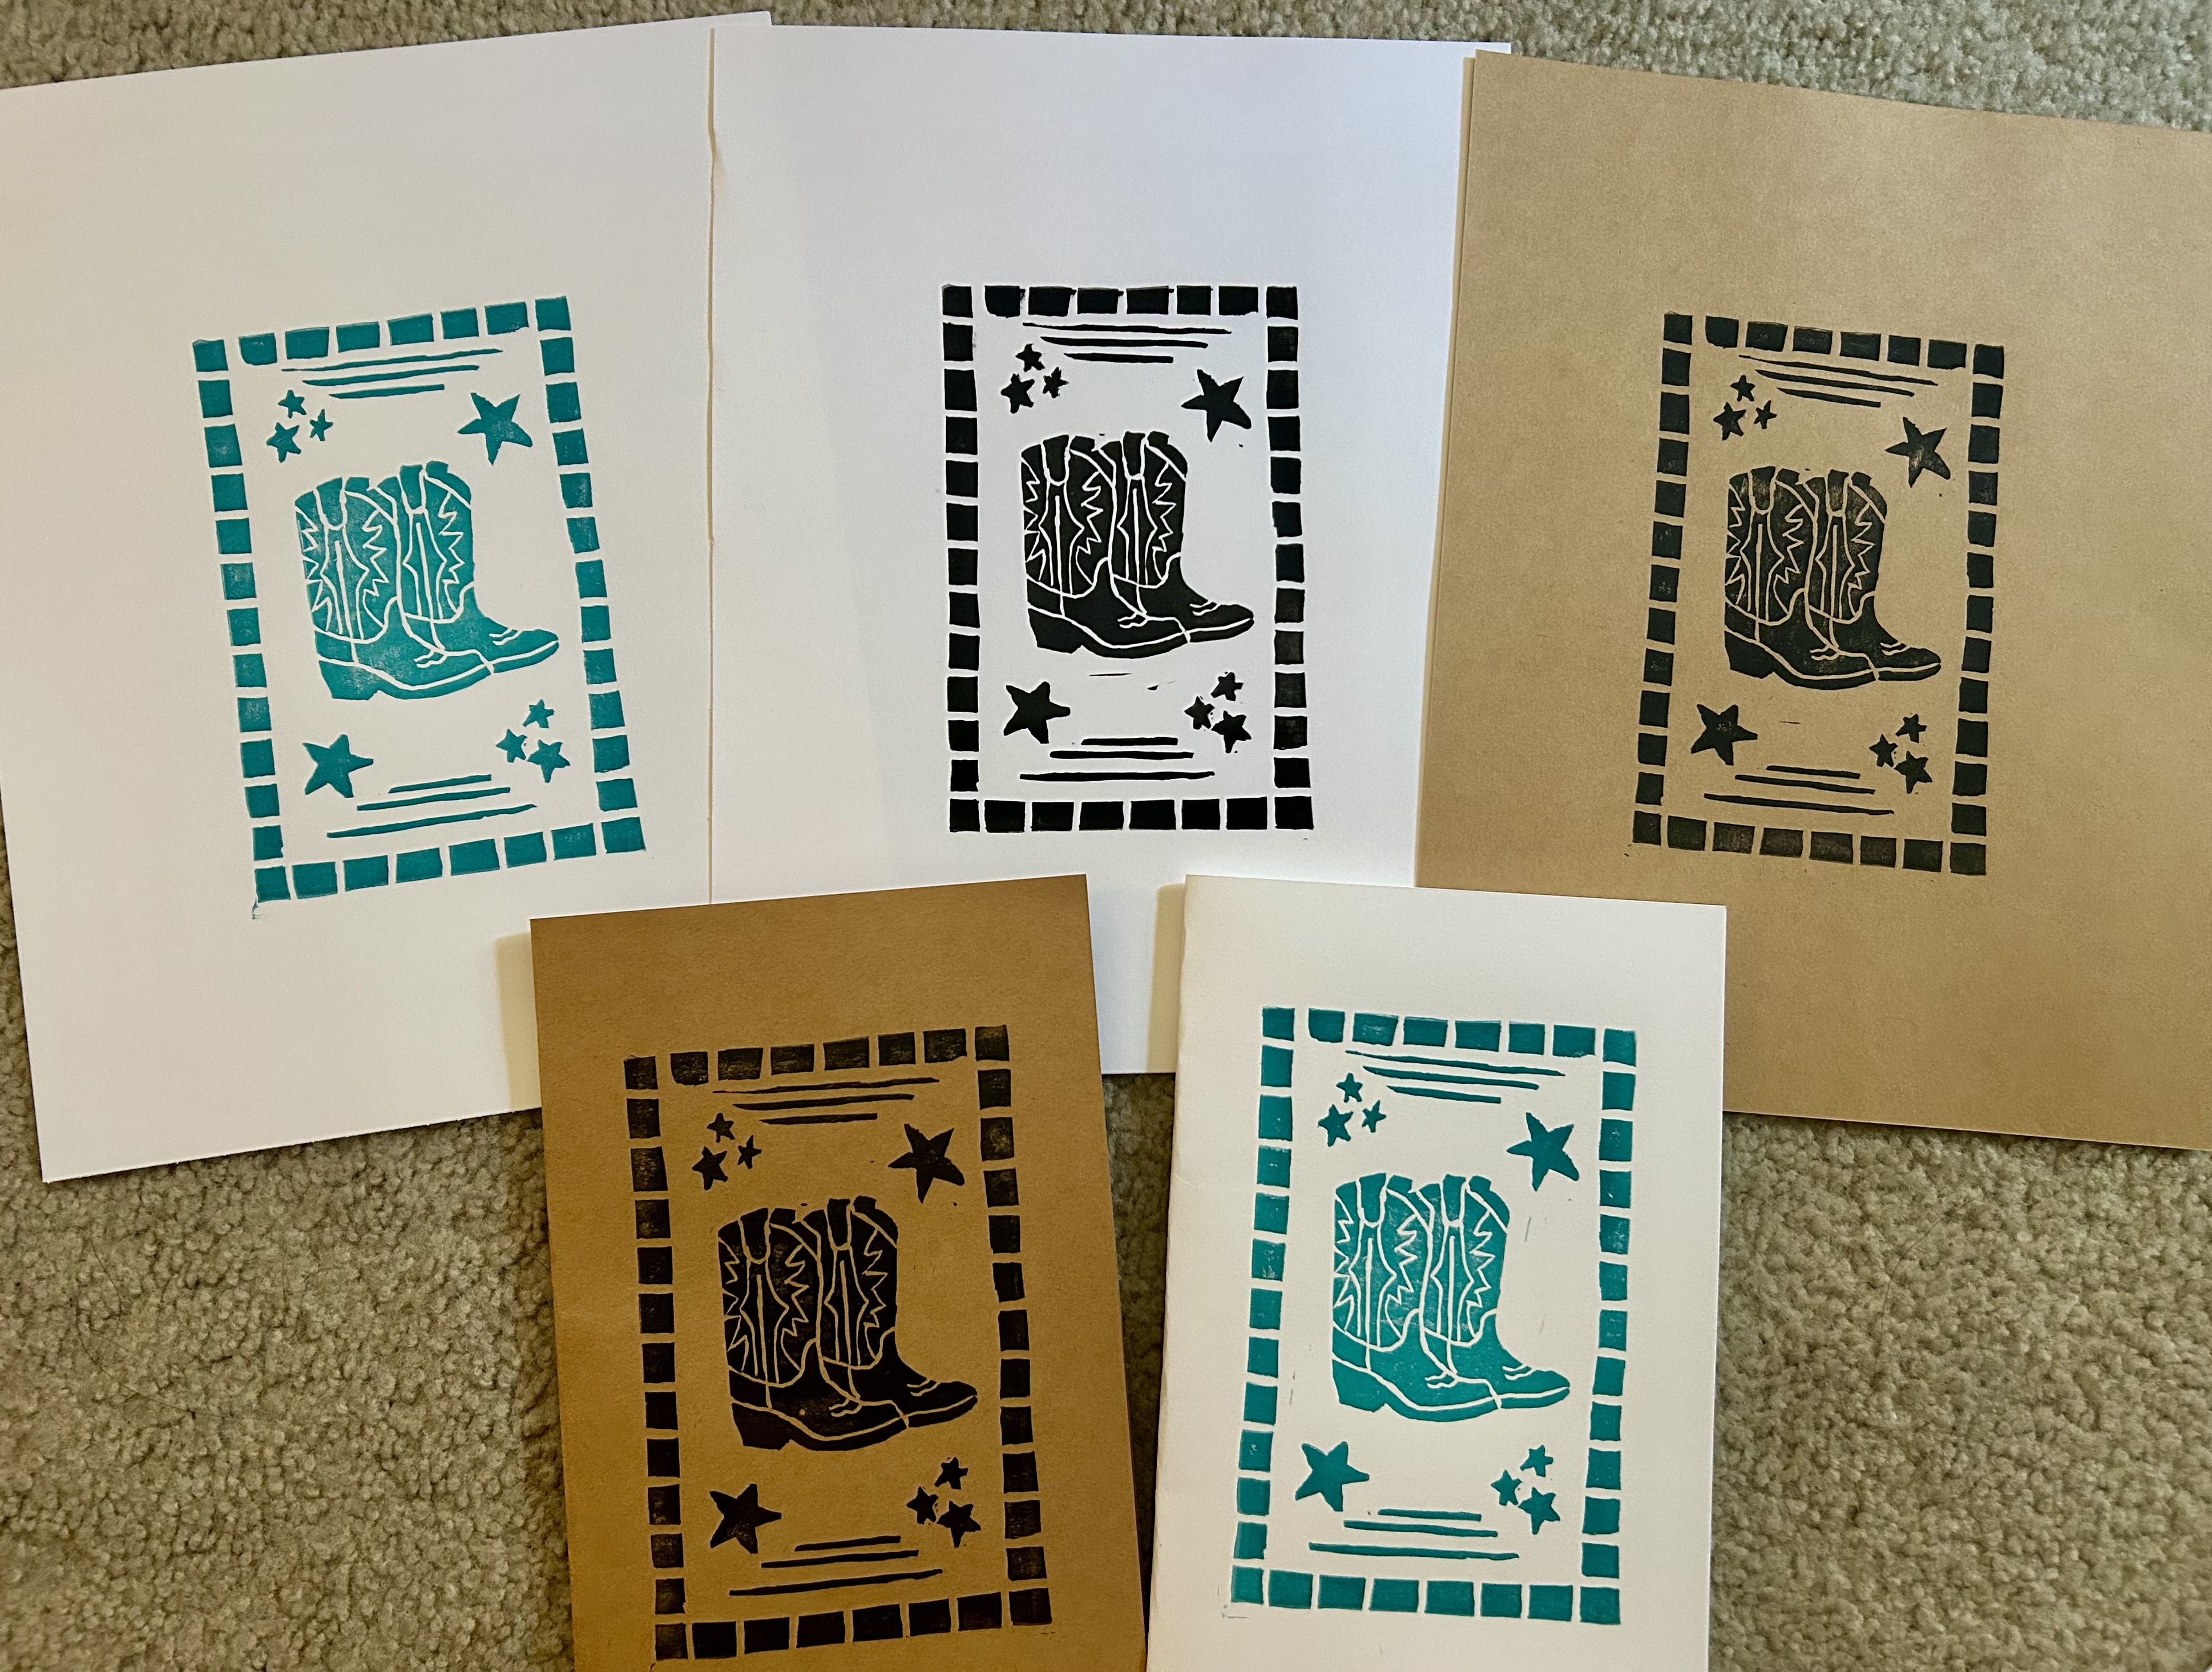
Now for the fun part, inking it up! I was so excited for this. I started with the black ink that came in the starter kit, and you should use plexiglass or some smooth surface to roll the ink on, but I only had pieces of cardboard so that’s what I used for now until I get something better. So I took the brayer and rolled the black ink until there was a thin layer of ink on the brayer and rolled it on top of the relief. For some reason I was worried about the lines not being carved deep enough, but even the smallest details held up really well because the ink literally only attaches to the raised parts! The first print needed a little more ink but after that it was smooth sailing. I used the relief as more of a stamp and I pressed it down on top of my paper so that I could see where I was printing it instead of putting the paper on top of it.
I also picked up a turquoise/blue color ink as well, so that’s what I decided to do next. I wiped down my brayer and the carving and started fresh with the turquoise ink and I absolutely love how it came out. I did this color on white paper, and experimented with brown paper with the black ink as well. I did some on 8.5×11 sheets and some I also made into cards! I made a bunch of prints because you never know who will want one or which one I’m going to decide to frame/hang up! Here are my results!
I had so much fun doing this and I absolutely love how they came out. I have another ready to carve block so I will for sure be doing another carving soon!
Which color combo do you like the best? I’m loving the black on brown!
Thanks for reading,
Ella