Hi everyone! It’s been quite a while since I last updated you all! I have a lot to catch you up on. Most of it is about the replica of my grandparents’ house, but I also have ceramics updates, watercolor updates, and end-of-year remarks! Since there’s plenty to talk about, let’s get right into it!
First, I finished glazing the house replica just in time for the final kiln firing! Before showing the final result, here’s a look at it pre-kiln. The semester’s end crept up on me, so I had just one day to finish glazing. Still, I’m happy with the result, and the time crunch helped me push through. I started with the siding, hand-painting each wood panel, and used the same textured approach for the roof, but with a single color. The windows and other details were challenging, but worth it. Attaching the stairs was tedious, and I managed it with white glaze and a paintbrush. That simple of an explanation doesn’t encapsulate how much of a pain it was, but I digress. Then, I had to leave it in the hands of the kiln! Here’s what it looked like before firing.
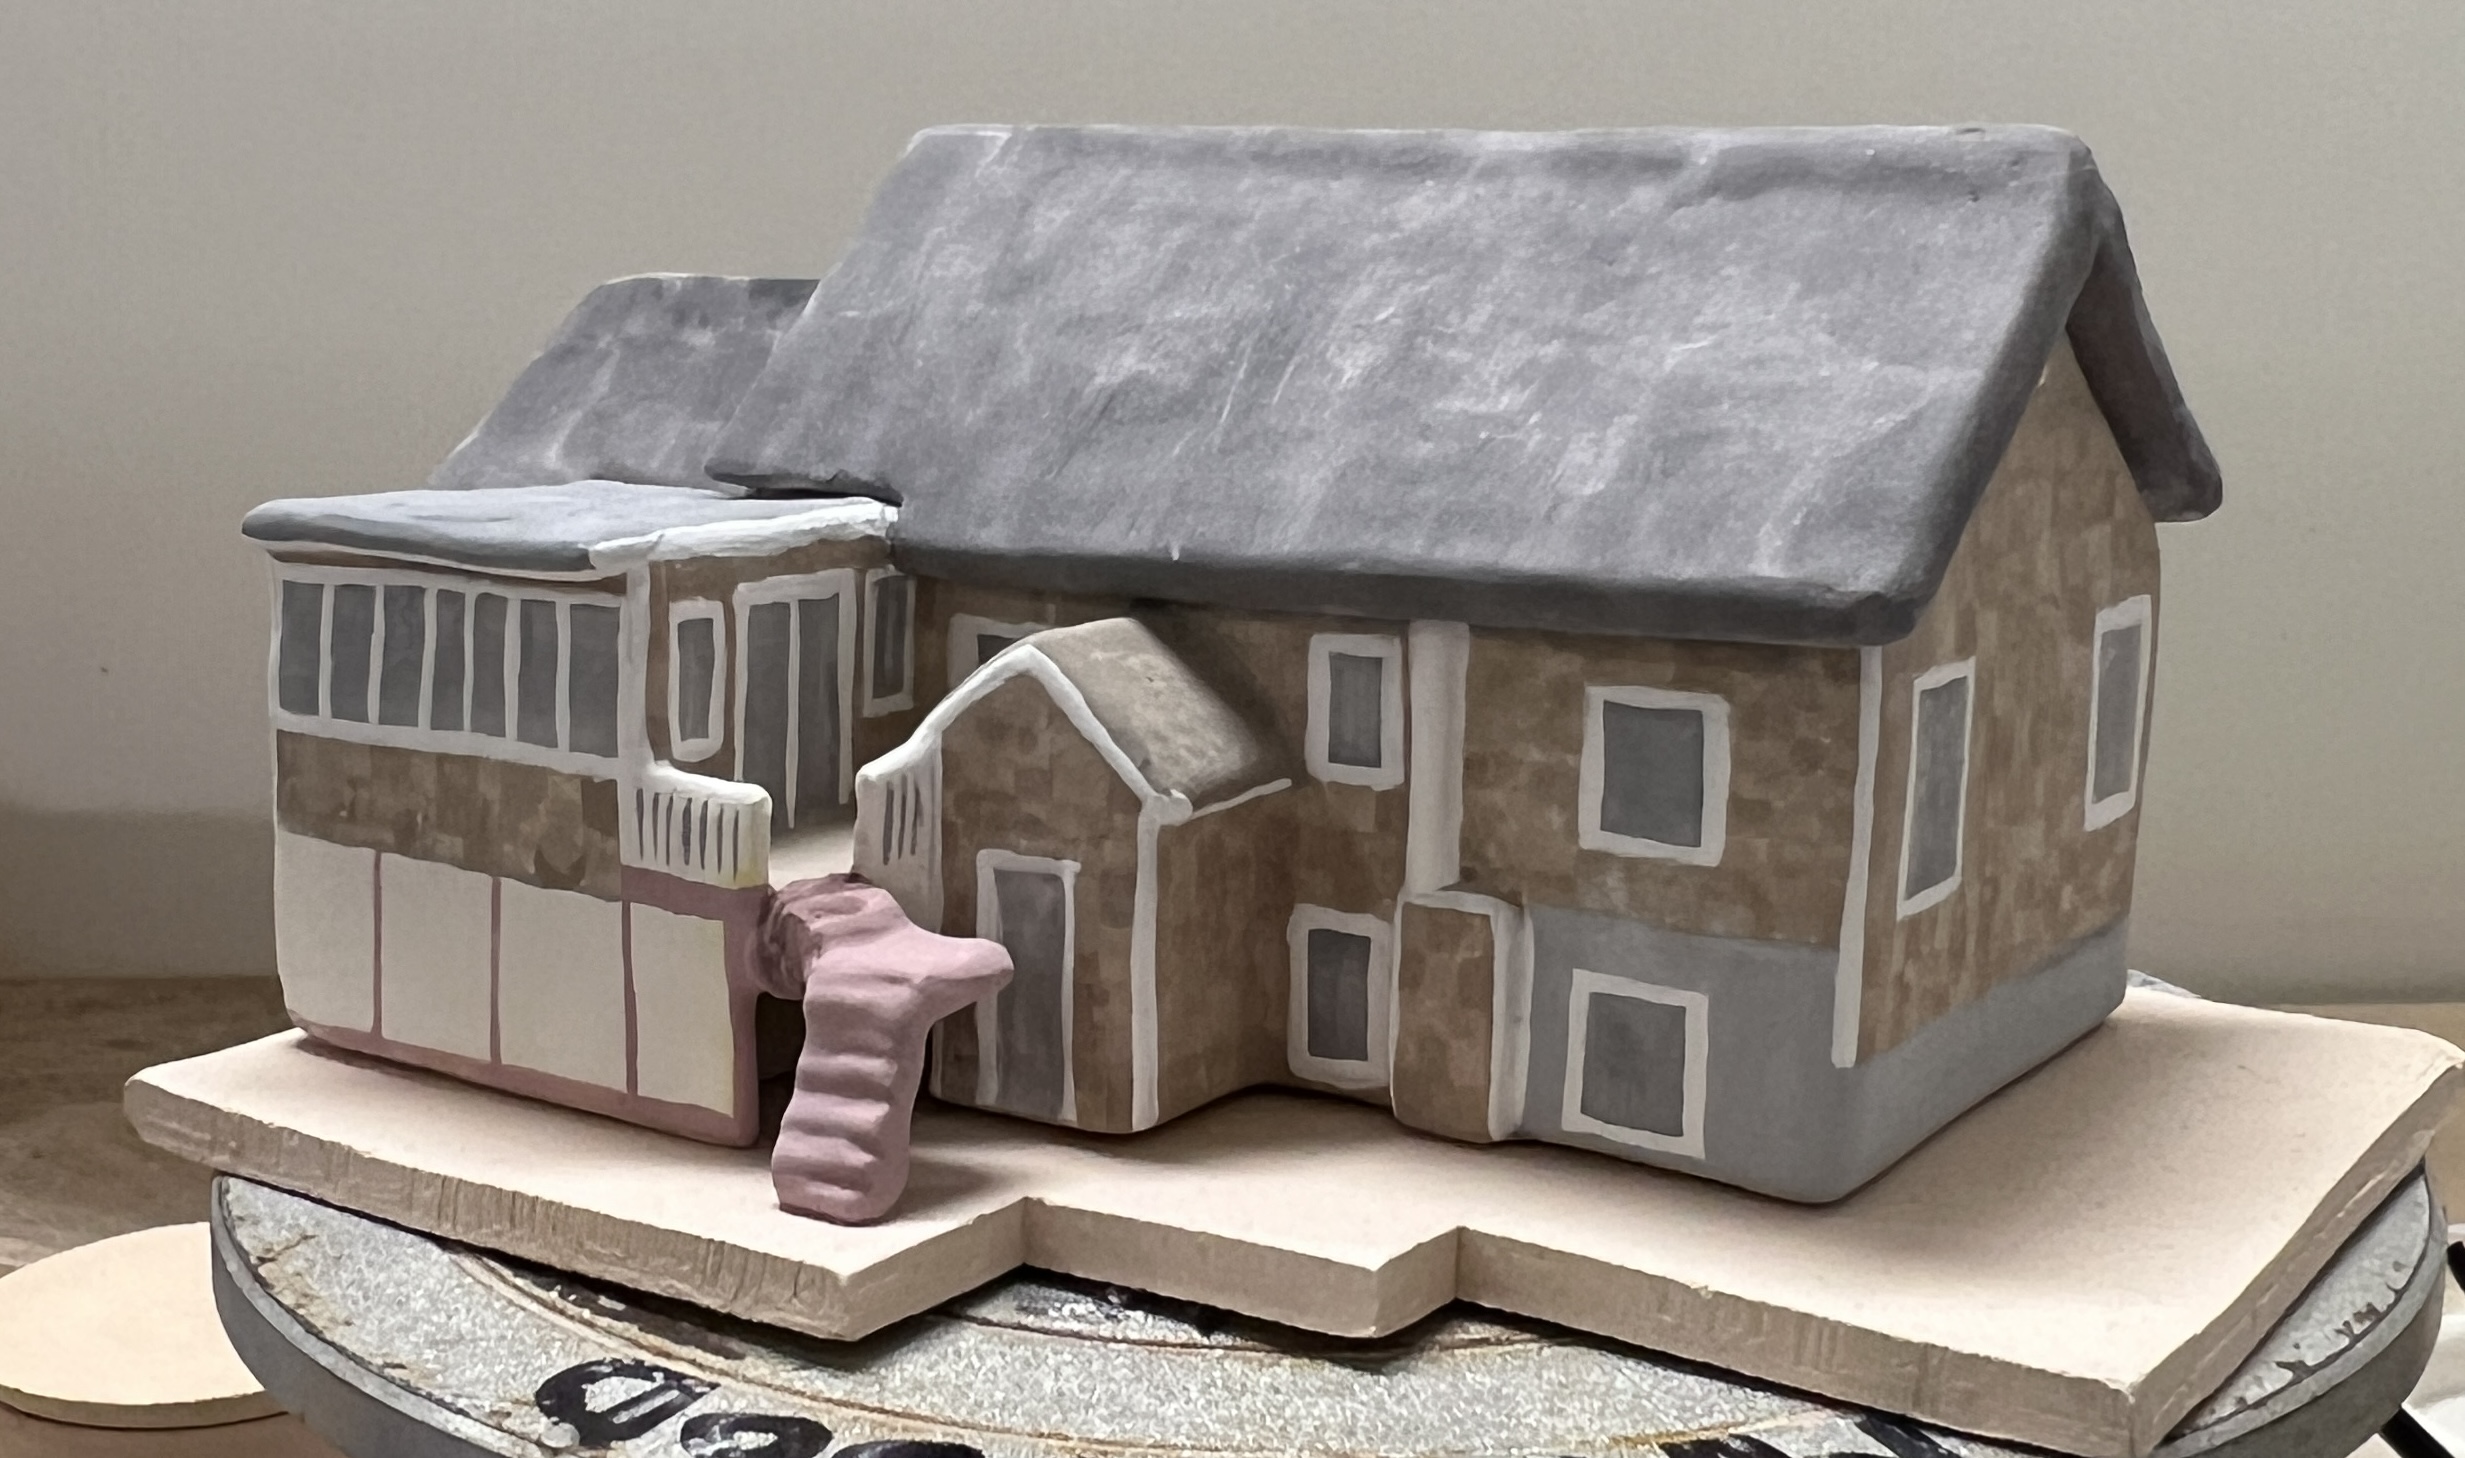
After firing, I first checked the colors and was relieved they matched my expectations. Thankfully, there were no explosions, the stairs stayed put, and the glaze didn’t crawl or bubble. The only mishaps were with the roofs. The larger one warped more after glazing, and the smaller one fused to the house, though I accepted it. My goal was for the larger roof piece to come off, and it did. Here’s how it turned out after the glaze firing!

If I were to go back and do this project again, perhaps with my own house, I think I could finish it much faster and more effectively. I definitely encountered many learning curves throughout this process, especially as someone who rarely hand-builds. That said, I don’t think I’ll be doing anything like this anytime soon ahah! It was a lot of fun and interesting to try, but wow, it takes patience that I don’t have right now! But who knows? Miracles happen!
Next comes something that takes a little less patience, mixing glazes. Last semester, for our glaze-mixing project, I mixed up a beautiful greenish-blue color that has become a signature of mine and a studio favorite. This semester, we had to repeat the process, but with three glazes instead of one. I had several glaze recipes saved, so I picked ones I thought would work well together or with the clay’s natural color. Remembering last semester’s blue-green glaze, I chose a darker blueish purple, a lighter seafoam green-blue, and a sandy yellow. Mixing glazes always takes longer than expected for me, so mixing three in one day was ambitious, but I completed them all. Another part of the project was to experiment with layering, since the results can be surprisingly different. I dipped test tiles into each glaze individually and also layered them by dipping from one into another. The waiting period for the results is brutal, but when it’s time to open the kiln, it’s so rewarding. I’ll show you some of the results I got.


First of all, I was thrilled with the results of these test tiles and immediately wanted to make more glazes and experiment with them on my pieces. I love any blue glaze on red stoneware because, after firing, the clay turns an orange-brown that beautifully contrasts with the blue. I also want to try these glazes on a white clay body, which I might do next semester! I’m showing you a few of my favorites here. I also experimented with the darker blue from this semester and the green-blue from last semester, which surprisingly made purple. I’m thrilled because I’ve wanted to make a purple glaze for ages! I’ll keep experimenting with my new colors for the spring semester!
Now, moving away from ceramics for a minute, I thought I mentioned my final watercolor project in a previous post, but looking back, I guess I didn’t. So, I’m excited to share! Our final projects could be almost anything. I decided to challenge myself by painting a photo of my dad and me when I was younger. I usually don’t draw people, let alone paint them, but I wanted to push myself after the success of my shell painting. I know that’s not the same, but a girl can dream.
Going in, I wanted to paint as realistically as I could, but honestly, it didn’t feel necessary once I got into painting. I wanted it to feel nostalgic since the photo is about fifteen years old. I was adding bright tonal layers and planned to paint over them to create depth and value, but I actually really liked the vibes they gave off. They added to the nostalgia, kind of like a grainy photo with splashes of color. I can’t really describe what I’m picturing, but if you know, you know. Anyway, I reached a point where I was just adding colors wherever I saw them and wherever I thought it would look interesting. I have a lot left to do, and it’s going a different direction than I intended, but that’s how most of my favorite pieces go, so I’m sticking with it! I’ll show you the original photo too, but here’s where I am with it so far. Yes, the semester is over, and it’s not done. I don’t want to talk about that part!


Wow, that was a loaded post! Can you believe I still have more to say? To wrap up, I’m really happy with all I’ve done this semester! Fall always flies by, and I treat it as a trial run for spring. That has definitely happened this year. Luckily, I’ll be getting a ceramics journal so that I can come prepared when spring arrives! I’ll also be posting project recaps and finally sharing everything I promised on Instagram. I’m not great at posting, but I often post short updates on my story. All updates will be on @jennaking05_art. A lot of content that I post on my story doesn’t even end up in my blog posts, so check there if you’re interested in extra updates from me! This is probably my last post before the new year, so thanks so much to everyone who’s kept up with me here. It means a lot! Have a fantastic holiday and stay creative!
-Jenna 🙂