Aside from my usual assignments and projects within my classes, I try to find time to take on my own projects. I am a very hands-on artist and really enjoy physically making something out of whatever materials I have. Some days the ideas come pouring in naturally and some days not so much, and that is usually when I turn to the “Do It Yourself” (DIY) projects I find online. The DIY projects I have saved to either my phone or computer consist of many different things ranging from furniture restoration, clothing designs, or décors. For me personally the best part of taking on a DIY project is the problem solving the concept may require. Some ideas I found never come with instructions or materials, and I am sometimes left to figure it out myself, which I appreciate because I believe that helps me grow and learn for myself.
Recently I tested/completed a DIY project I found back in the fall. I could not be any happier with the end result and I am going to share the project with everyone today! There is no specific name for the project but I simply call it “Spray paint Jar.”
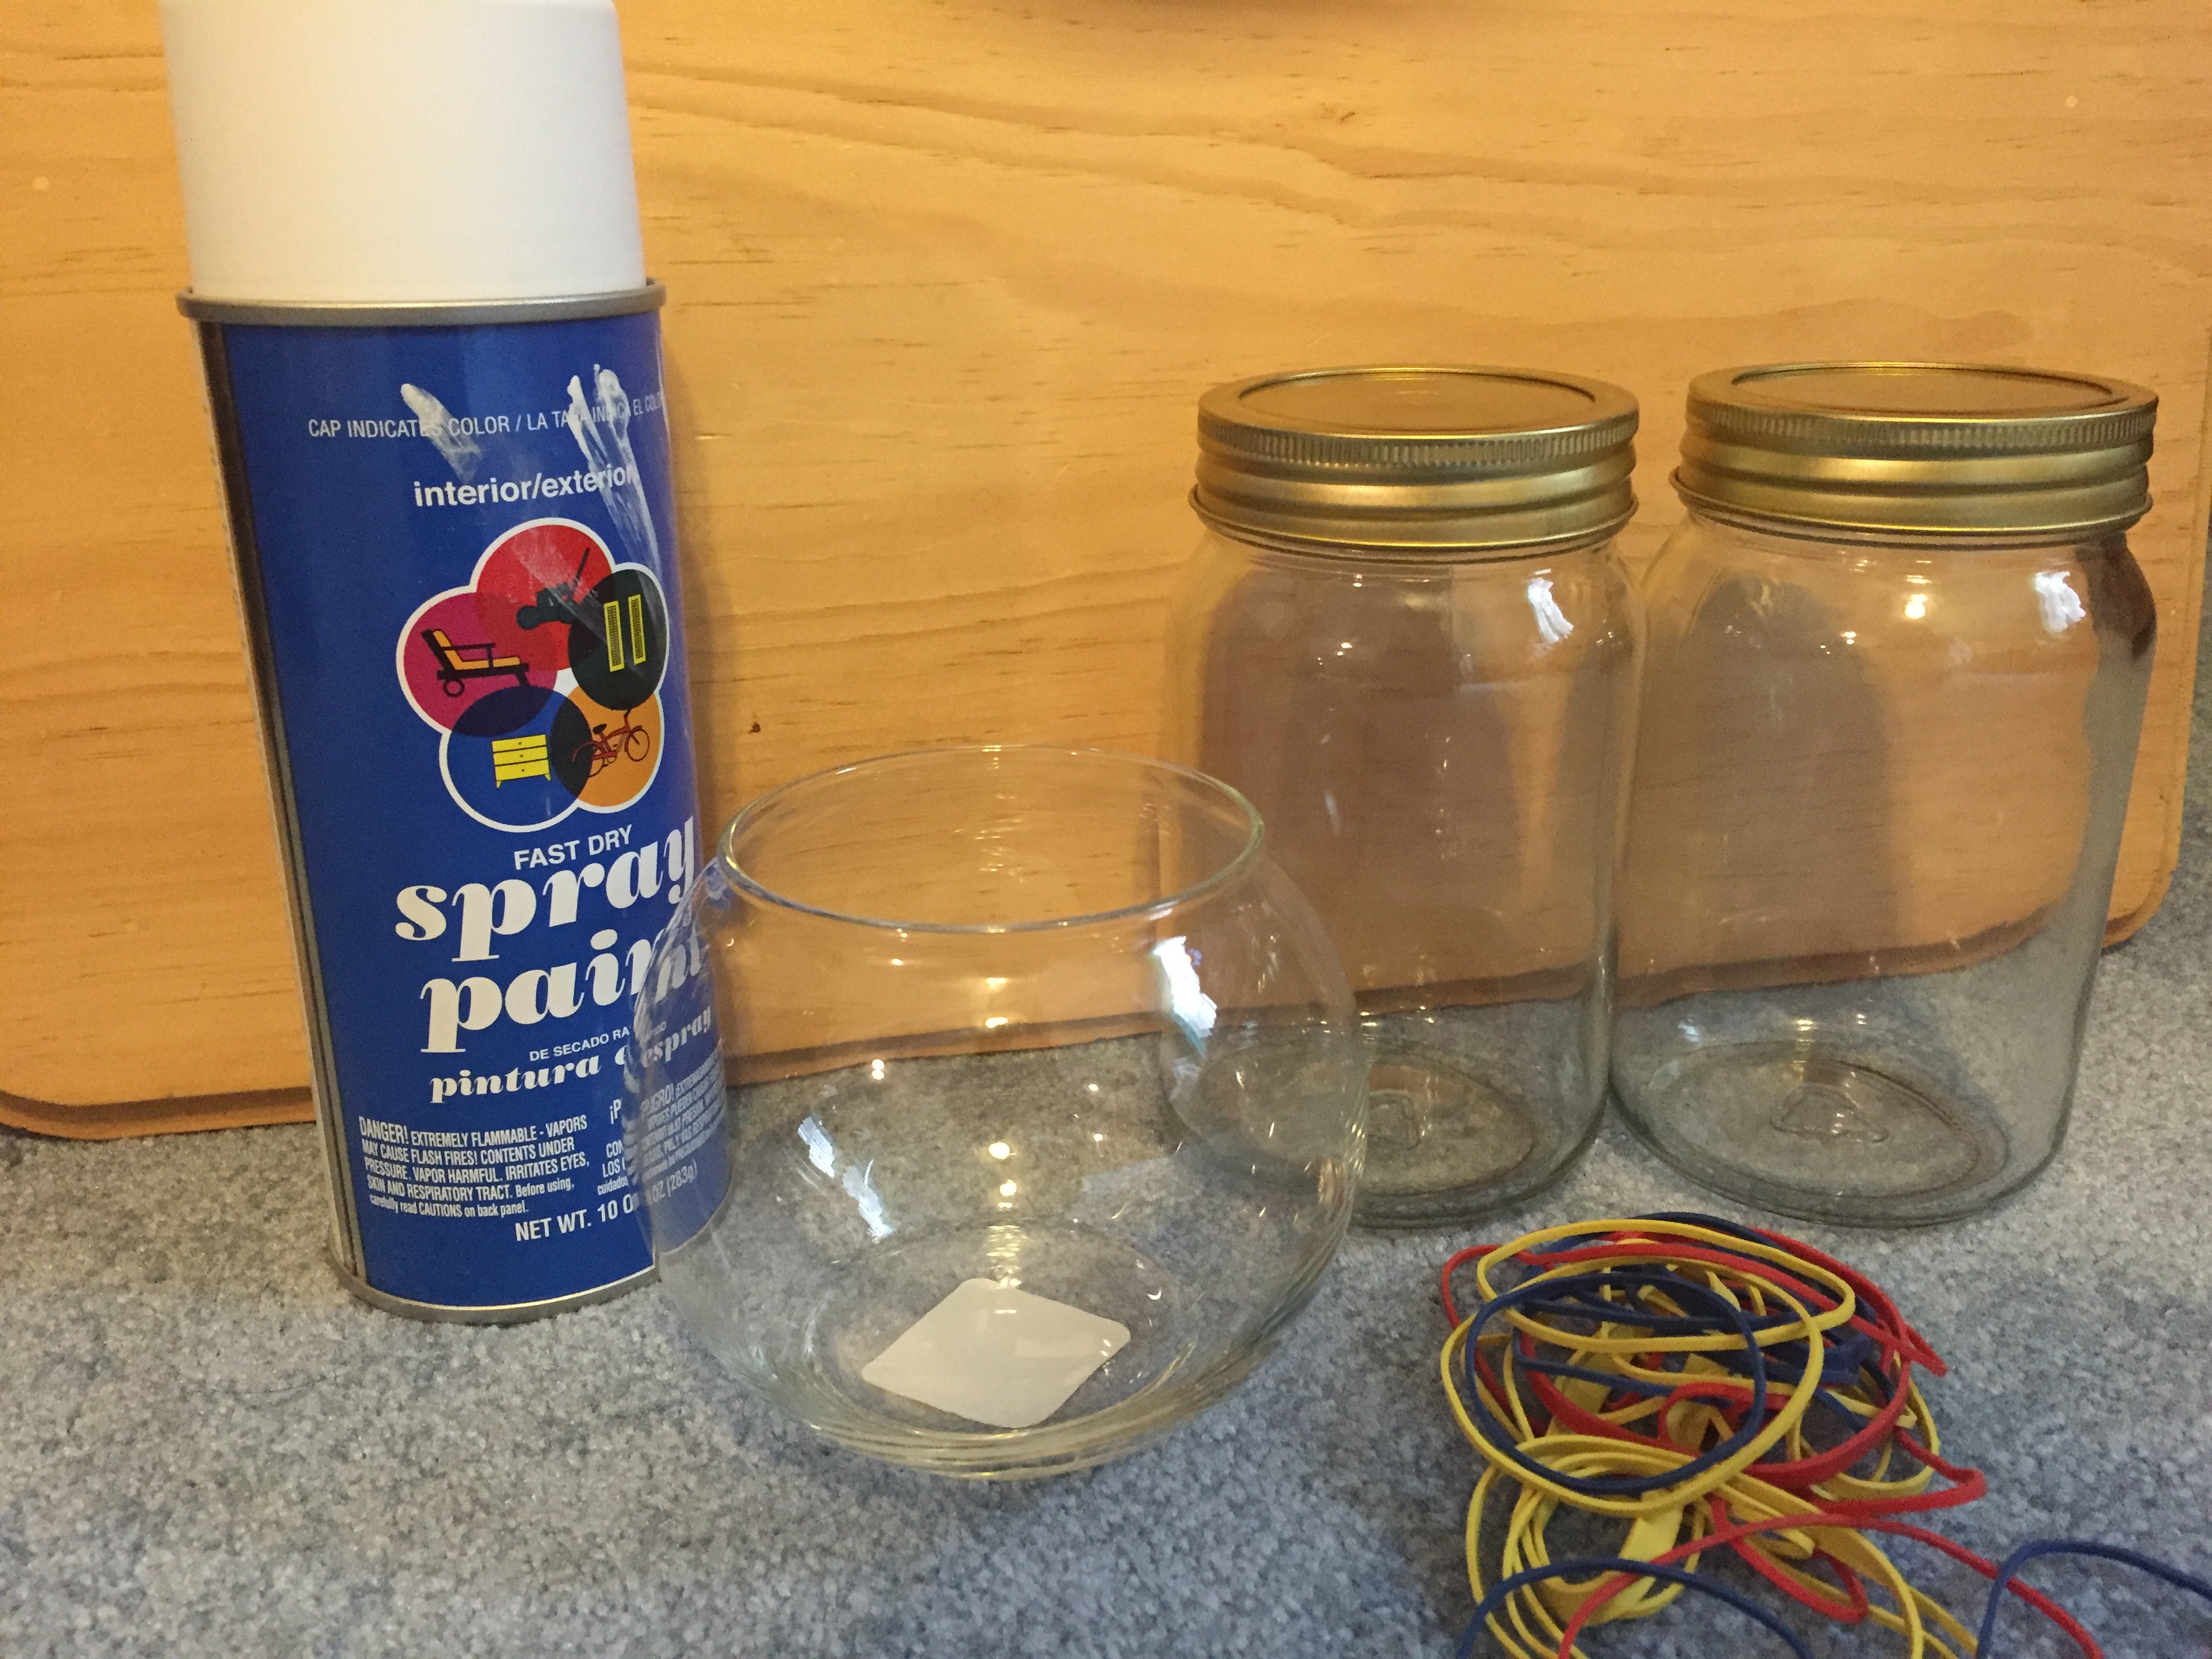
Materials Needed:
- Jars, any shape and size will do just fine!
- Spray paint, a color(s) of your choice
- Rubber Bands
- Tea Lights
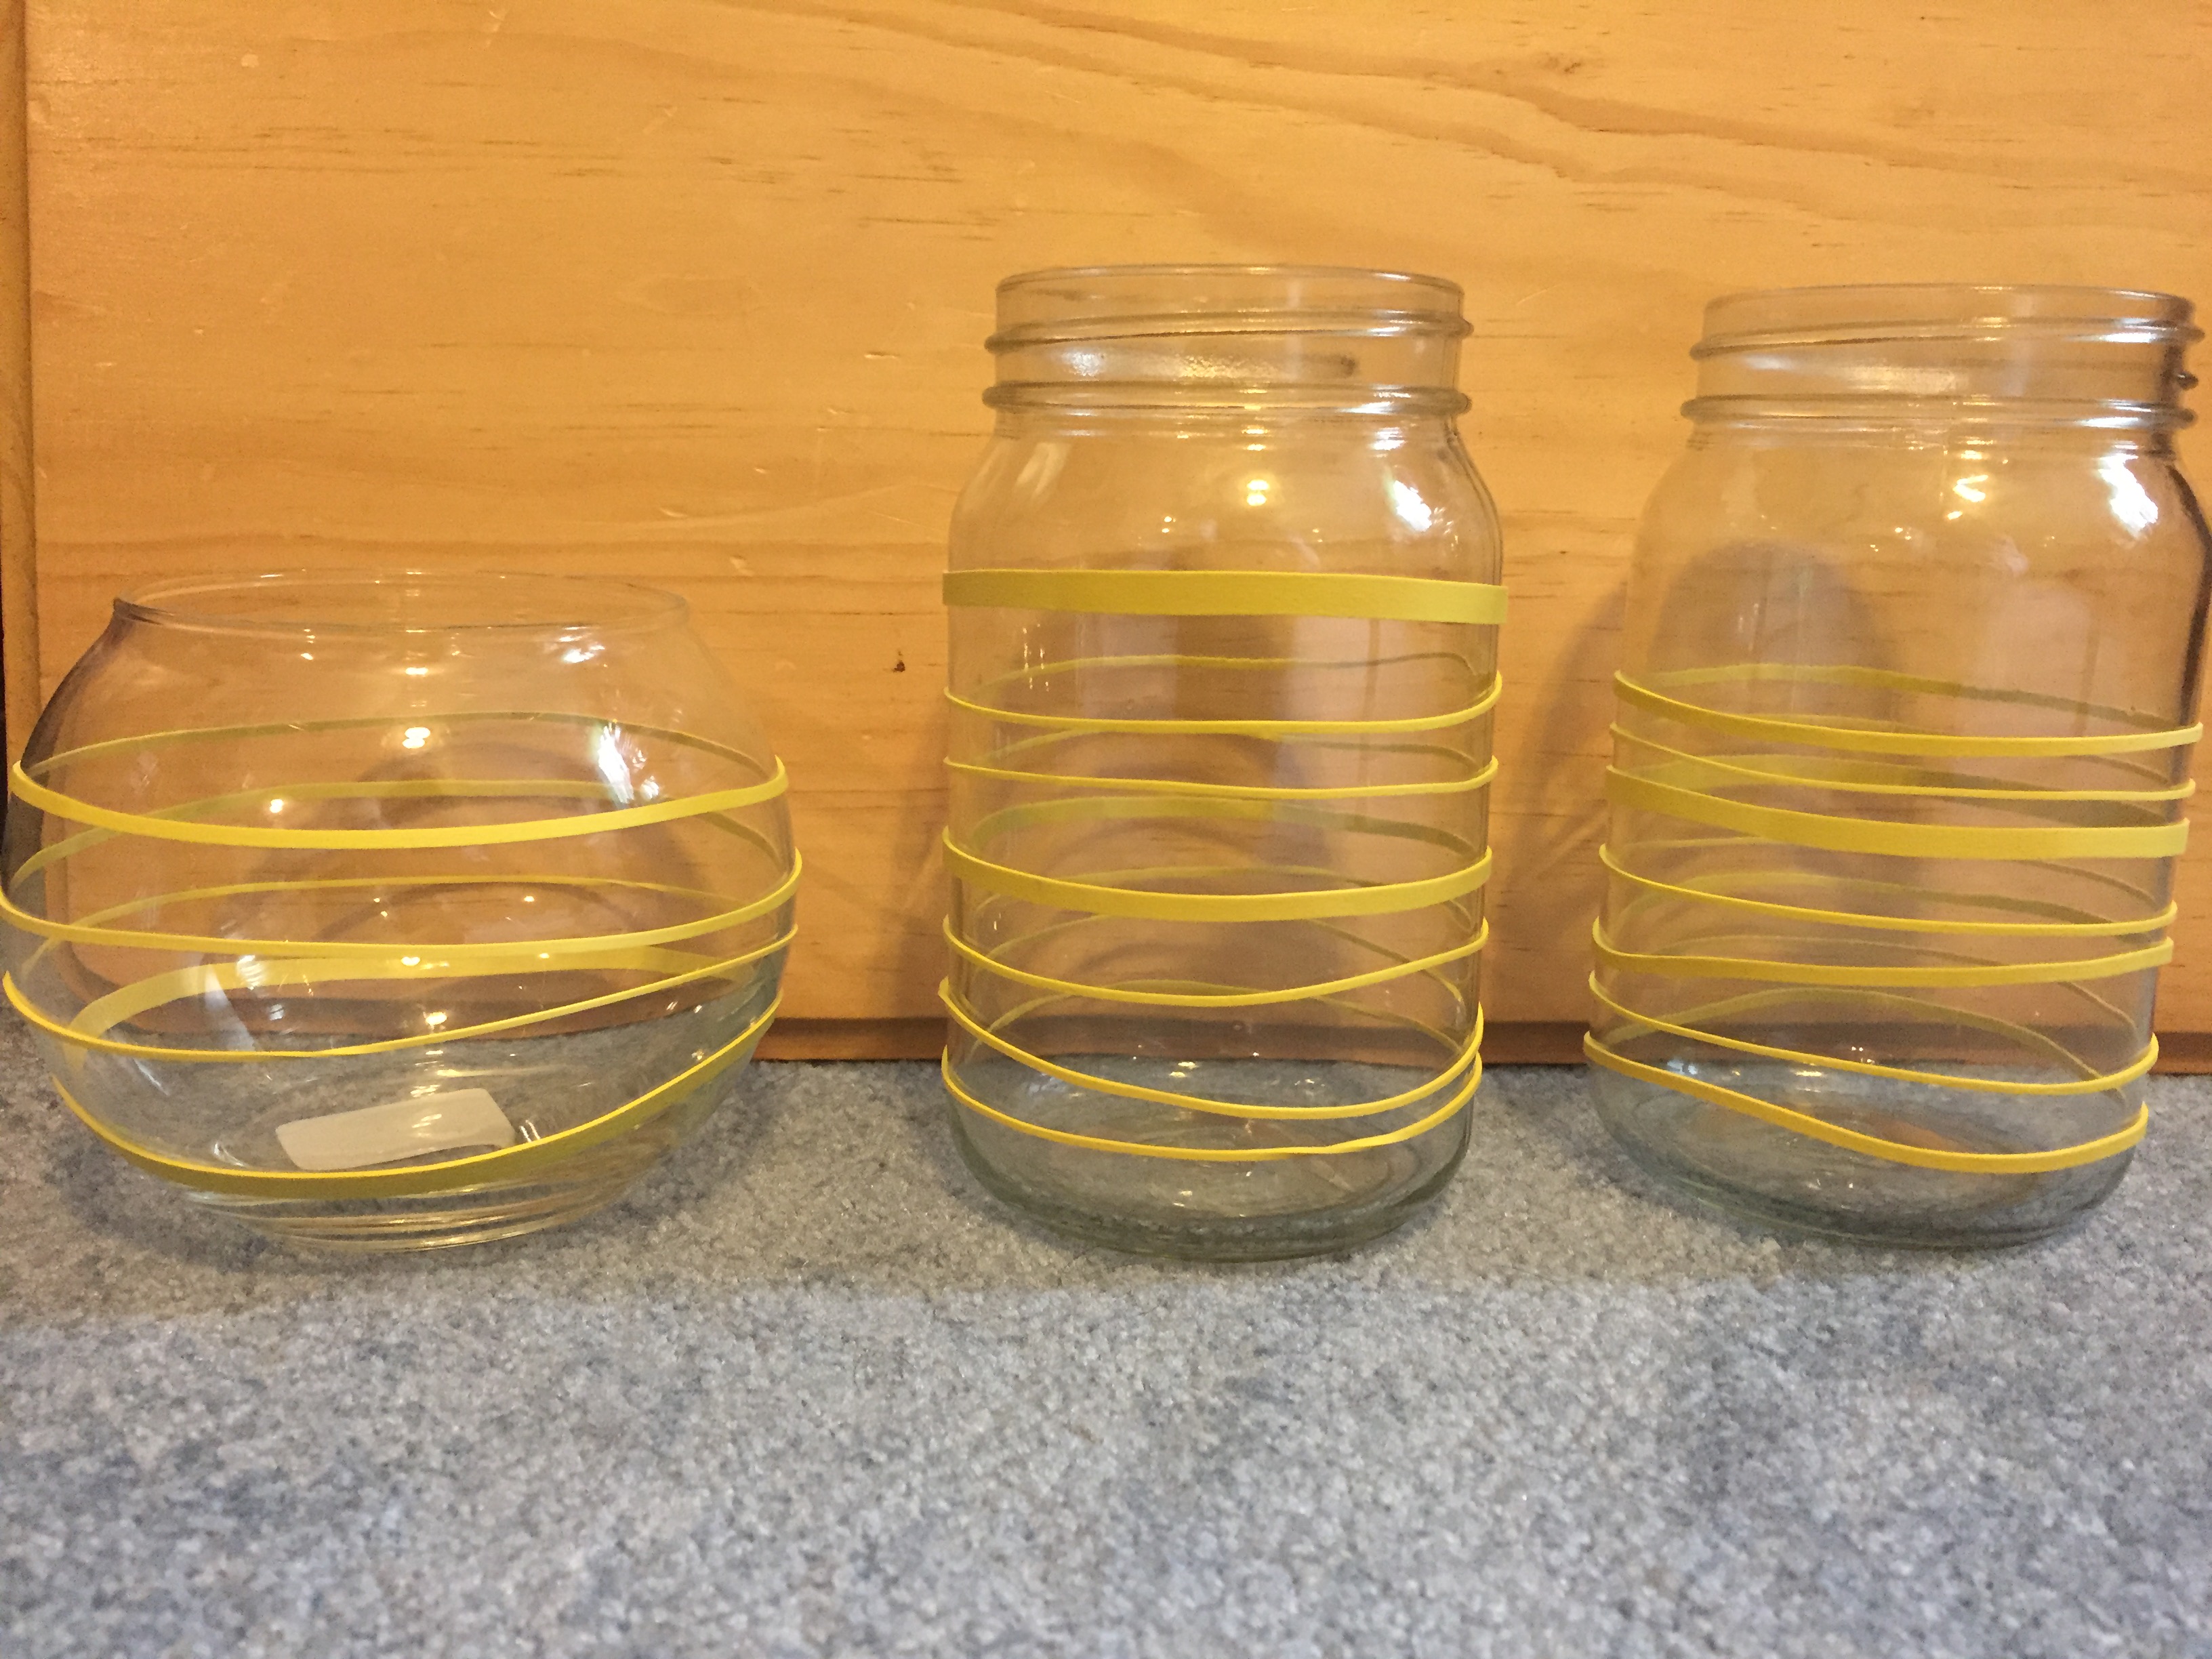
 Once you have gathered up your materials, the first step is to place the rubber bands around the jars in any fashion you wish!
 After you have placed the rubber bands around the jars, it is now time to spray paint the jars!
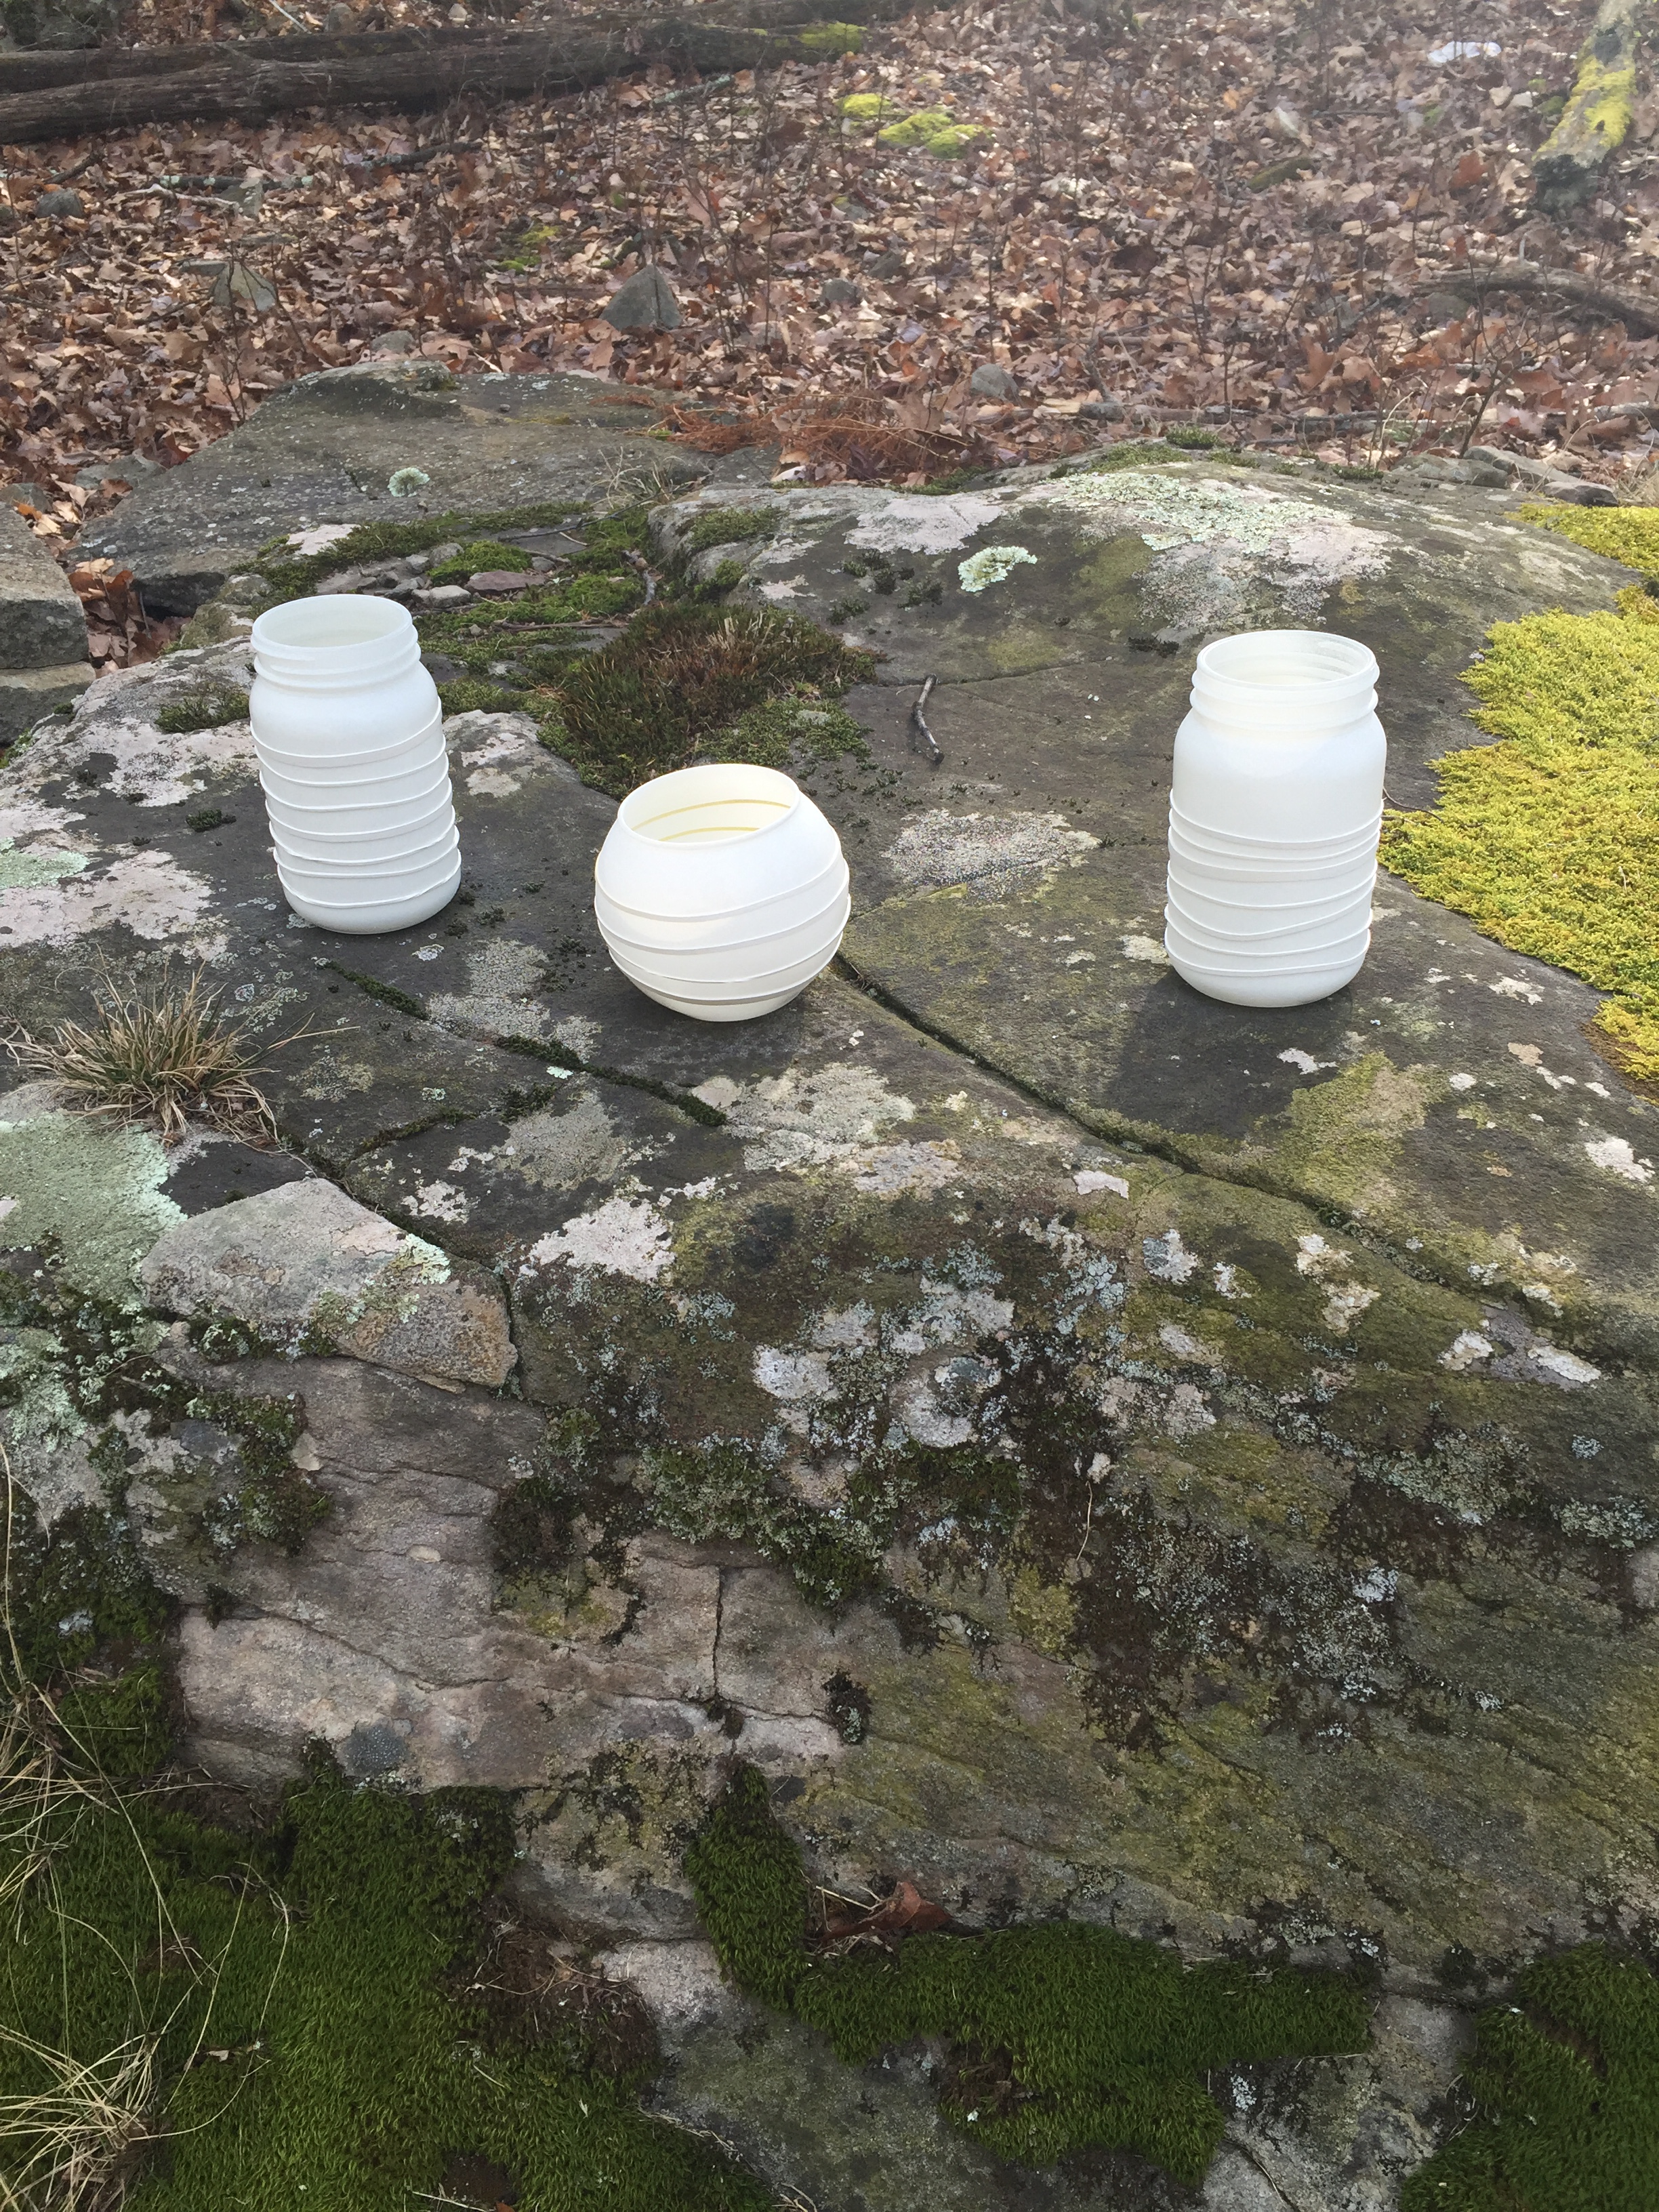 Then, once the jars are spray painted and dried, you can remove the rubber bands.
 The final step is to place the tea lights into the jars! Unfortunately, I did not have any tea lights so I used regular Christmas lights just for the purpose of getting a picture with the light showing through.


This is a simple DIY project in which I truly enjoyed and I hope everyone will enjoy too!
I have tried it in the past! Really easy and really cute!
Yes! I definitely agree! It is one of my favorite DIY projects I have ever done!