Hi Everyone! This week I am back with something that I’ve been working on here and there for a few weeks. As a part of my independent printmaking study, I challenged myself to do a more complicated reduction linocut print. For this, I chose to do a 6-grid print, where I individually cut and carved six 3×3 pieces that interconnect into each other, but when I print them they will be slightly separated. This was very hard to visualize, so here was my process.
First, I chose the subject I wanted to carve, which was a bunch of lily flowers, because I was referencing a bible verse that I liked, Luke 12:27. It says “Consider the lilies, how they grow: they neither toil nor spin, yet I tell you, even Solomon in all his glory was not arrayed like one of these.” It basically means to not worry about anything, and to think about how the lilies don’t have to do anything in order to grow and be provided for. So I drew my design digitally first and laid out my grids in illustrator, with the words “Consider the lilies” at the top and Luke 12:27 at the bottom. Then I printed it out backwards and individually cut the squares out, and traced the design for each square onto the pvc board by using carbon paper.
Once I had the design traced onto it, I started carving out what I wanted my first layer to be. For this design, since it was a lot of detail and will be hard for registration, I had a hard time figuring out how many colors to do and which color would be what. I ultimately decided to carve out the words and the flowers and have those be white like an outline, and then only do 2 other colors. I wanted the centers of the flowers to be yellow, so I left everything that was yellow and printed the whole thing yellow first. I glued each piece onto another piece of mat board so they would be in the same spot every time, and created a registration panel around it for the paper.
After I did the first layer with yellow, it was looking pretty good! I made about 7 copies, which I probably should’ve done more, but we live and we learn. After that I had to go back onto the squares and draw what yellow spots I had to carve out now, and that was a little difficult. But once I did that, I made a pretty red/pink color to go on top, and started printing. When I was carving into the squares on the mat board, they must have moved a little, because I could not get the registration right until the very last print on top of the yellow. It was quite frustrating, but we did it and I think some of the other copies look cool too.
I kept printing more with just the red color, so I am going to color in the spots that I want yellow, and also maybe green on the leaves! I originally thought maybe I could Chine-collé some tissue paper on top in those spots, but it was extremely difficult to cut out the shapes I wanted. Anyway, here are some process pictures and what the best one looked like!
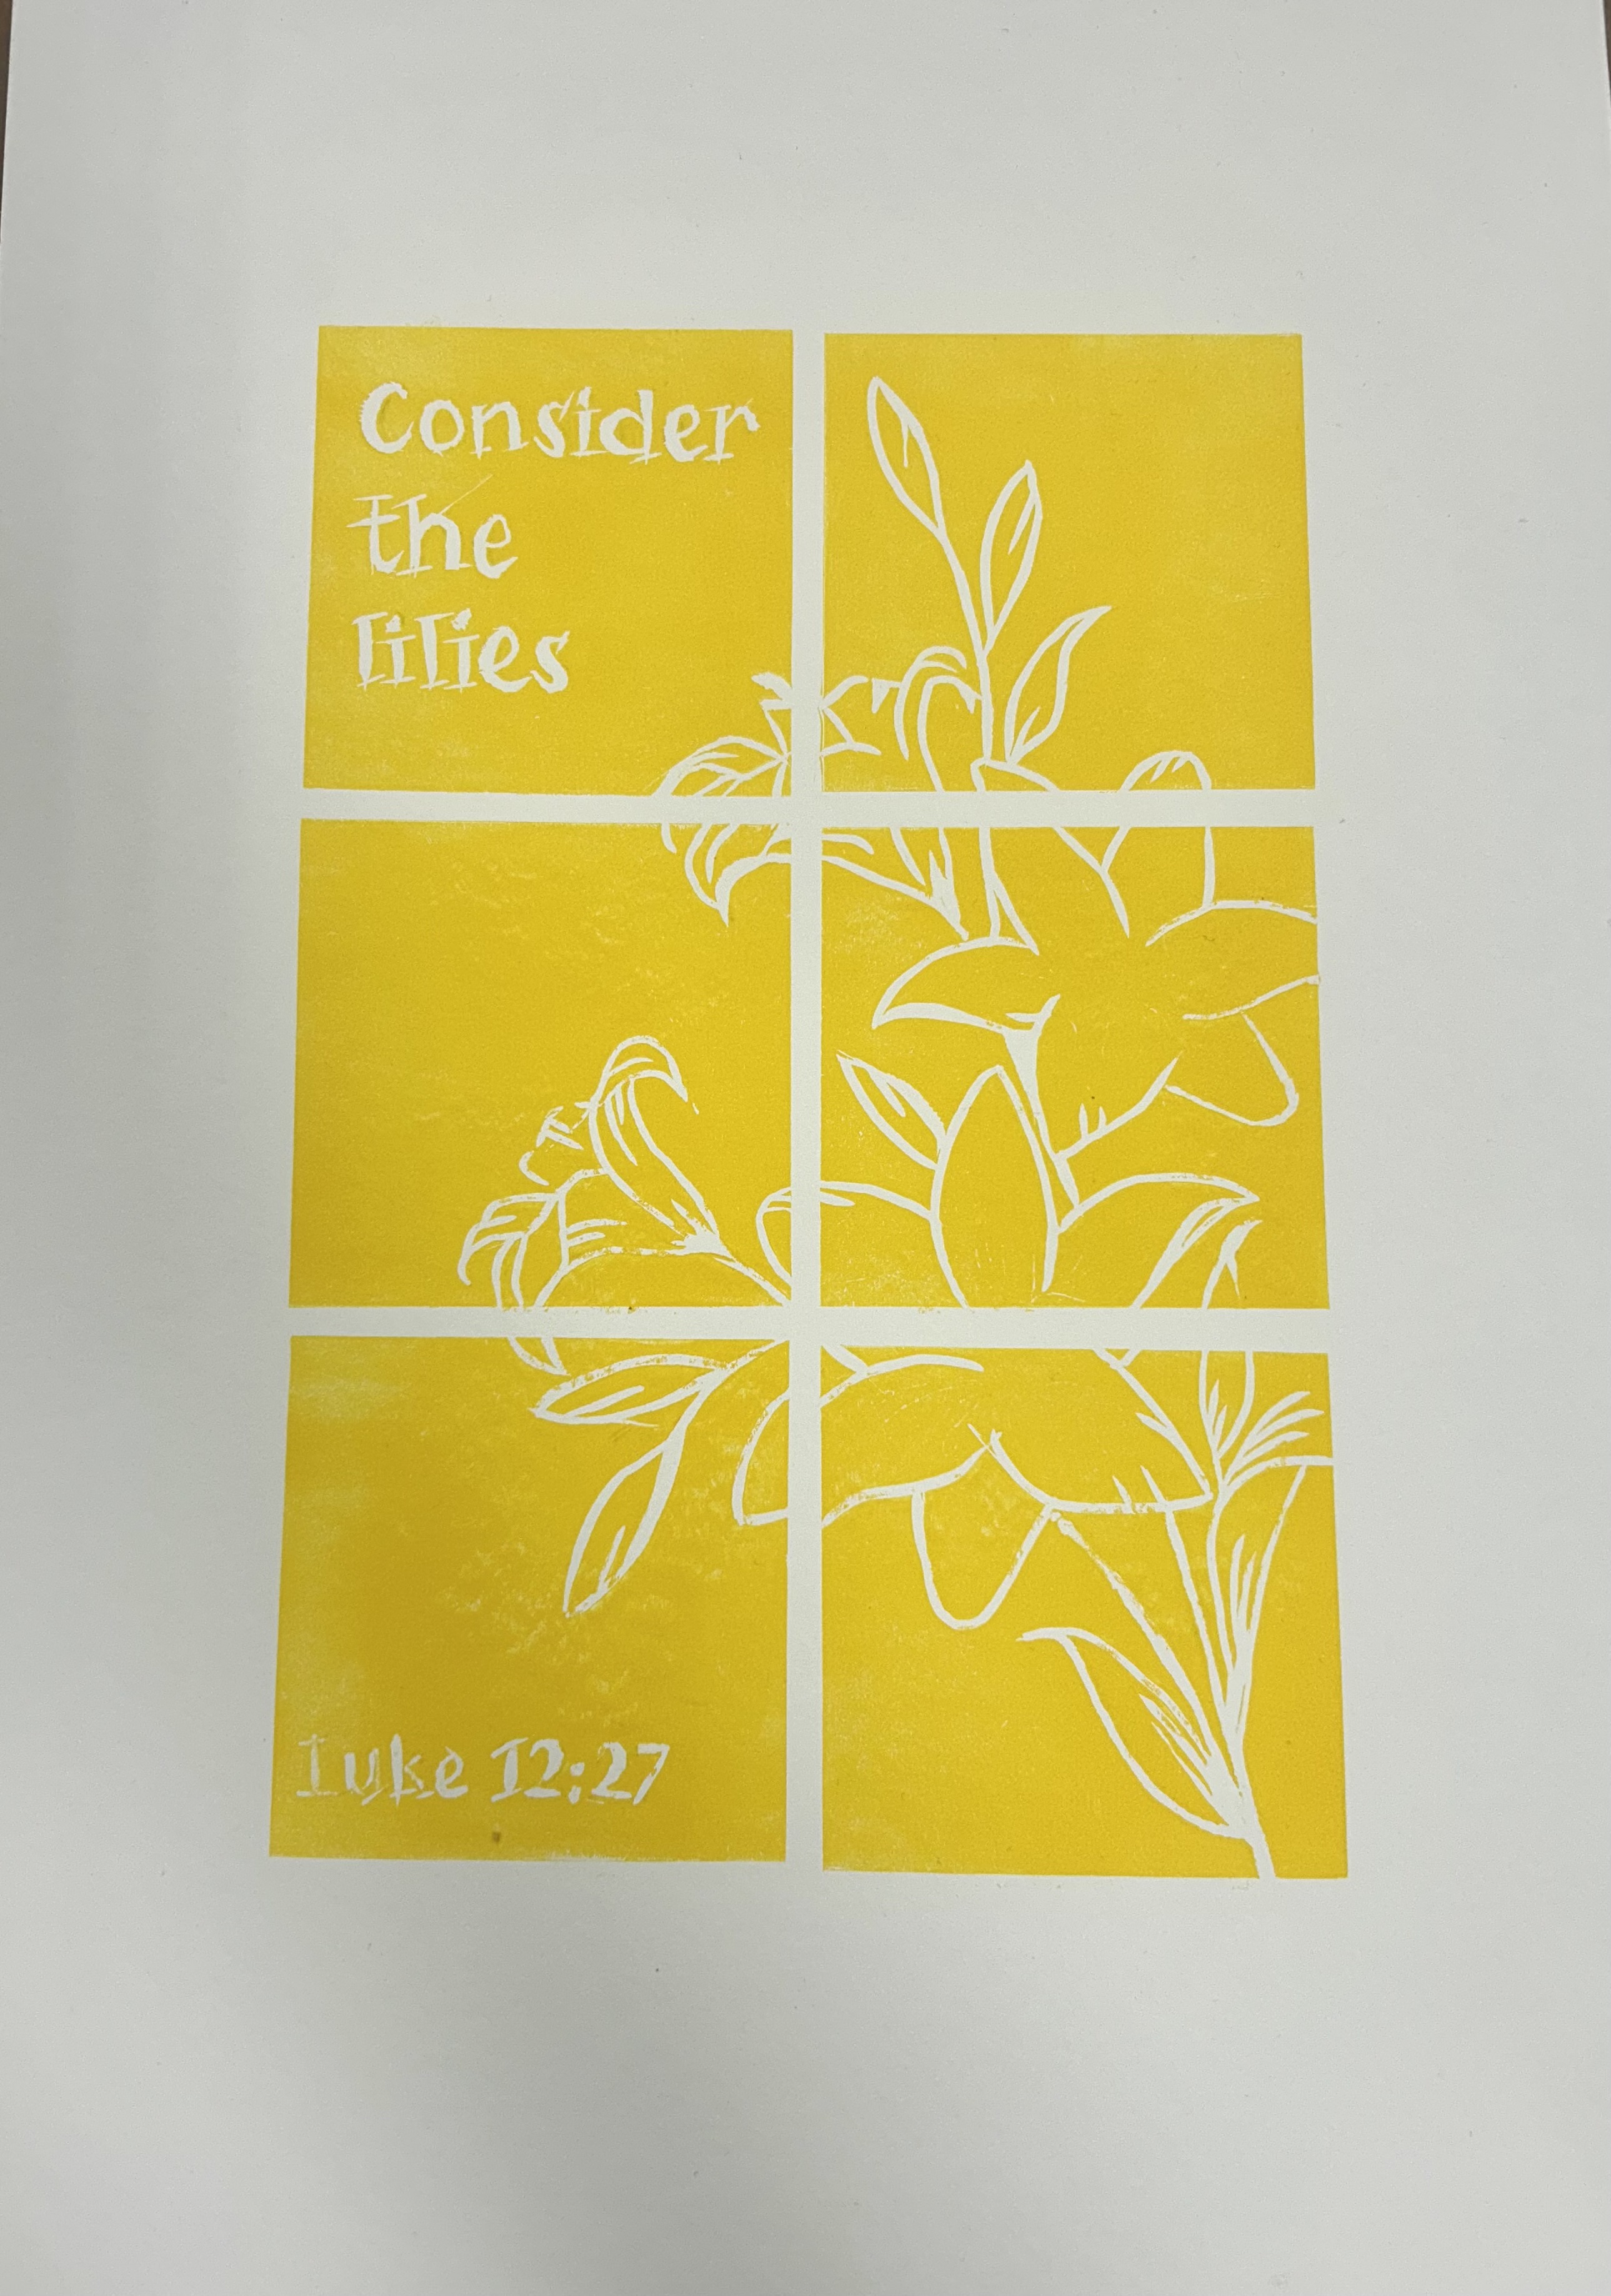
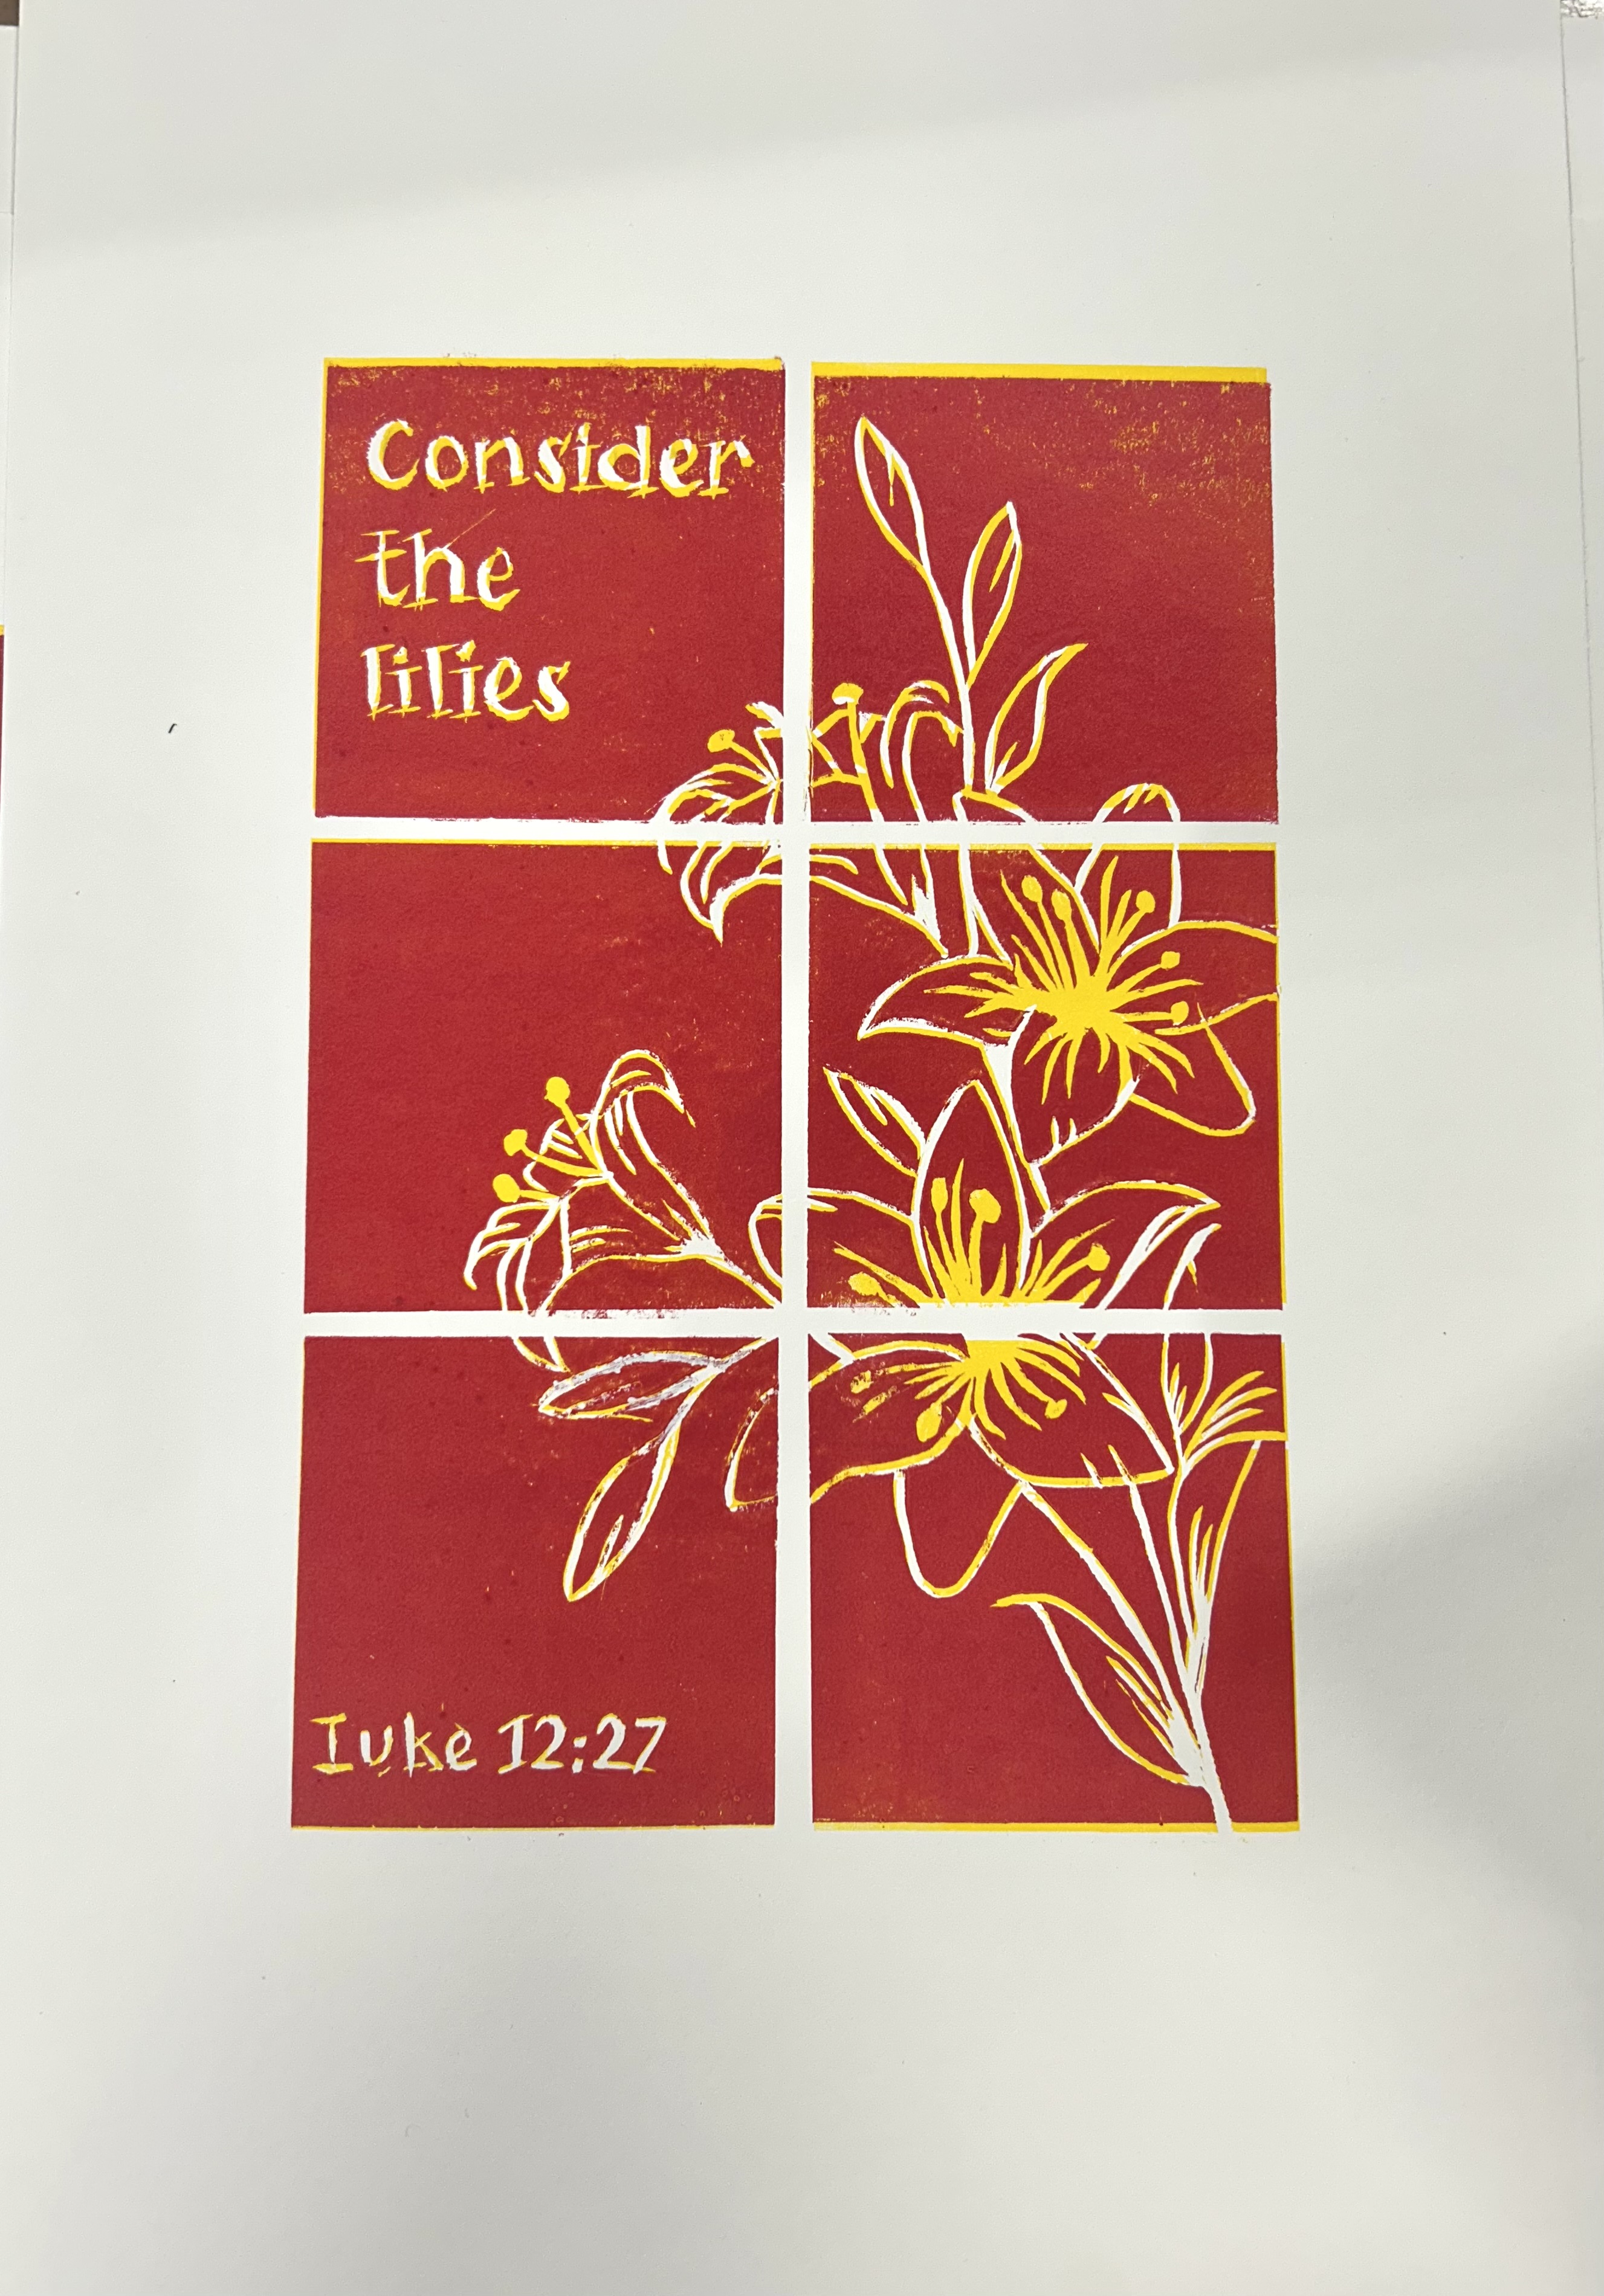
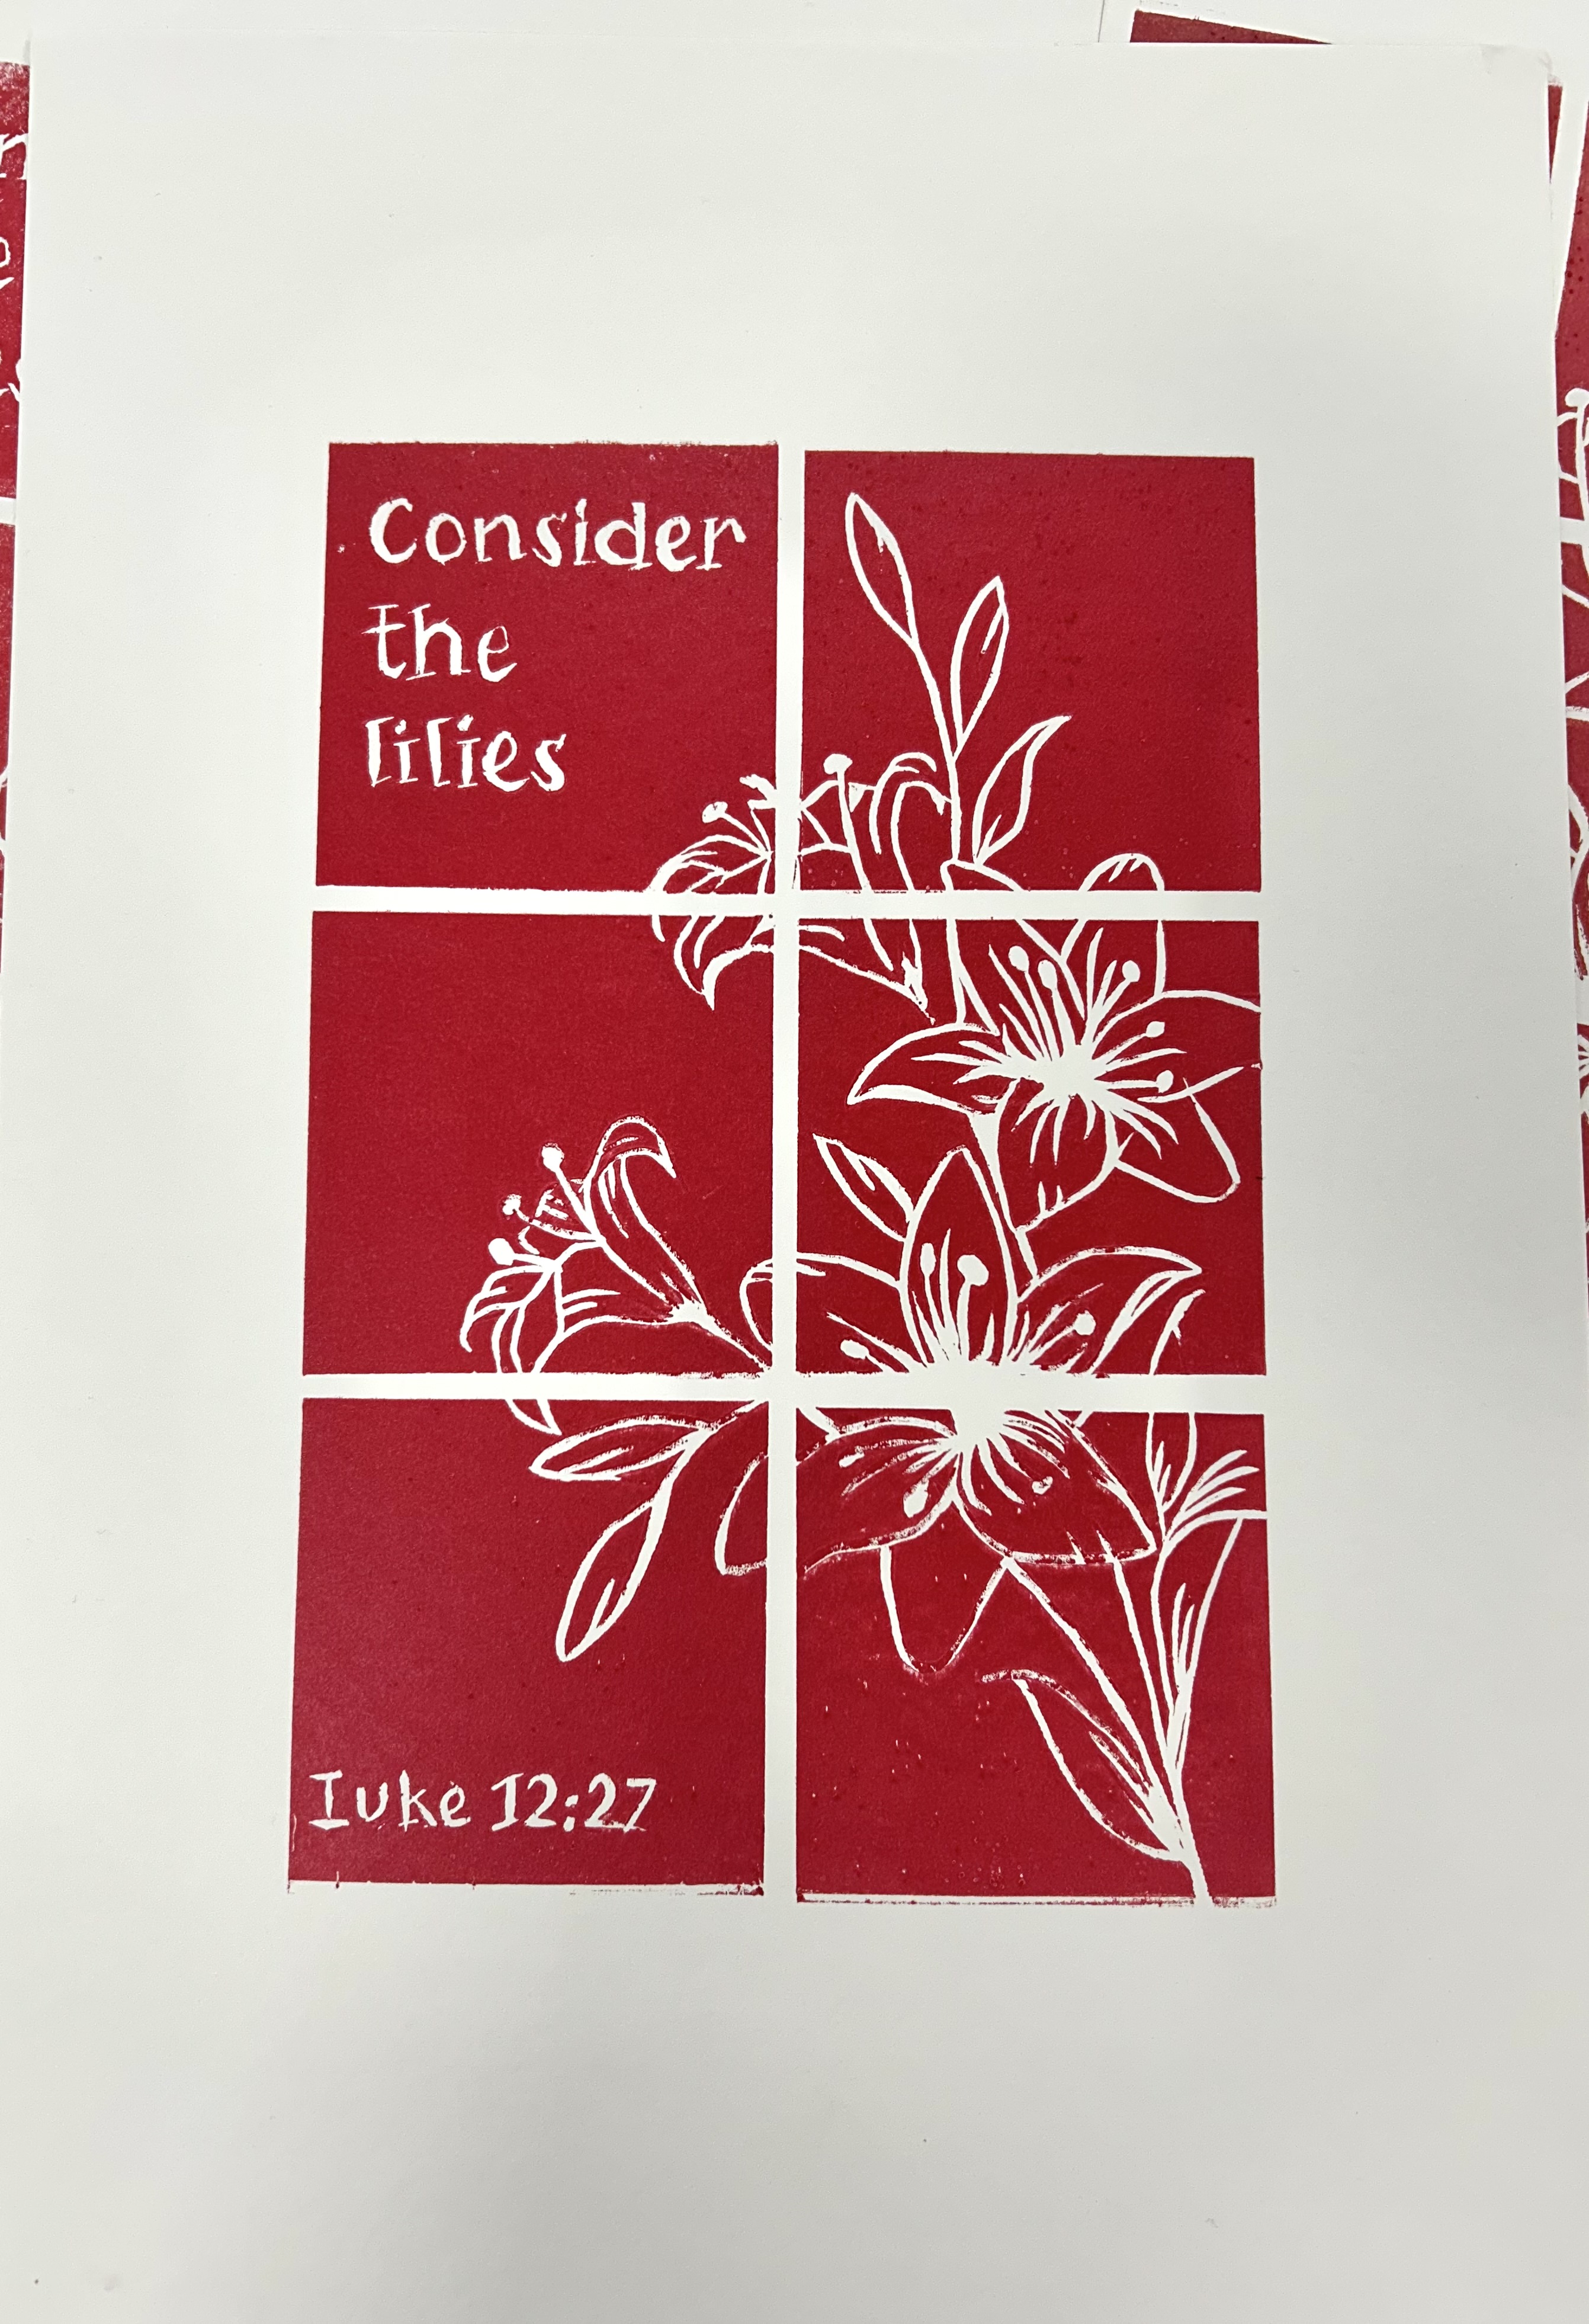
Overall I am pretty happy with how this turned out, but I think I wanted it to be a little more clean. I might go back over some of the white lines with white paint or ink and make it more clean.
Thanks for reading!
Ella