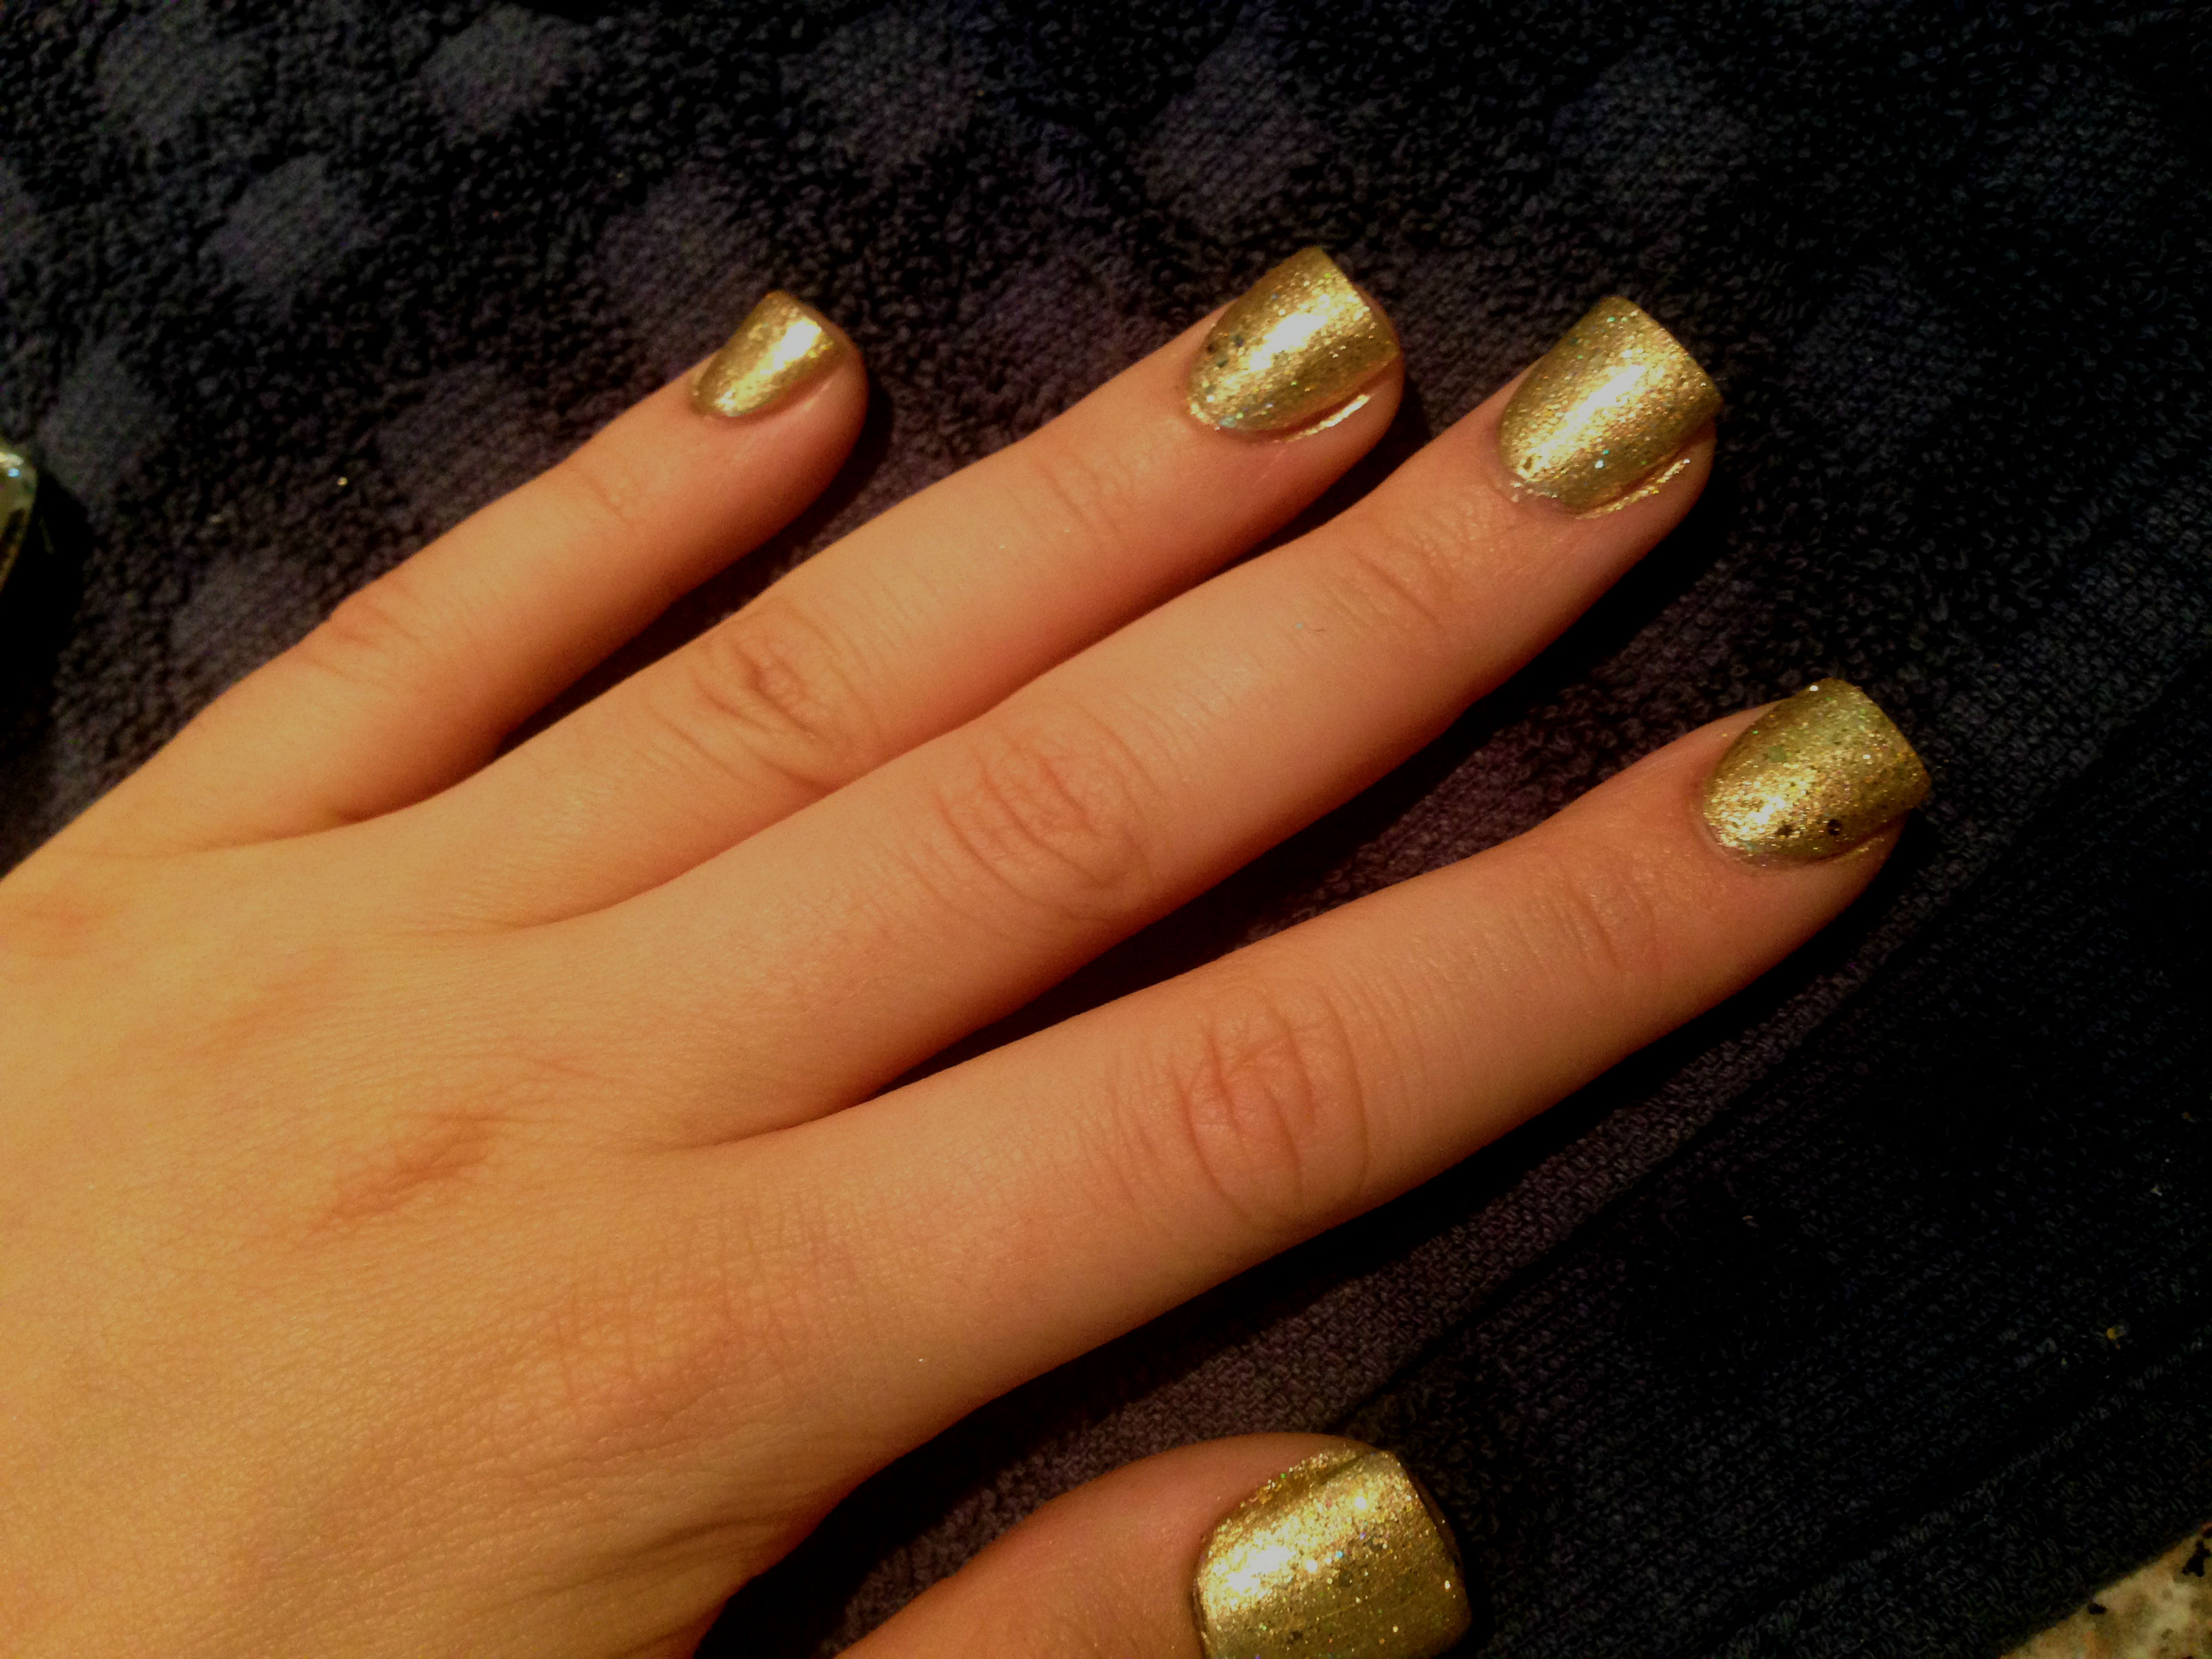
Its Summer! So I thought it would be fun to show you one of my favorite nail designs that I love to do. I had mentioned in my previous posts that my mom owns her own nail salon but you don’t need to go to the salon to get this design. Its a lot simpler than it looks. Here is how to do it step-by-step:
Step 1: Paint your nails
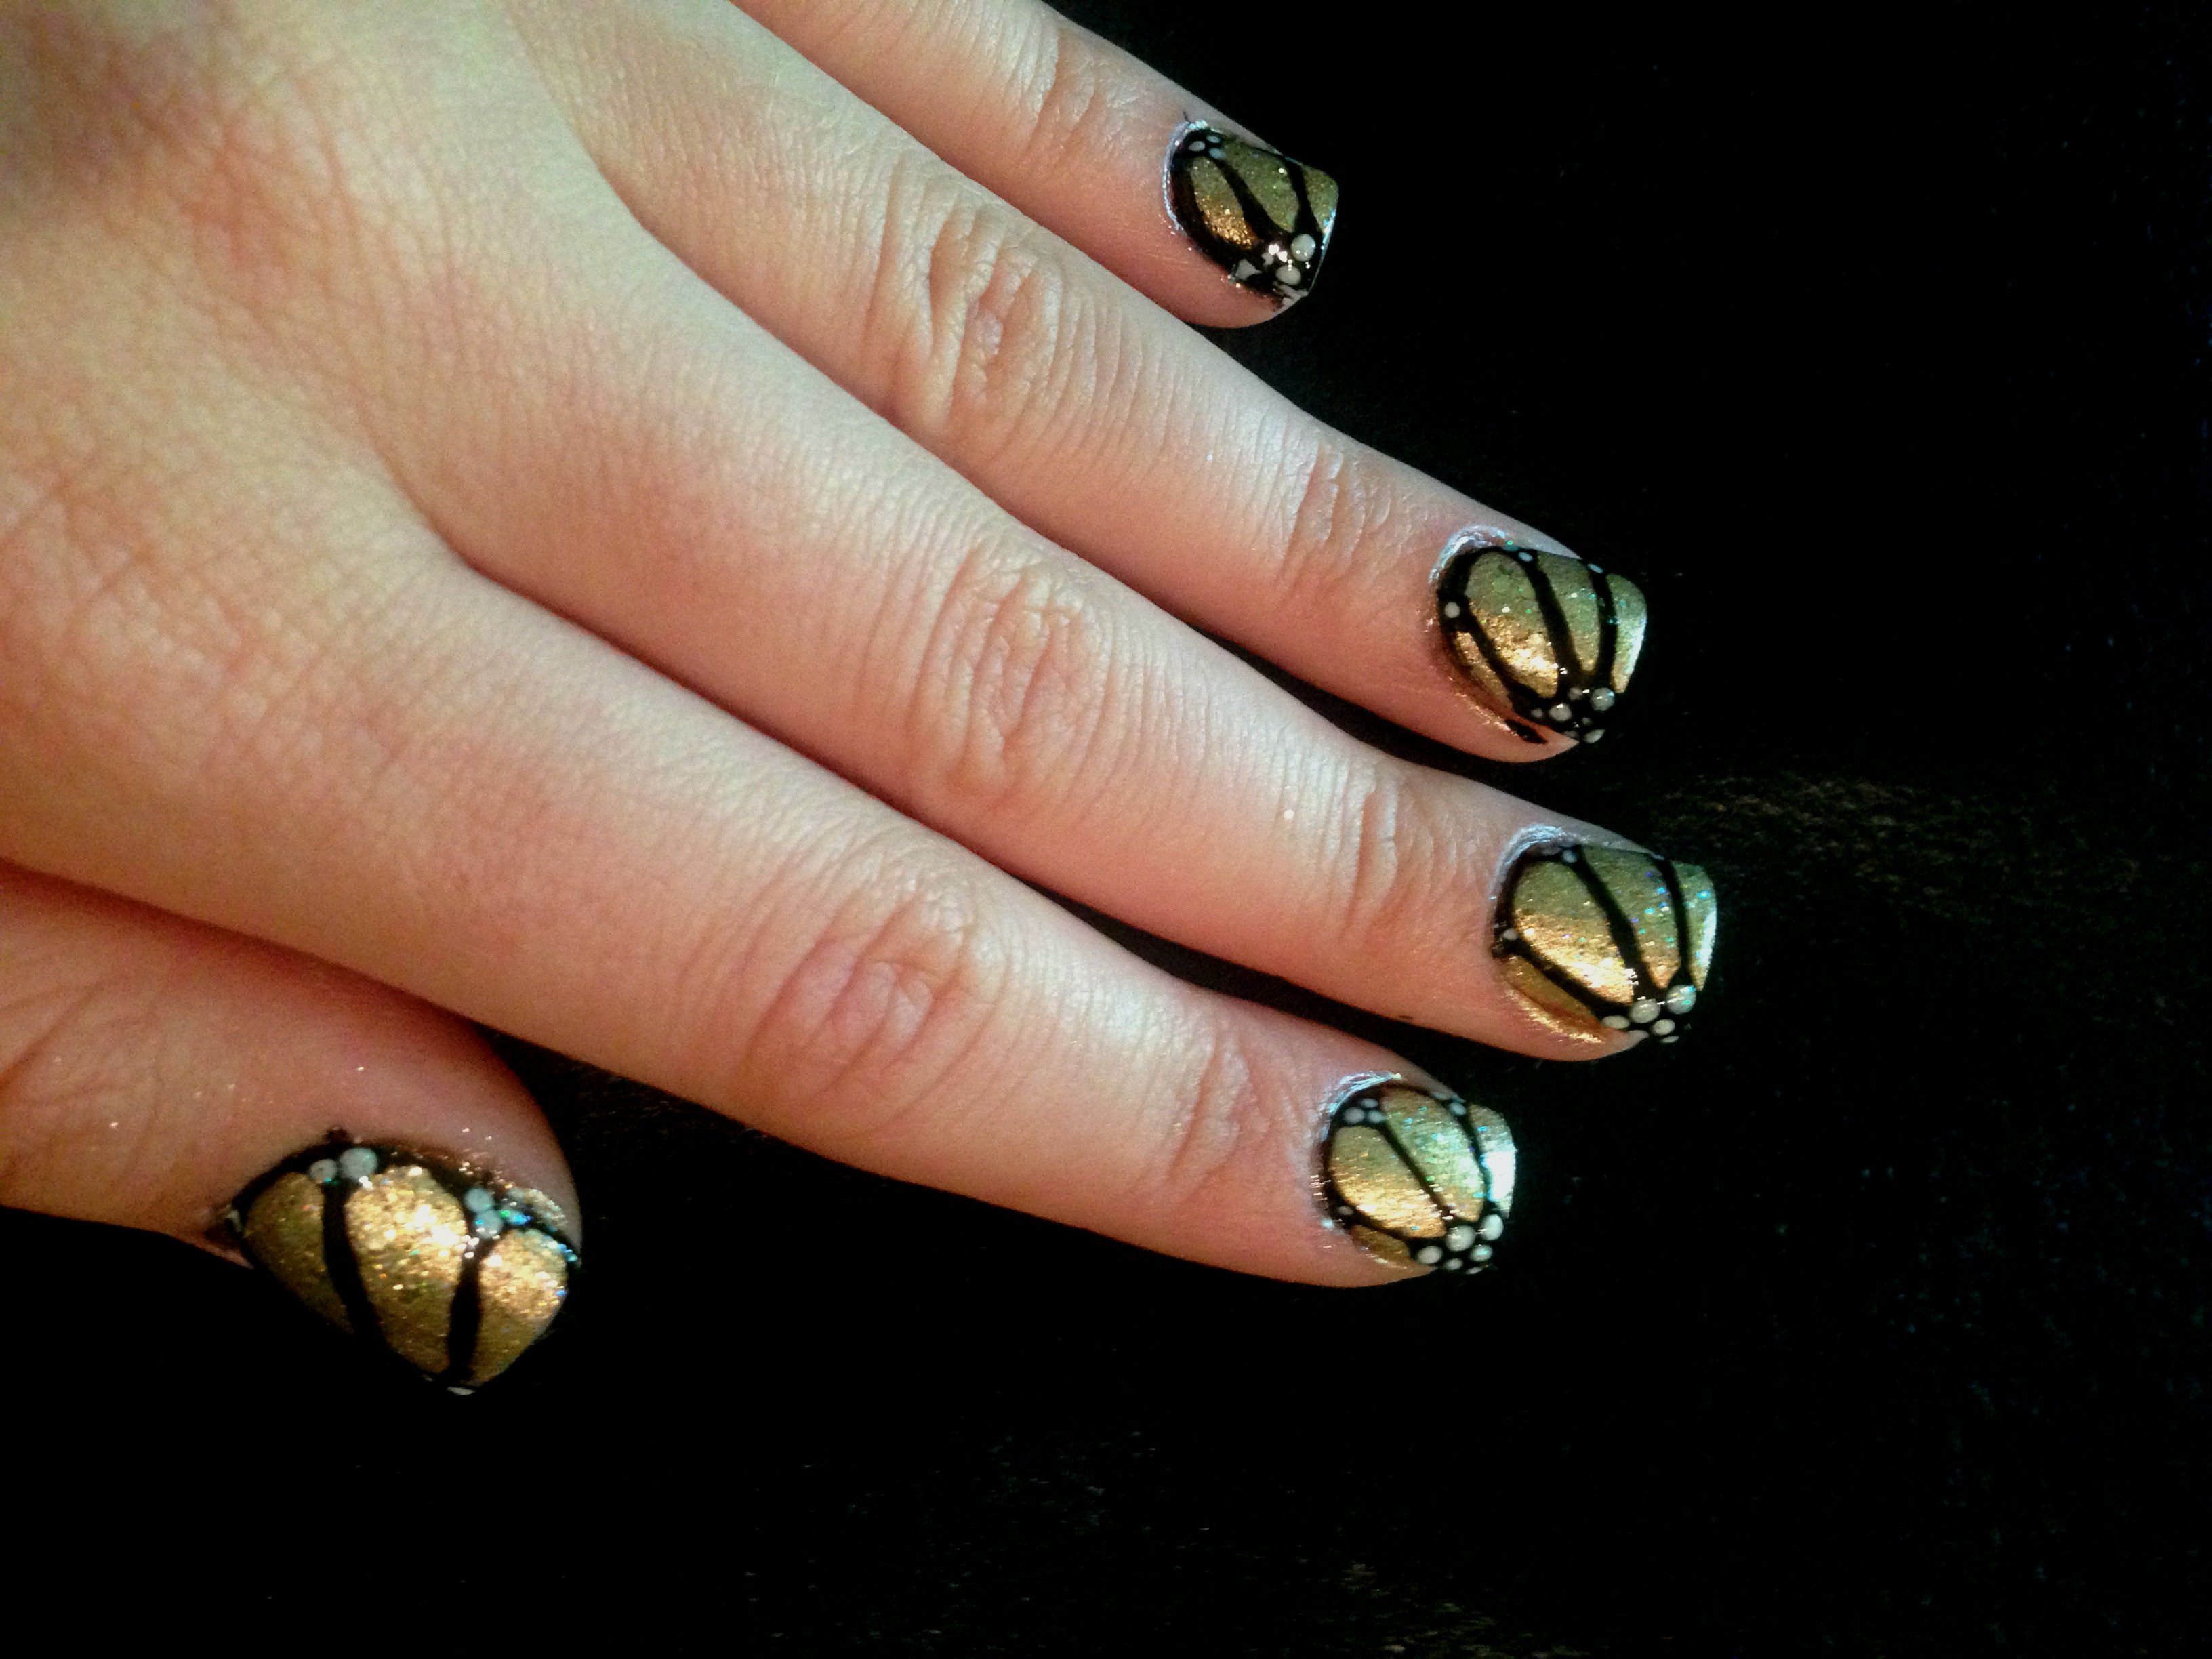
Use any color you want or even multiple colors if you like. I chose gold and then added a coat of glitter. Its important to let the paint dry between each coat.
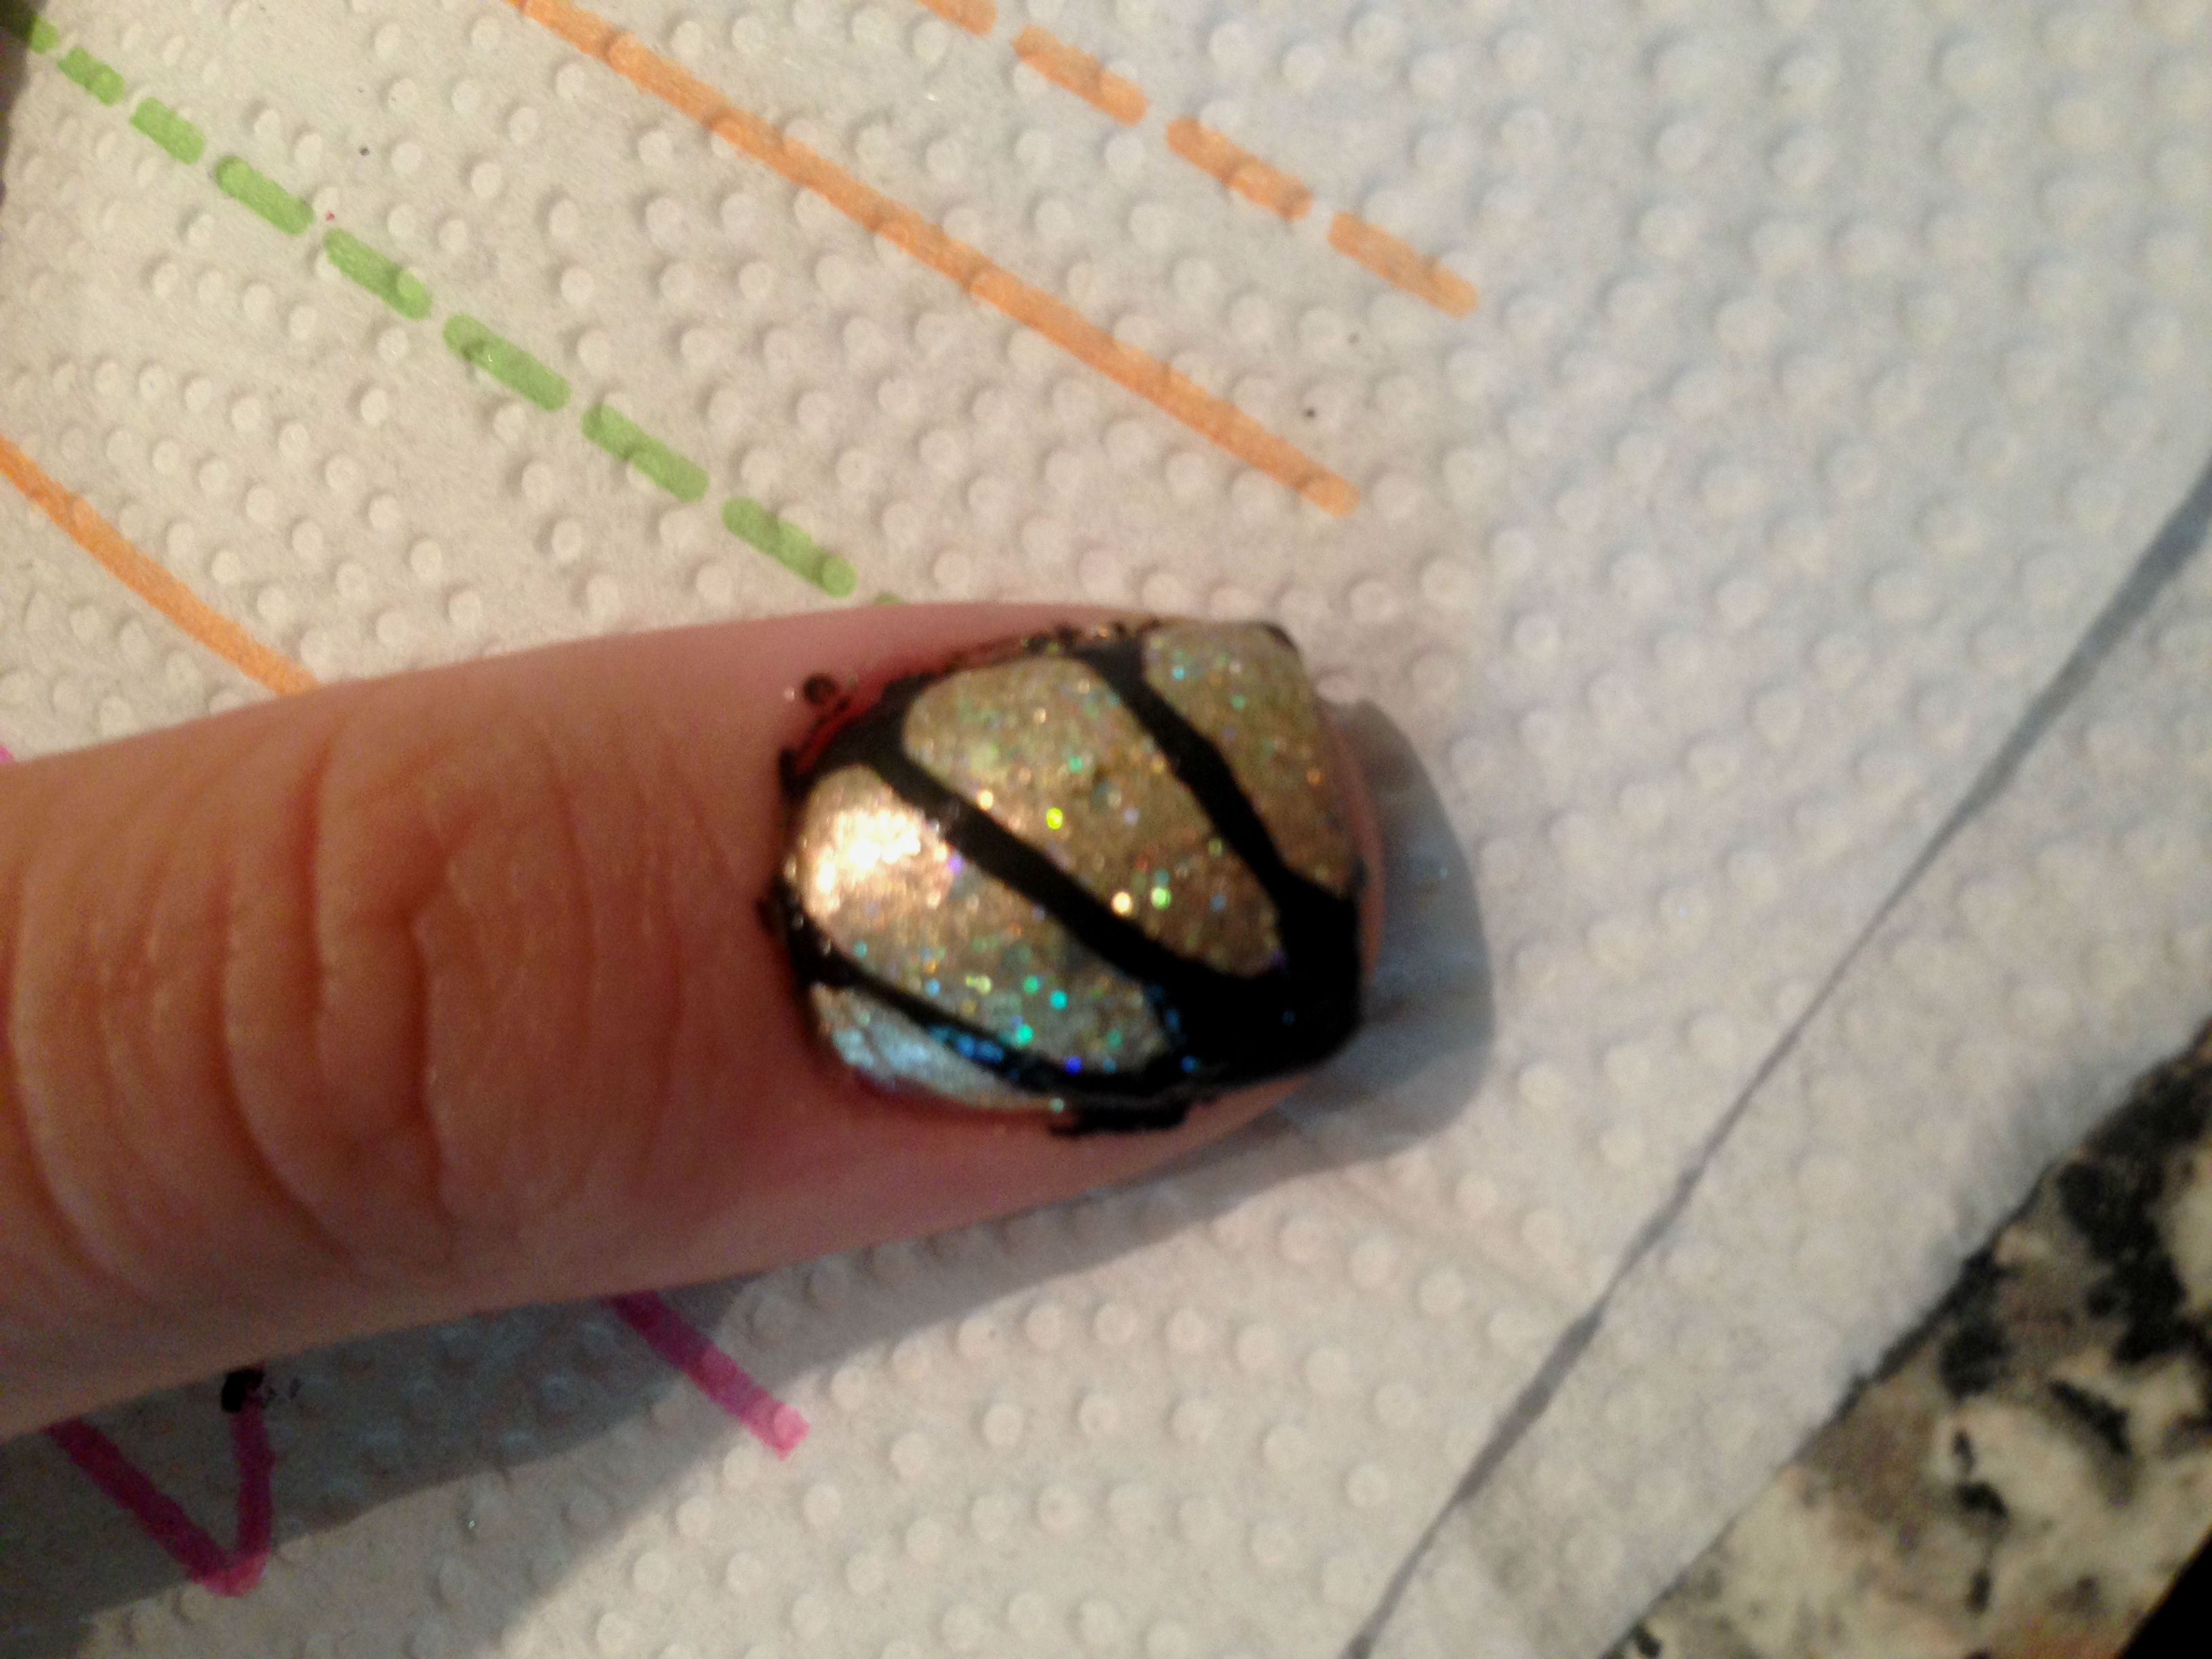
Step 2: make some stripes
Next, take a black striper (a striper is just a skinny brush used to make thin lines.) and fill in one corner of your nail. Then paint lines fanning out from the corner of your nail. The amount of lines will vary depending on how big your nail is.
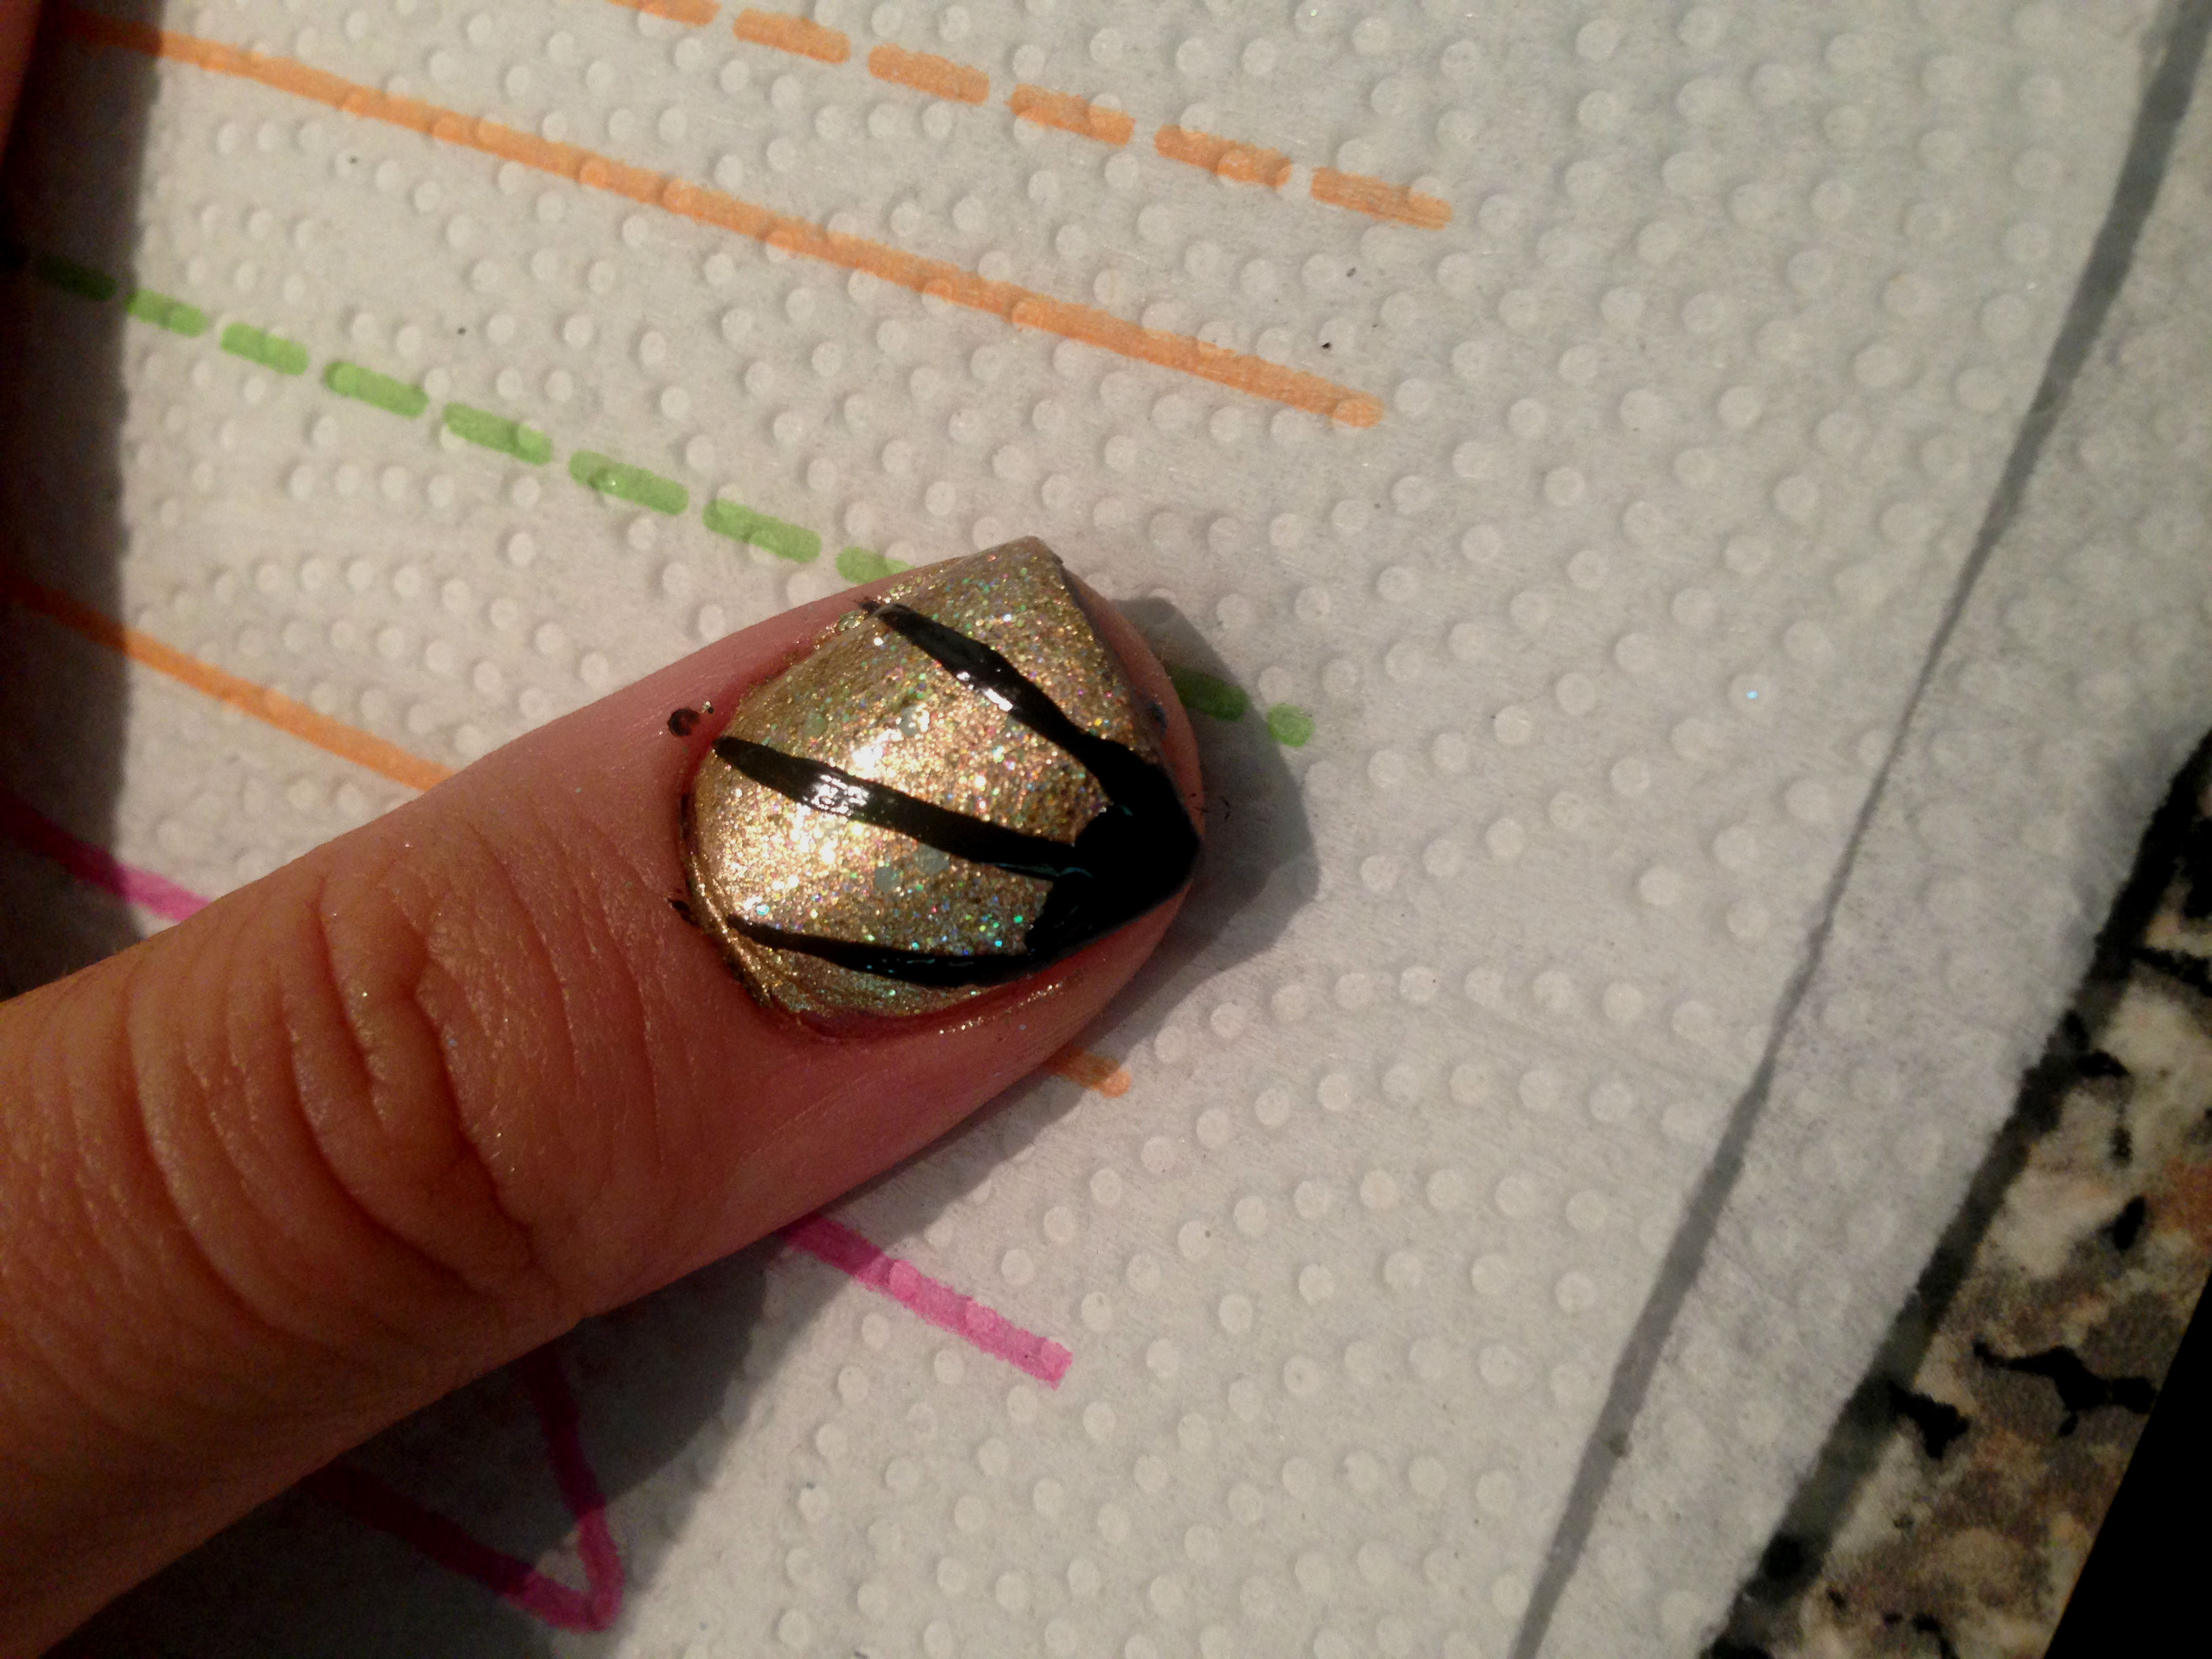
Step 3: Add a triangle
Next, with the striper, make a triangle like shapes at the end of each line. It should almost look like long tear drops between the lines.
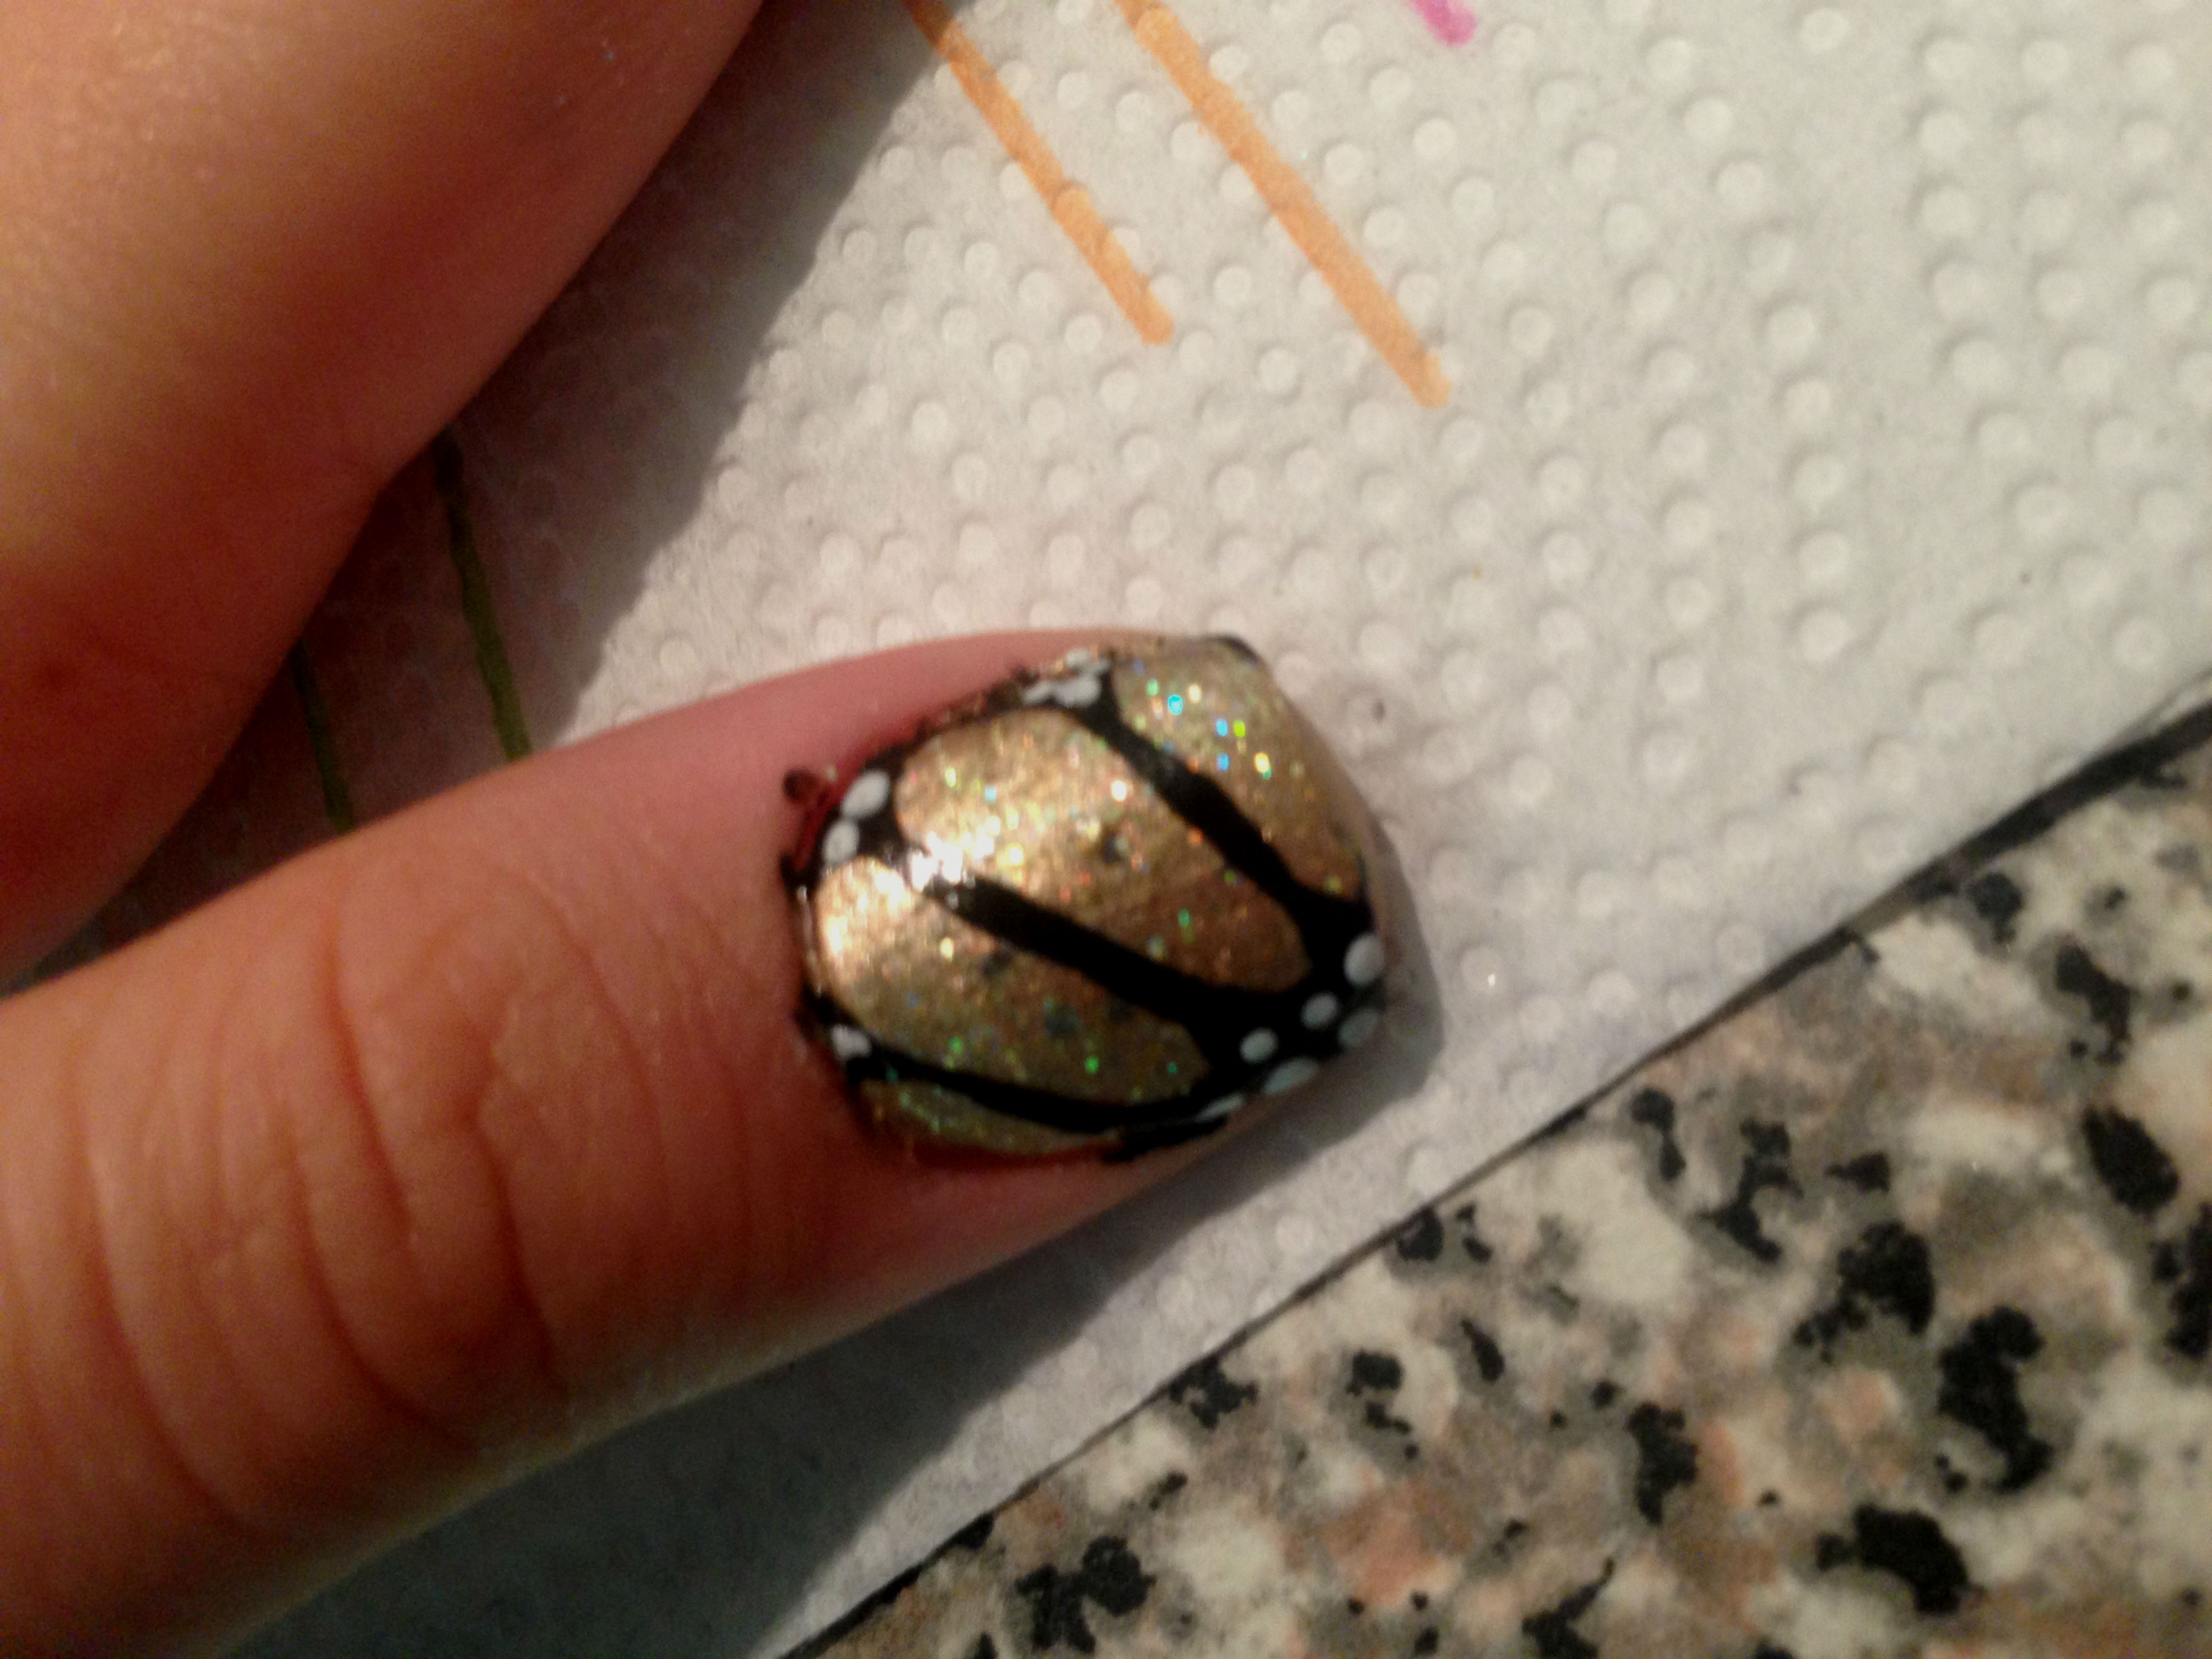
Step 4: Add the dots
After the black paint dries, add white dots to the corner of your nail and the triangles at the end of each line. You can apply the dots by using the end of a bobby pin. This will make cleaner dots.
Step 5: Apply a Clear Coat
Wait for your nails to completely dry before putting a clear coat on. If you apply a clear coat before the paint dries it will make the black paint bleed into the other colors.
I hope this How To was easy to follow. Now that you have a basic idea of the design you can even edit it to make it your own!
I thought it was very informative! I would read your blog anytime!
Thank you so much 🙂 that means a lot.