Hi everybody! I hope the start of your summer is going well and enjoying the free time, and congrats to anyone that graduated this weekend! For my last etching post of the semester I’m going to share my final project! I had so much fun with this one, it was definitely my favorite project yet. In the middle of the semester, Prof. Chris Medley gave us the idea that we could etch onto a plain CD if we wanted to, so I took one to hold on to incase I wanted to do it for my final project. As I was brainstorming the last few weeks, I knew I wanted to try the CD and incorporate some other elements to create the final piece. I love watercoloring, which I’m sure you’ll see lots of in my posts this summer now that I have more free time, so I really wanted to use the CD etching to do some sort of collage with watercolor.
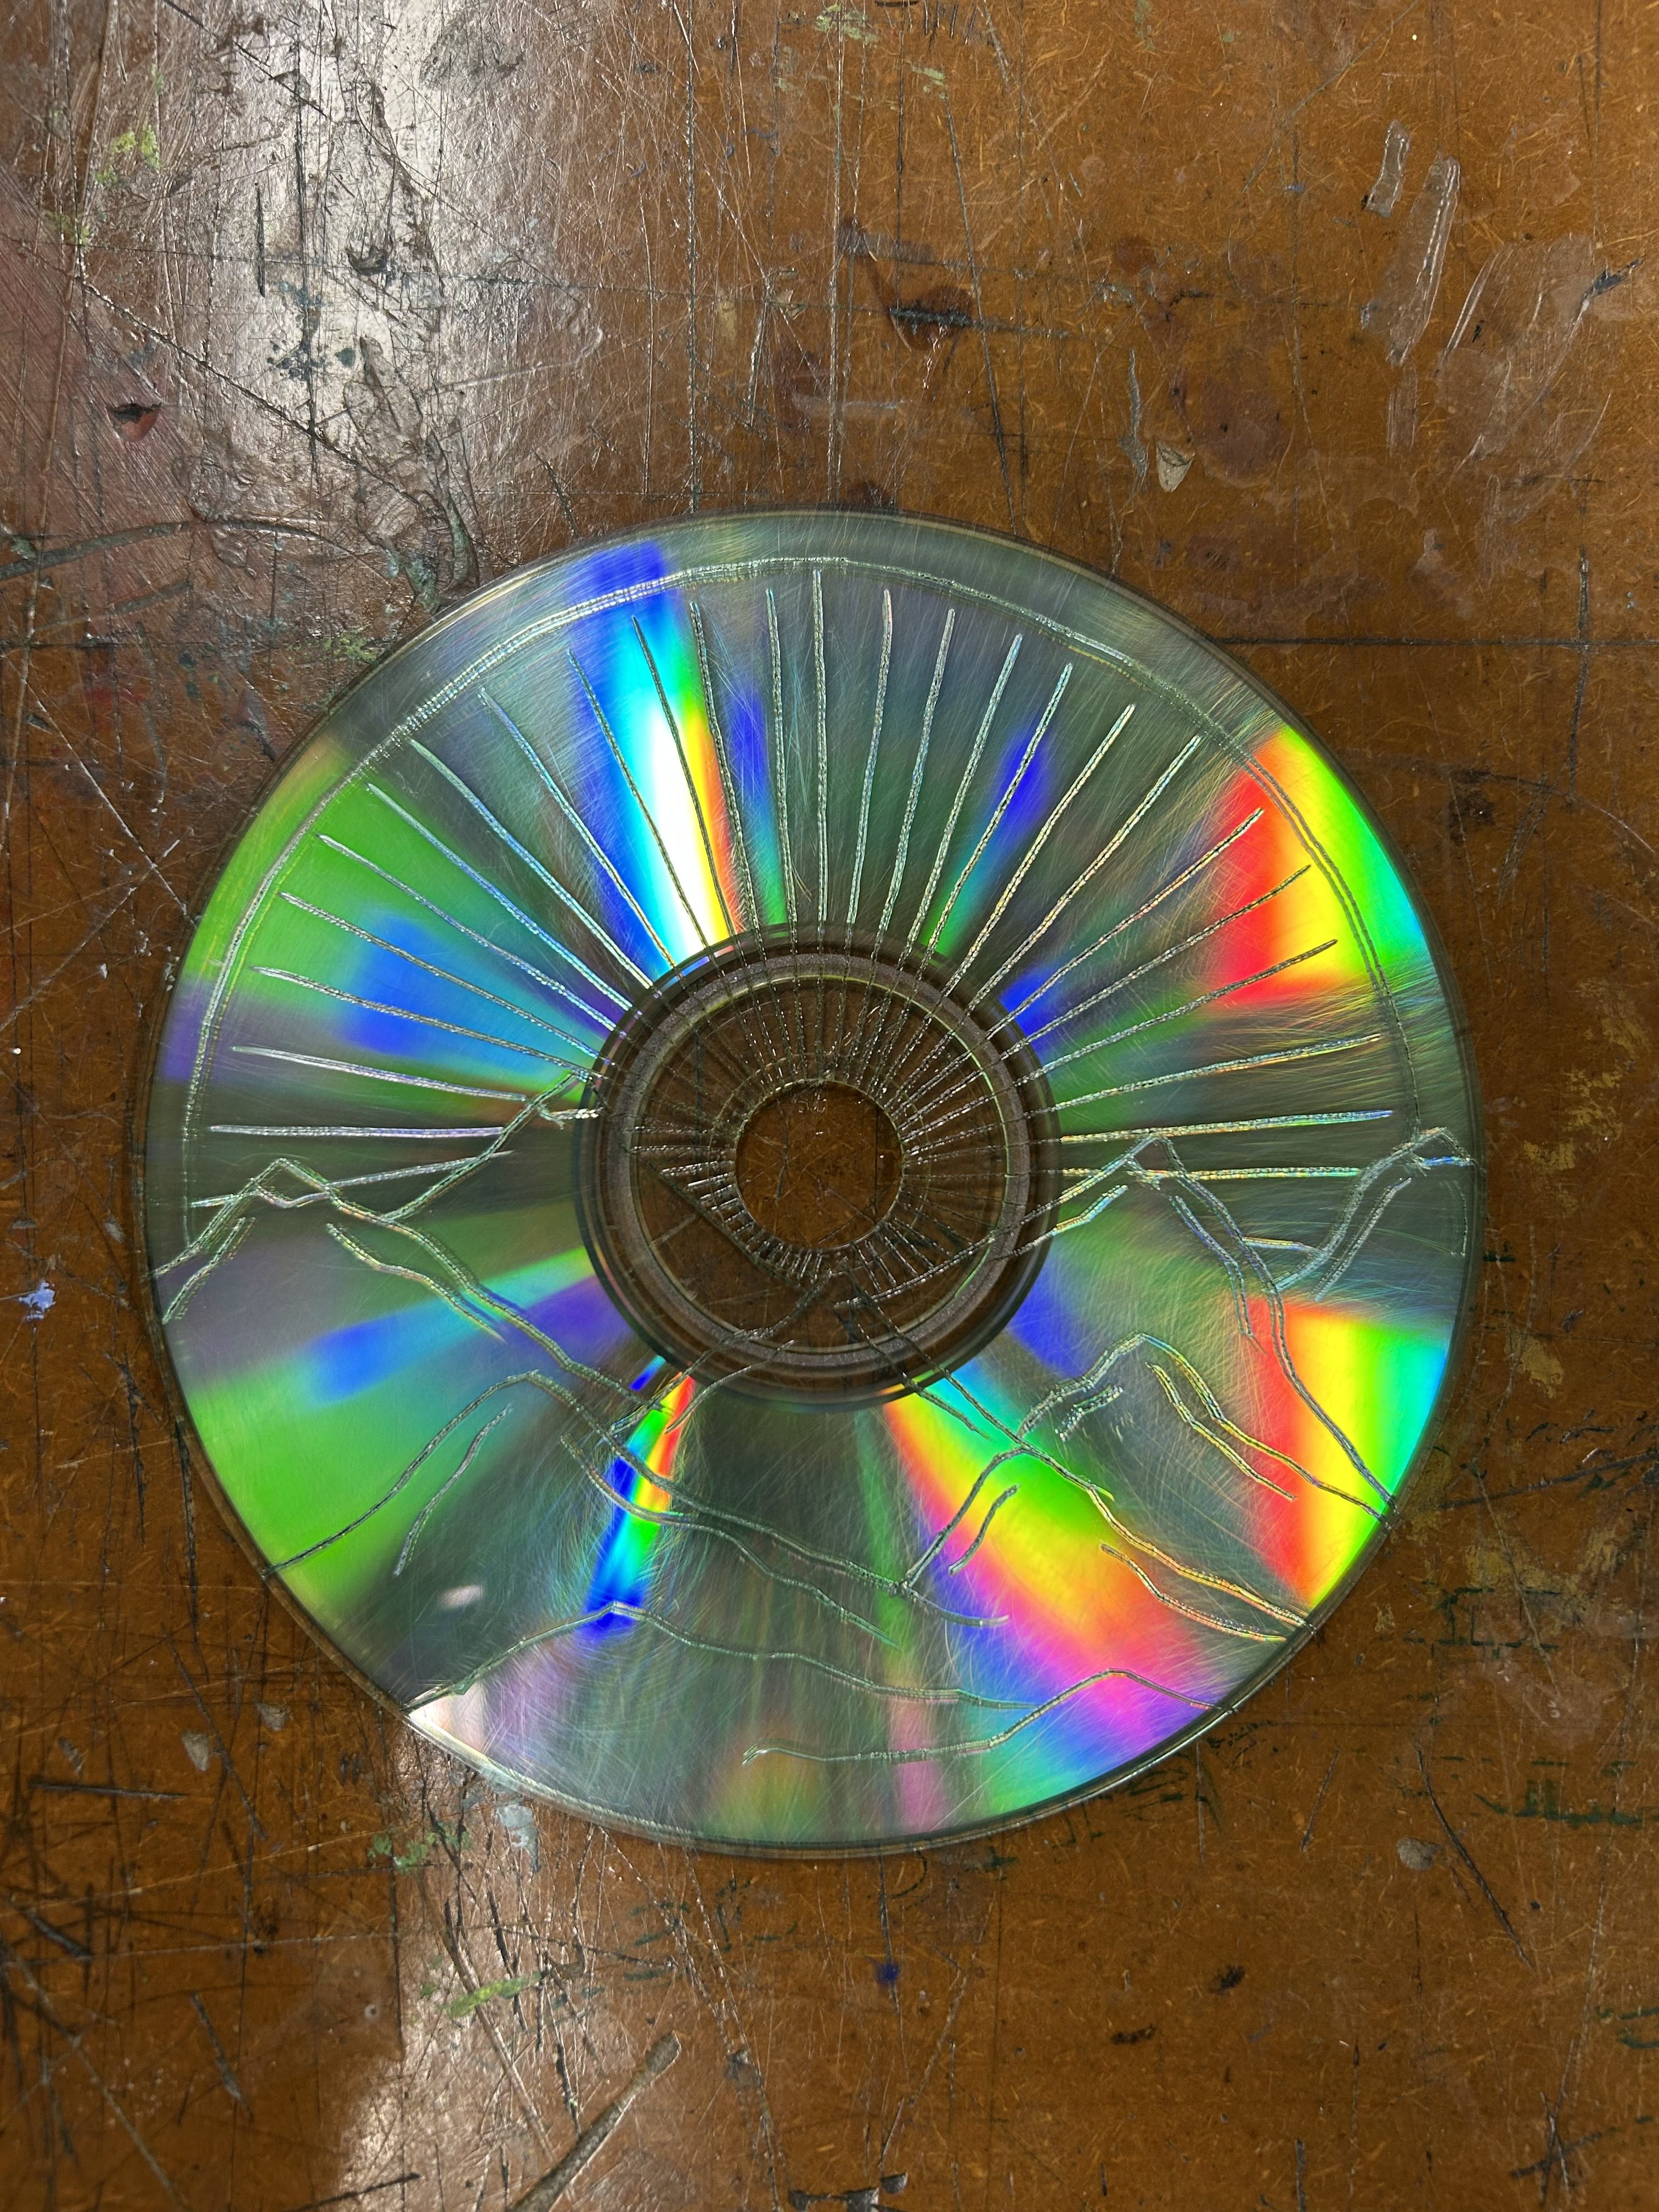
To start, I drew onto the CD with sharpie and made some mountains with a sun behind it with the sun rays going all the way to the edge. I decided to use the middle circle of the CD as the center of the sun so that when it printed, the big hole in the middle would be a piece of the artwork! Once I was happy with how the drawing looked, I started etching into it with the needle, and this was a lot harder than expected. I had to press down and drag really hard to get a deep enough impression into the material so that the ink would hold when it printed, and it definitely took some breaks and a few tries because my hand was hurting. But after I finally got it done, it was so worth it because it printed so beautifully!
When I inked it up to print, I first just started with some black ink to see how well it would hold up. I wiped off a decent amount so that I got a light gray tone where the lines weren’t, and it came out surprisingly well! Then I really wanted to experiment with colors, so first I mixed some red and black on the CD to create a red-ish brown color, and it was actually really pretty. Then I decided to experiment with gradients, so I did some of the brown color again with some red and yellow, so that the yellow was mostly the sun. That one came out really good and I was very happy with the red/brown ones overall, but then I decided to do a green and yellow one for fun too, for more of a nature vibe. Overall I was extremely satisfied with how the ink held up on the plate and it created some beautiful prints. Here is my CD before inking up, and also the 4 best colored prints I got:
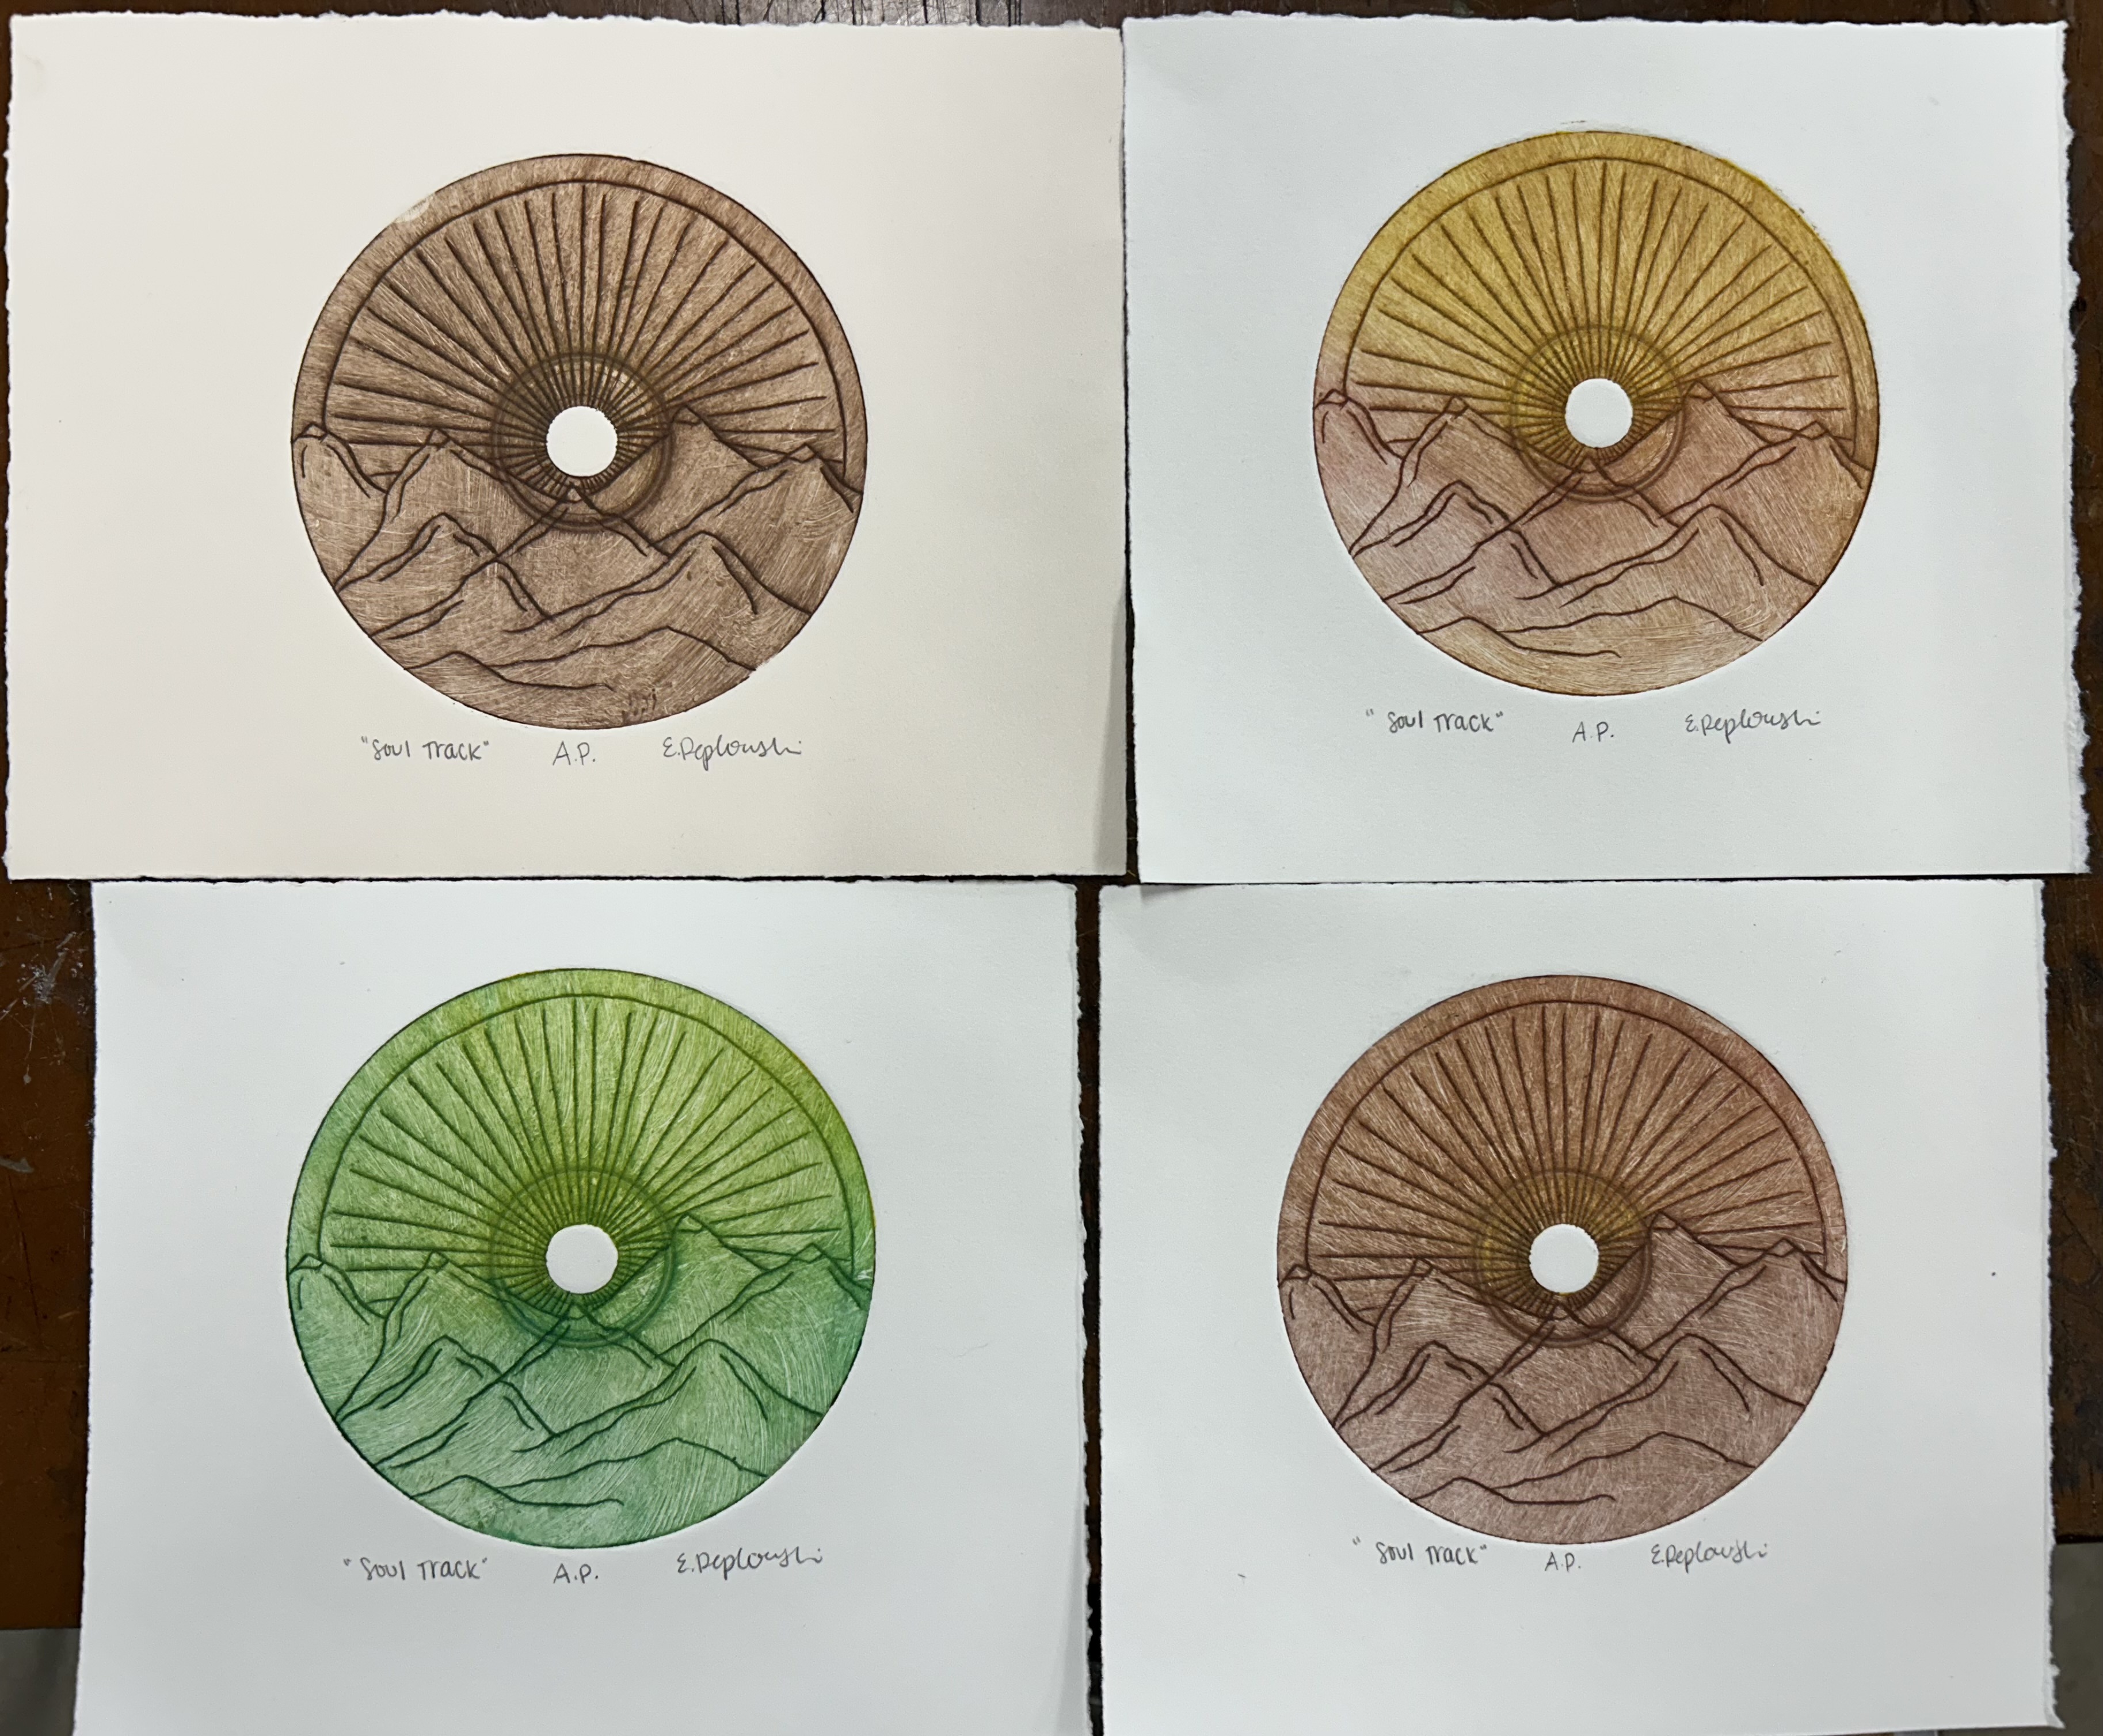
I decided to name it “Soul Track” because it sort of is like a look into my soul through a CD, I love nature and the sun and I just thought it was a fun name! So after some more planning after I got these prints, I decided to watercolor another piece to add onto one of them. I drew some flowers and leaves that would border the bottom part of the mountains and go along the shape of the circle, and watercolored them some bright colors. I decided to use the black inked one with this, so I cut it out and watercolored over it, in the sun and the mountains, matching the colors to the flower border I created. Once I had these two pieces the way I wanted, I took some black paper and pasted both of them on together. I was very pleased with how it came together and how much it elevated the print by adding some other elements!
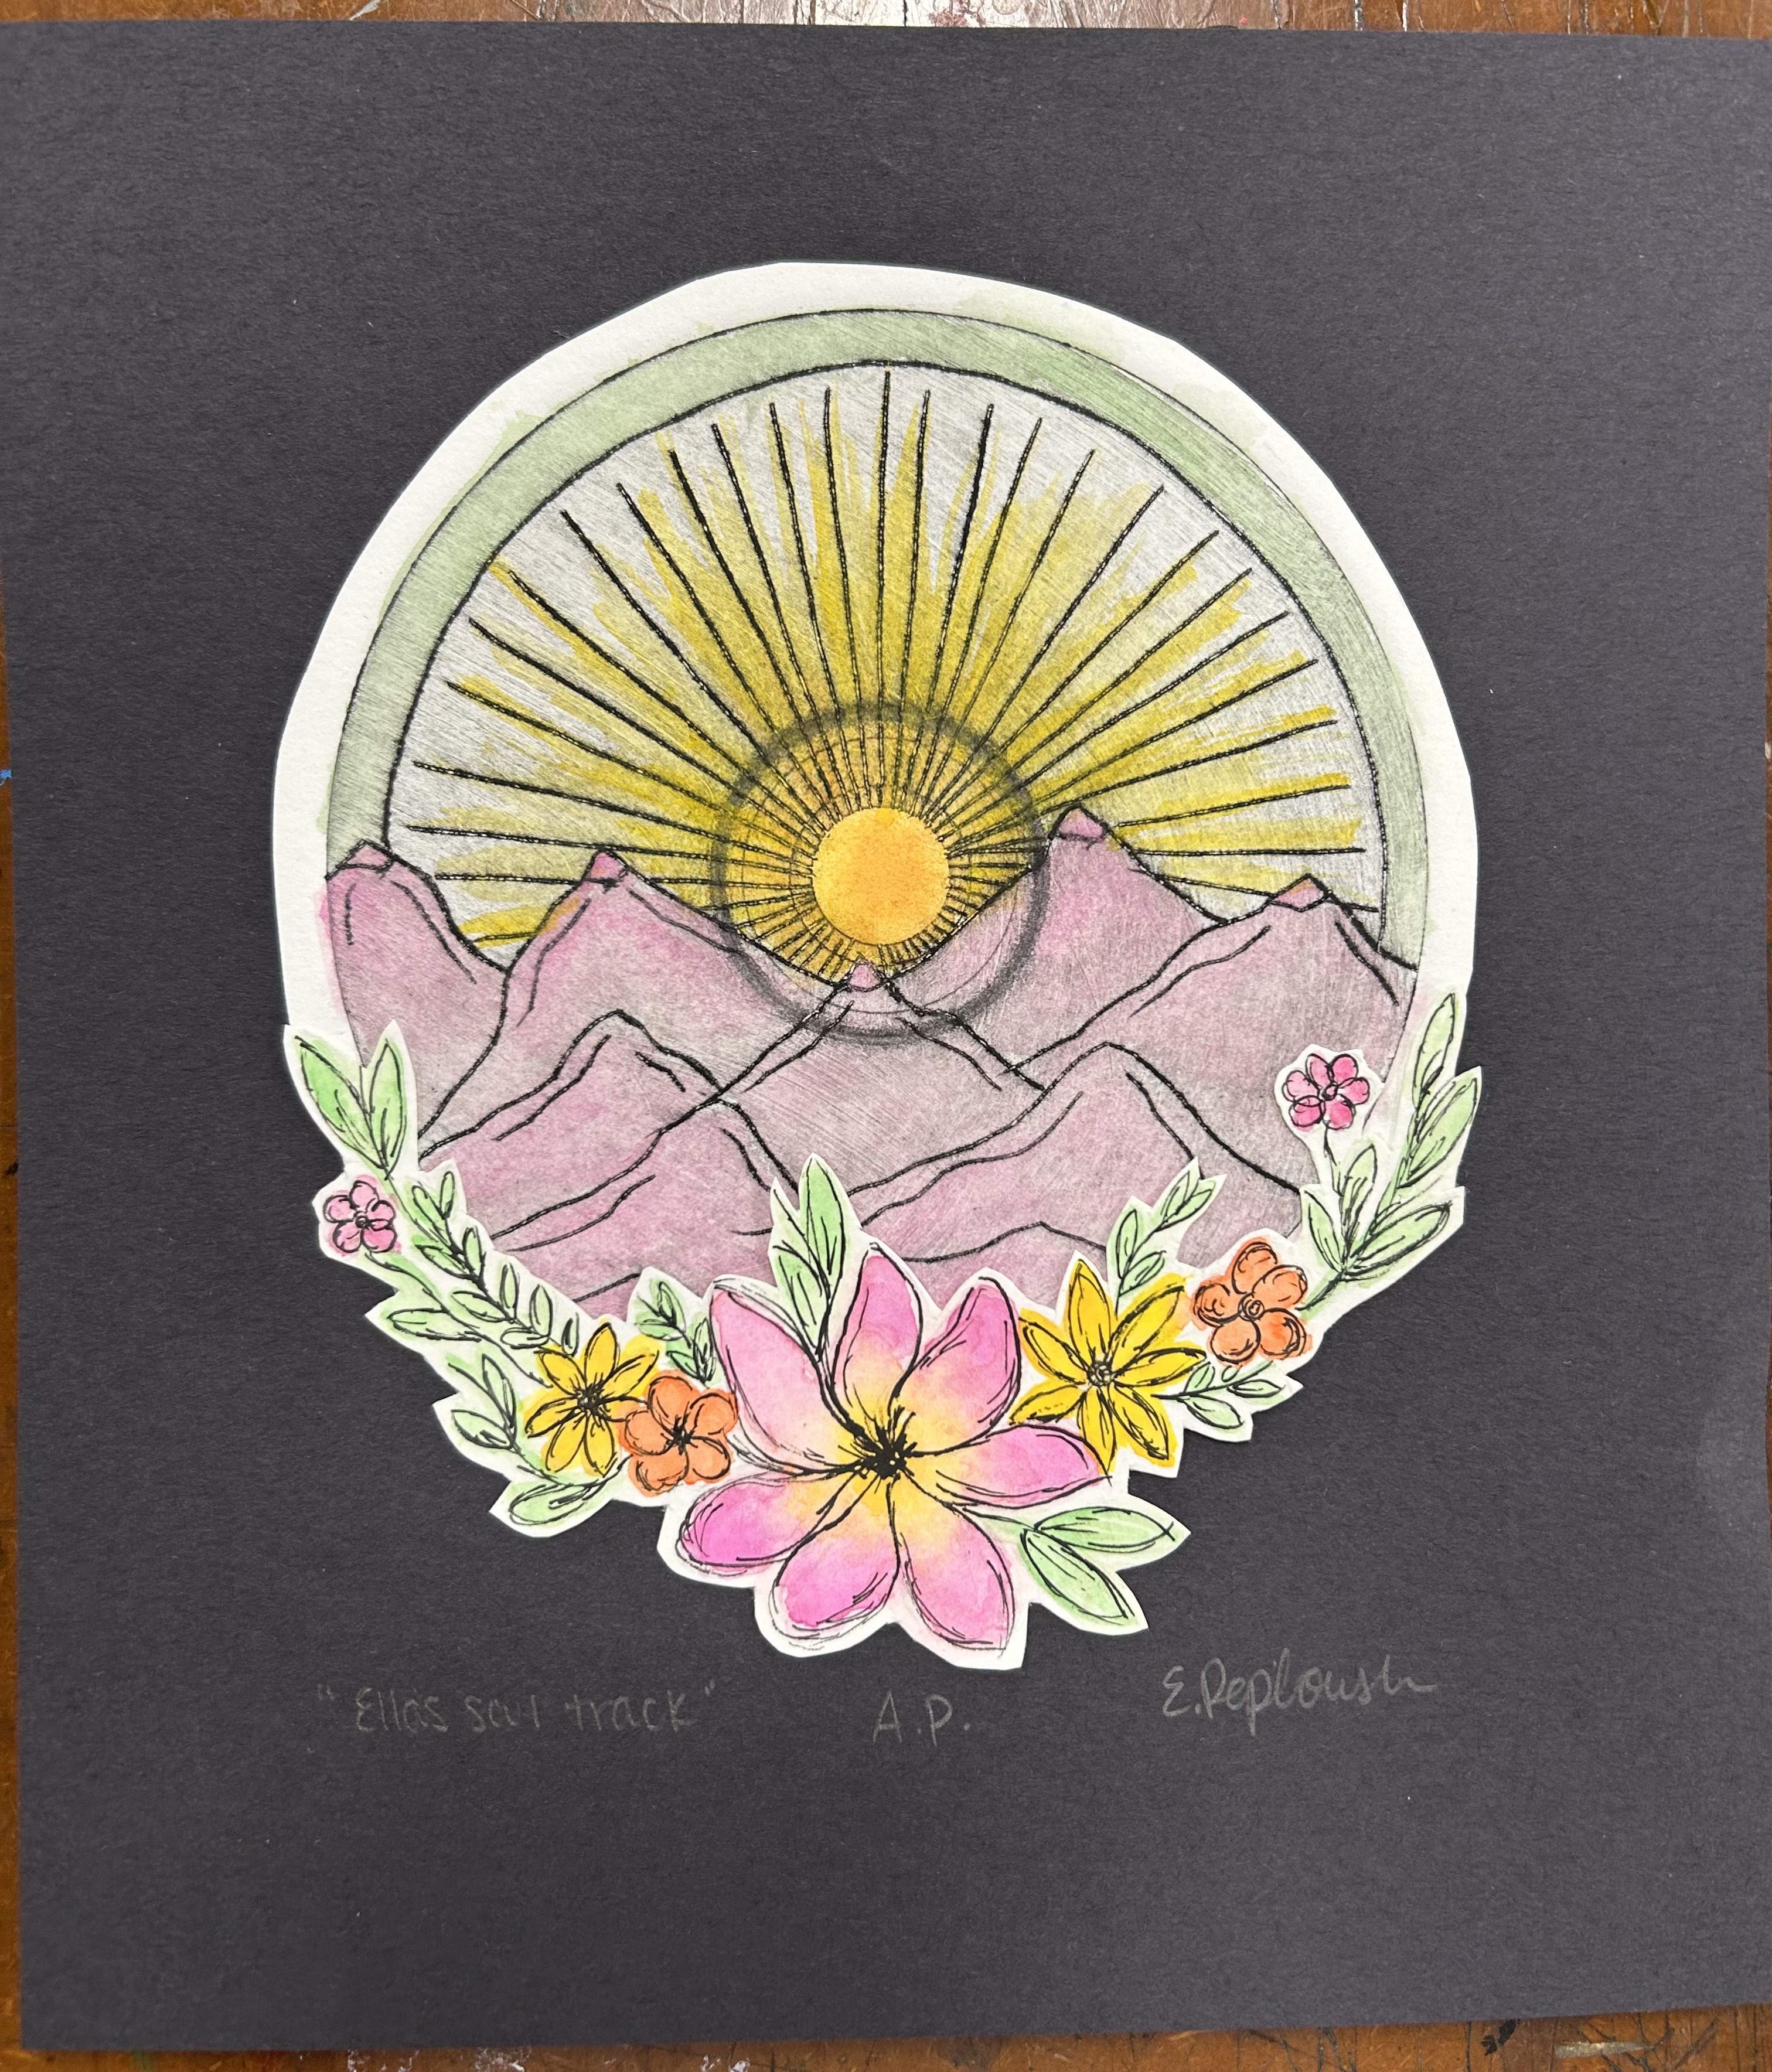
I named this one slightly different, as “Ella’s Soul Track,” because the flowers just make it even more unique to me because I absolutely love flowers and am always incorporating them into my designs. Overall, this was definitely my favorite project yet and I am so happy with how I ended the semester. I really loved this class and learning all about etching! Which version of the print was your favorite?
Hope everyone is enjoying their summer, thanks for reading!
Ella