Last week I discussed my experience at the Corning Museum of Glass. While I was at the museum, I had the opportunity to blow my own glass at a workshop featured at the museum called “make your own glass.” The workshop is approximately 45 minutes long and includes an instructed, hands-on experience with glass. There are multiple workshops to choose from, including wind chimes, flowers, beads, tableware, and more. I chose to make an ornament because I wanted to experience blowing glass. This meant I had to physically blow in one end of a long mental rod to fill the glass with air and cause it to expand. The workshop was amazing, and the instructor was extremely helpful and informative.
the work space
The workshop was set up with different stations across a large room. Along the back wall were furnaces to melt the glass and on the side walls were kilns to cool down the finished works at a controlled rate. In the center were the stations and with them an instructor and coloring options for your piece. There were about 20 to 30 different color options, ranging from primary to neon colors; this allowed your ornament to be unique and personalized.
The station to blow your own ornament had a seat adjacent to 2 parallel wooden bars with a metal rod placed on top. The metal rod was about 4 to 5 feet long and would be rolled back and forth over the bars. An individual would sit in the seat and blow into the metal rod while rolling it back and forth. The width of your rolls were controlled by the instructor and he would direct the speed you rolled at and the amount of pressure in each blow. Every time the glass started to cool down or needed a color added to it, the instructor took the metal rod and put it in the furnace. Though you did all the main motion and creation, the instructor controlled how you did it.
the experience
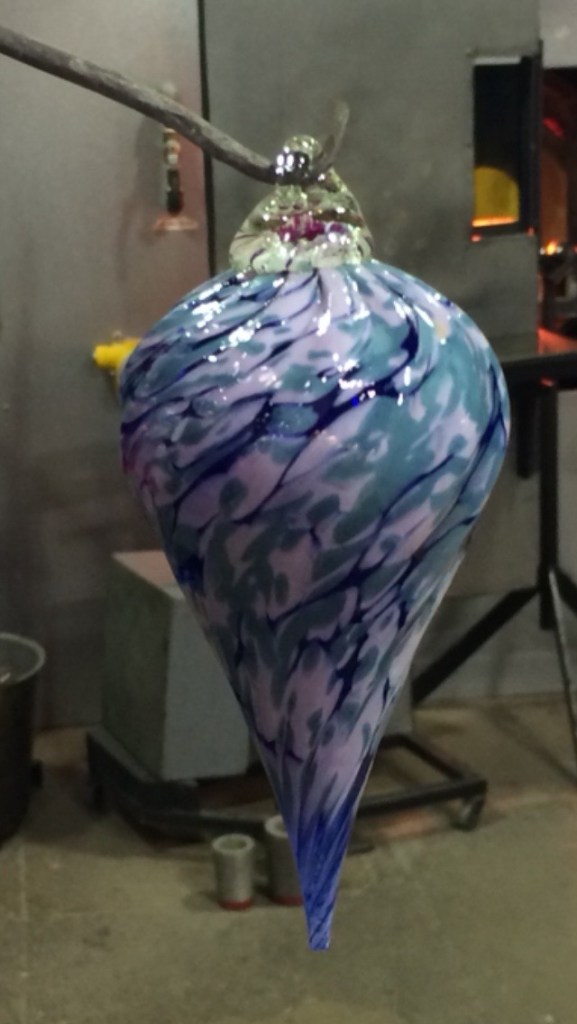
When you first walk in, you have to chose the color and shape you want your piece to be. You may chose up to 3 of the colors provided and the order they are layered on, luckily the workers helped in making your decision by providing you with an idea of how it will turn out. There are 4 shapes to choose from. I chose the colors dark blue, purple, and light blue and placed them in that order in a teardrop shape with ripples.
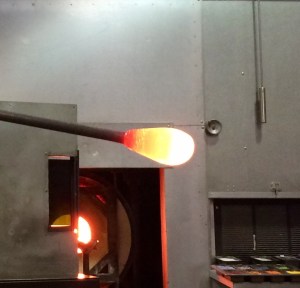 Stage 1
I first sat down at the station and watched as the instructor took cooled, hardened glass, placed it on the metal rod, and put it in the furnace. When he took it out, the glass had an illuminating, orange-yellow glow. He then placed it on the parallel, wooden bars and I placed a clean new mouth piece on the metal rod. I started to blow into the rod and roll it back and forth while the instructor told me what to do and controlled how far I rolled it.
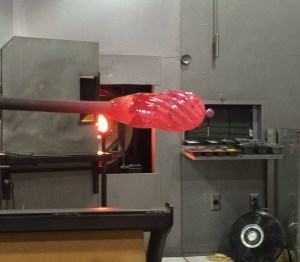 Stage 2
He added the first layer of color and placed it back down for me to roll again. As the glass started to cool and harden, it became much harder to force air into it. Slowly the glass began to expand. When I stopped rolling the rod, he pulled on the piece with pliers in a turning motion. This motion created ripple in the glass and the teardrop shape.
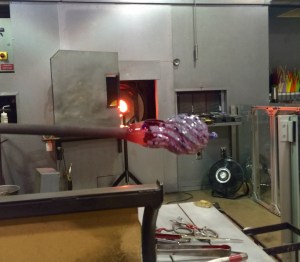 stage 3

The picture on the left shows the part of the process when the glass had all of the layers of glass on it. To layer the colors the instructor simply rolled the glass into the pigments of color and put it in the furnace. By placing it in the furnace after putting on the colored pigments, the pigments were able to fuse into the glass. This stage the layering of color was finished, and the shape had only started to form.
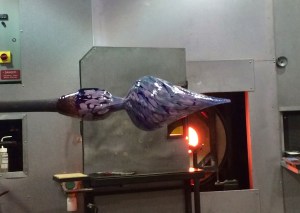 stage 4
At this stage, the shape is formed and the coloring is finished. The last step is to cut the piece off of the metal rod. To do this, the instructor added tension and stress to neck of the piece with pliers. Then he just taped gently on the glass, and the ornament broke off perfectly at its neck.
 STAGE 5
To finish the piece, the instructor melted glass without added pigmentation. He took the melted glass and placed a drop of it on top of the ornament and shaped it into a circle. This created a hole to allow the piece to be hung on a Christmas tree. It cooled and hardened into clear glass to not be a distraction from the ornament’s shape and color.
I am extremely pleased with the finished piece. I am astounded by the quality of the glass and the how the colors blended beautifully together. My favorite part of the ornament is the bottom tip, where the 3 colors thin out and swirl together. I think the transparency of it adds another element to the piece and creates more movement.
I enjoyed the Corning Museum of Glass and the “make your own glass” workshop immensely, and I highly recommend that you enjoy this experience for yourself. Also if you haven’t yet and want to know more about the museum, please read my last post “The Corning Museum of Glass.”