Today I will be sharing with you my second technique I learned at the screen printing class. Which is drawing directly on the screen using a drawing fluid technique:
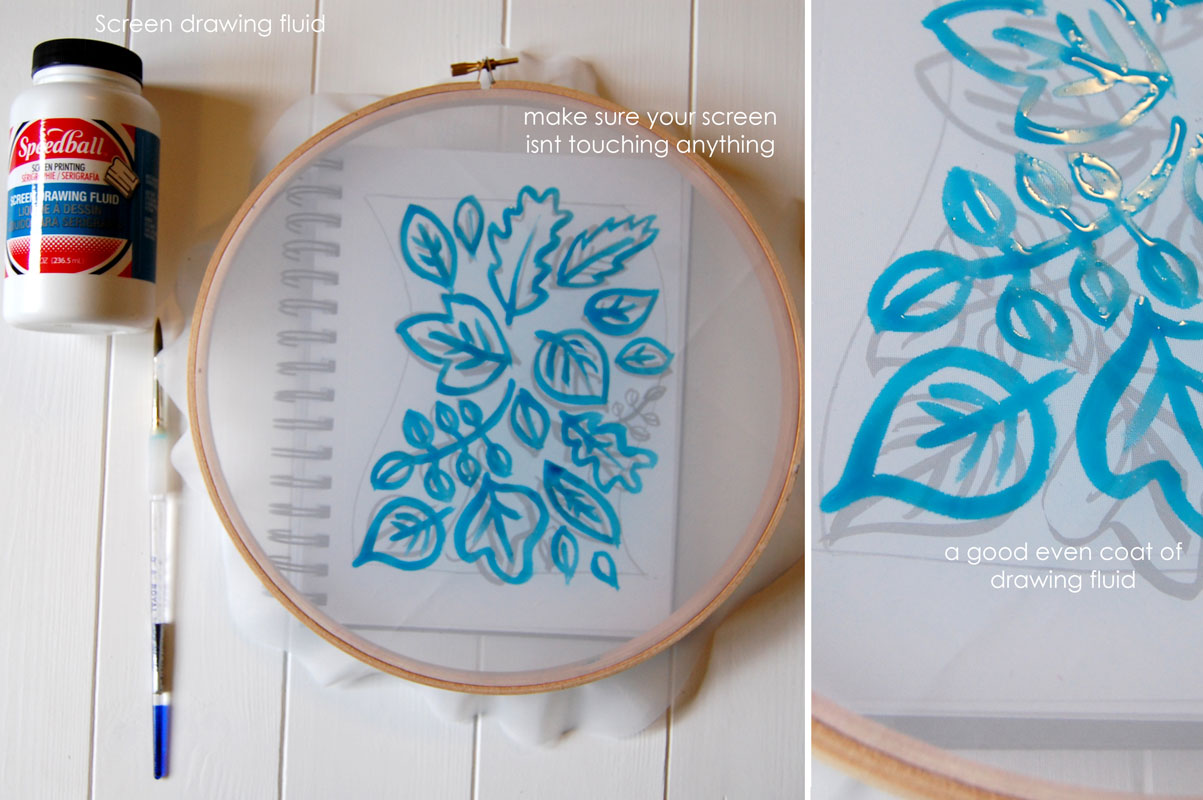
- First on a piece of paper draw out your design then trace the image. Place the paper with image on a surface of the clean and dry screen frame. Align the screen frame so that the side with the screen is down and against the paper. This is a setting up for creating a positive image opposed to negative. Use the soft pencil to trace on the screen. Later you will follow these pencil lines with the Drawing Fluid. If you want to free-hand paint with the Drawing Fluid that is fine too but I would recommend tracing it first because the lines will be straighter.
- Shake up the bottle before opening the Drawing Fluid. With the screen side of the frame elevated, I would recommend scraps of wood to elevate screen. Then paint on the drawing fluid with the brush. Keep the bottle near the screen as you paint it on. Apply the fluid lightly, just enough to saturate the mesh without bubbling. If you make a mistake at this point, gently rinse out with water and let the screen dry.
- Let it dry or dry it with a blow dryer that is a few inches away so that it doesn’t push the Drawing Fluid places you don’t want it. Leave the frame flat as the Drawing Fluid dries.
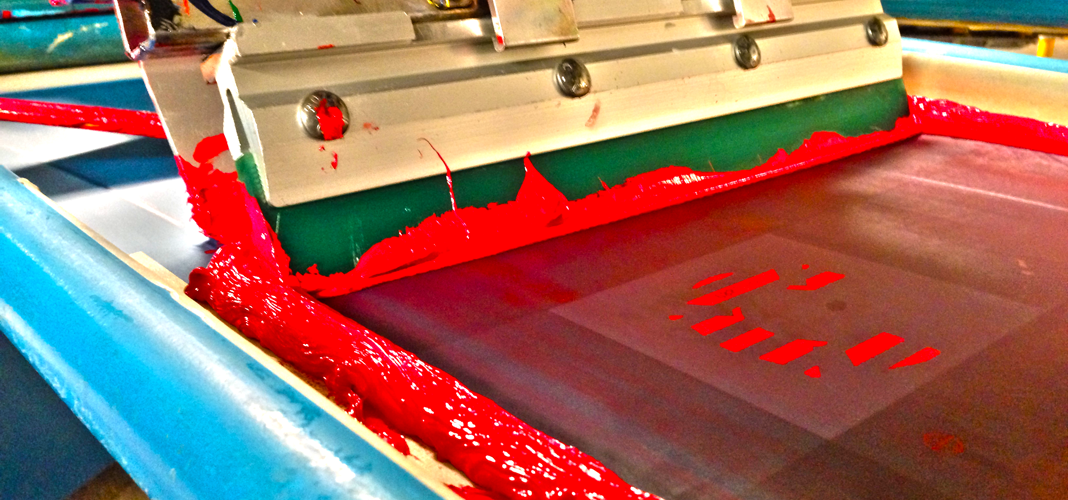

4. Next – shake up and open the Screen Filler bottle. Pour a bead of the filler across the screen along one of the two short lengths of frame. Use the squeegee to drag the filler all the way across the screen. Try not to create too much overlap. Thick areas should be leveled. If you have too much filler, pick up one end of the screen frame 45 degrees and drag the squeegee from the bottom up. The excess filler will collect on the squeegee blade and a credit card or a similar item can be used to sweep it back into the bottle. Follow the same steps as with Drawing Fluid for drying the screen.
5. When the screen is dry you can remove the Screen Filler on the areas of the screen where Drawing Fluid was applied. To do this, set the screen in a wet basin with warm water. The classroom had a holes that applying just enough water pressure to clean out the screen. However, you can use a toothbrush as well, making small circles on the areas of the screen slightly raised and blue from the drawing fluid under screen filler. Work the edges first and move across the screen following the pattern of your design. When complete let the screen dry off. Rush it along with a fan, over a surface you can drip on.
Then you’re ready to print I recommend using trace paper first to see what you like to fix with tape but after that you are good to go.
Until next time!