To start, I should mention this is my first blog post. Ever. So you can follow me as I learn what I’m doing because I know nothing. Secondly, hello! Tell me about yourself! When I get famous, you’ll want to be able to say you knew me before the world knew me!
Now that formalities are out of the way, I’d like to introduce you to this artist, you may or may not know his name, but I’ll bet you’ve seen at least one of his works. Edvard Munch, a Norwegian expressionist painter, who is most well known for The Scream.
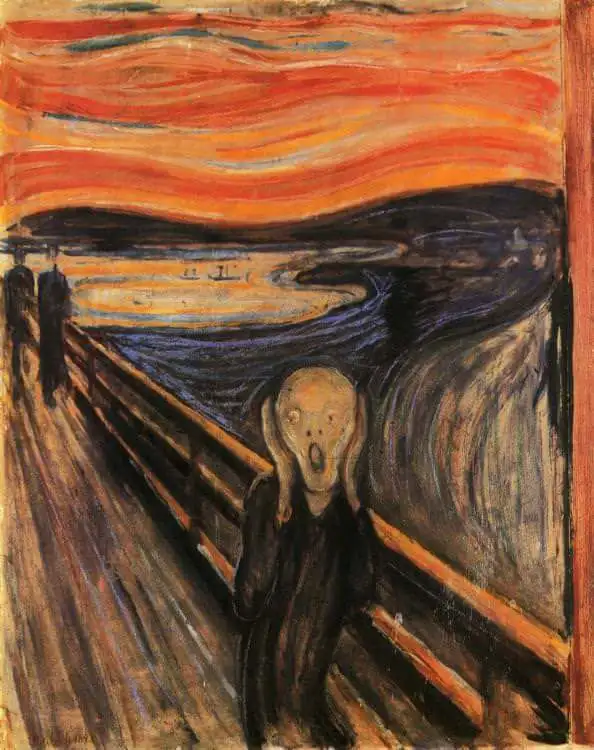
Most of his work stemmed from his personal mental anguish leading him, like most other painters, to become famous after death, and others profit off them. Although, to Munch’s defense, he deliberately sent off his work to museums to showcase and profit from, so, it was his own doing.
Now, I’m here to talk about sculpture, not paintings, so, I present to you my own three-dimensional take on this painting.
Before I show you more angles, let me tell you a bit more about it. I was prompted to make this in my senior year high school art class. We had to make a paper mache figure of an object from a painting. I of course chose this beautiful work because I love the extra taste of insanity in others’ works. It’s also a classic that I believe led to the creation of SCREAM, the serial killer guy. Don’t take my word for it though, or do.
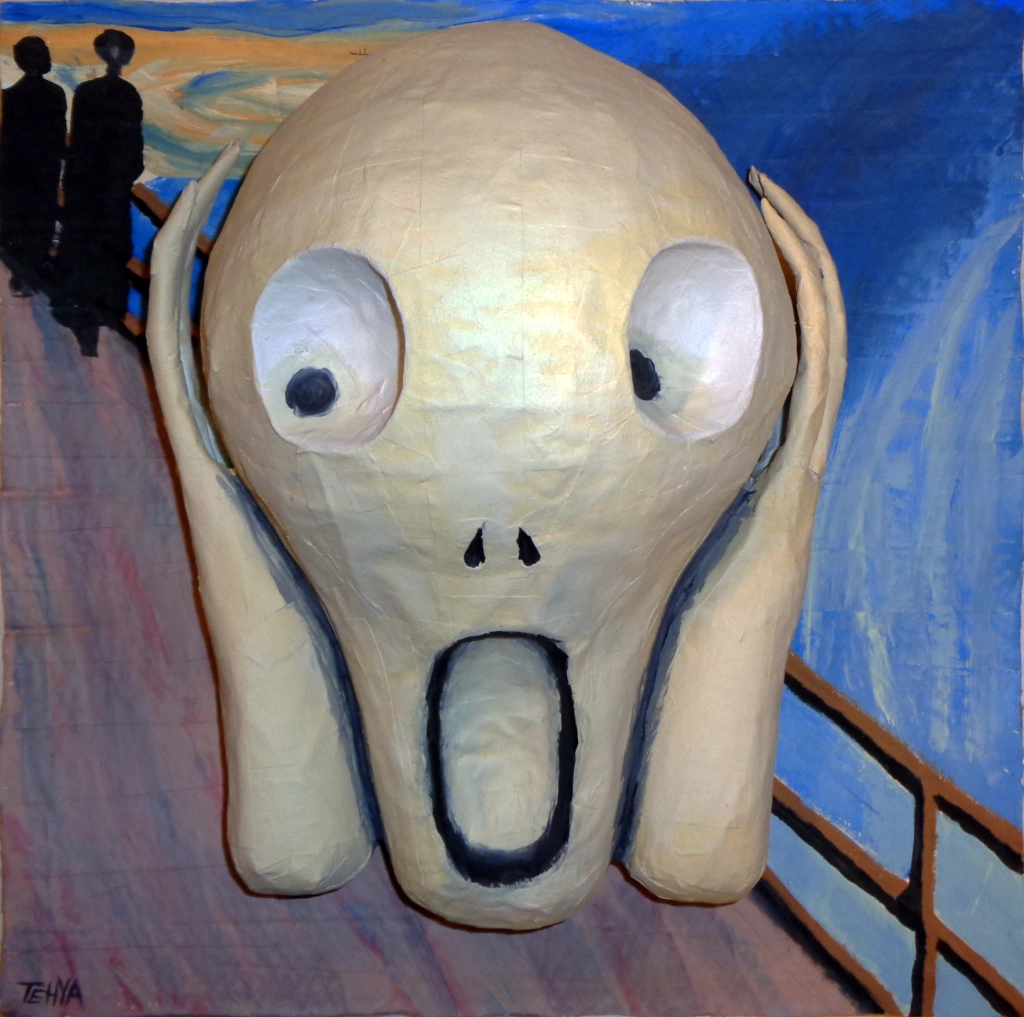
Luckily, I half-remembered to take progress pictures while I was making this so I could show off how cool and fun this was. Just a preface, the background is cardboard with a layer of paper mache.


I began at the hands, since you don’t see much in the painting, I took creative liberty and gave him some nasty claws. To start, I took pipe-cleaners and twisted them together to my desired thickness and then rolled as much masking tape that made my heart happy around the entire hand. When both hands were done, I moved to the wrists. For this, I cut a pool noodle to my desired shape, taped it into shape, and rigged the hands in place.


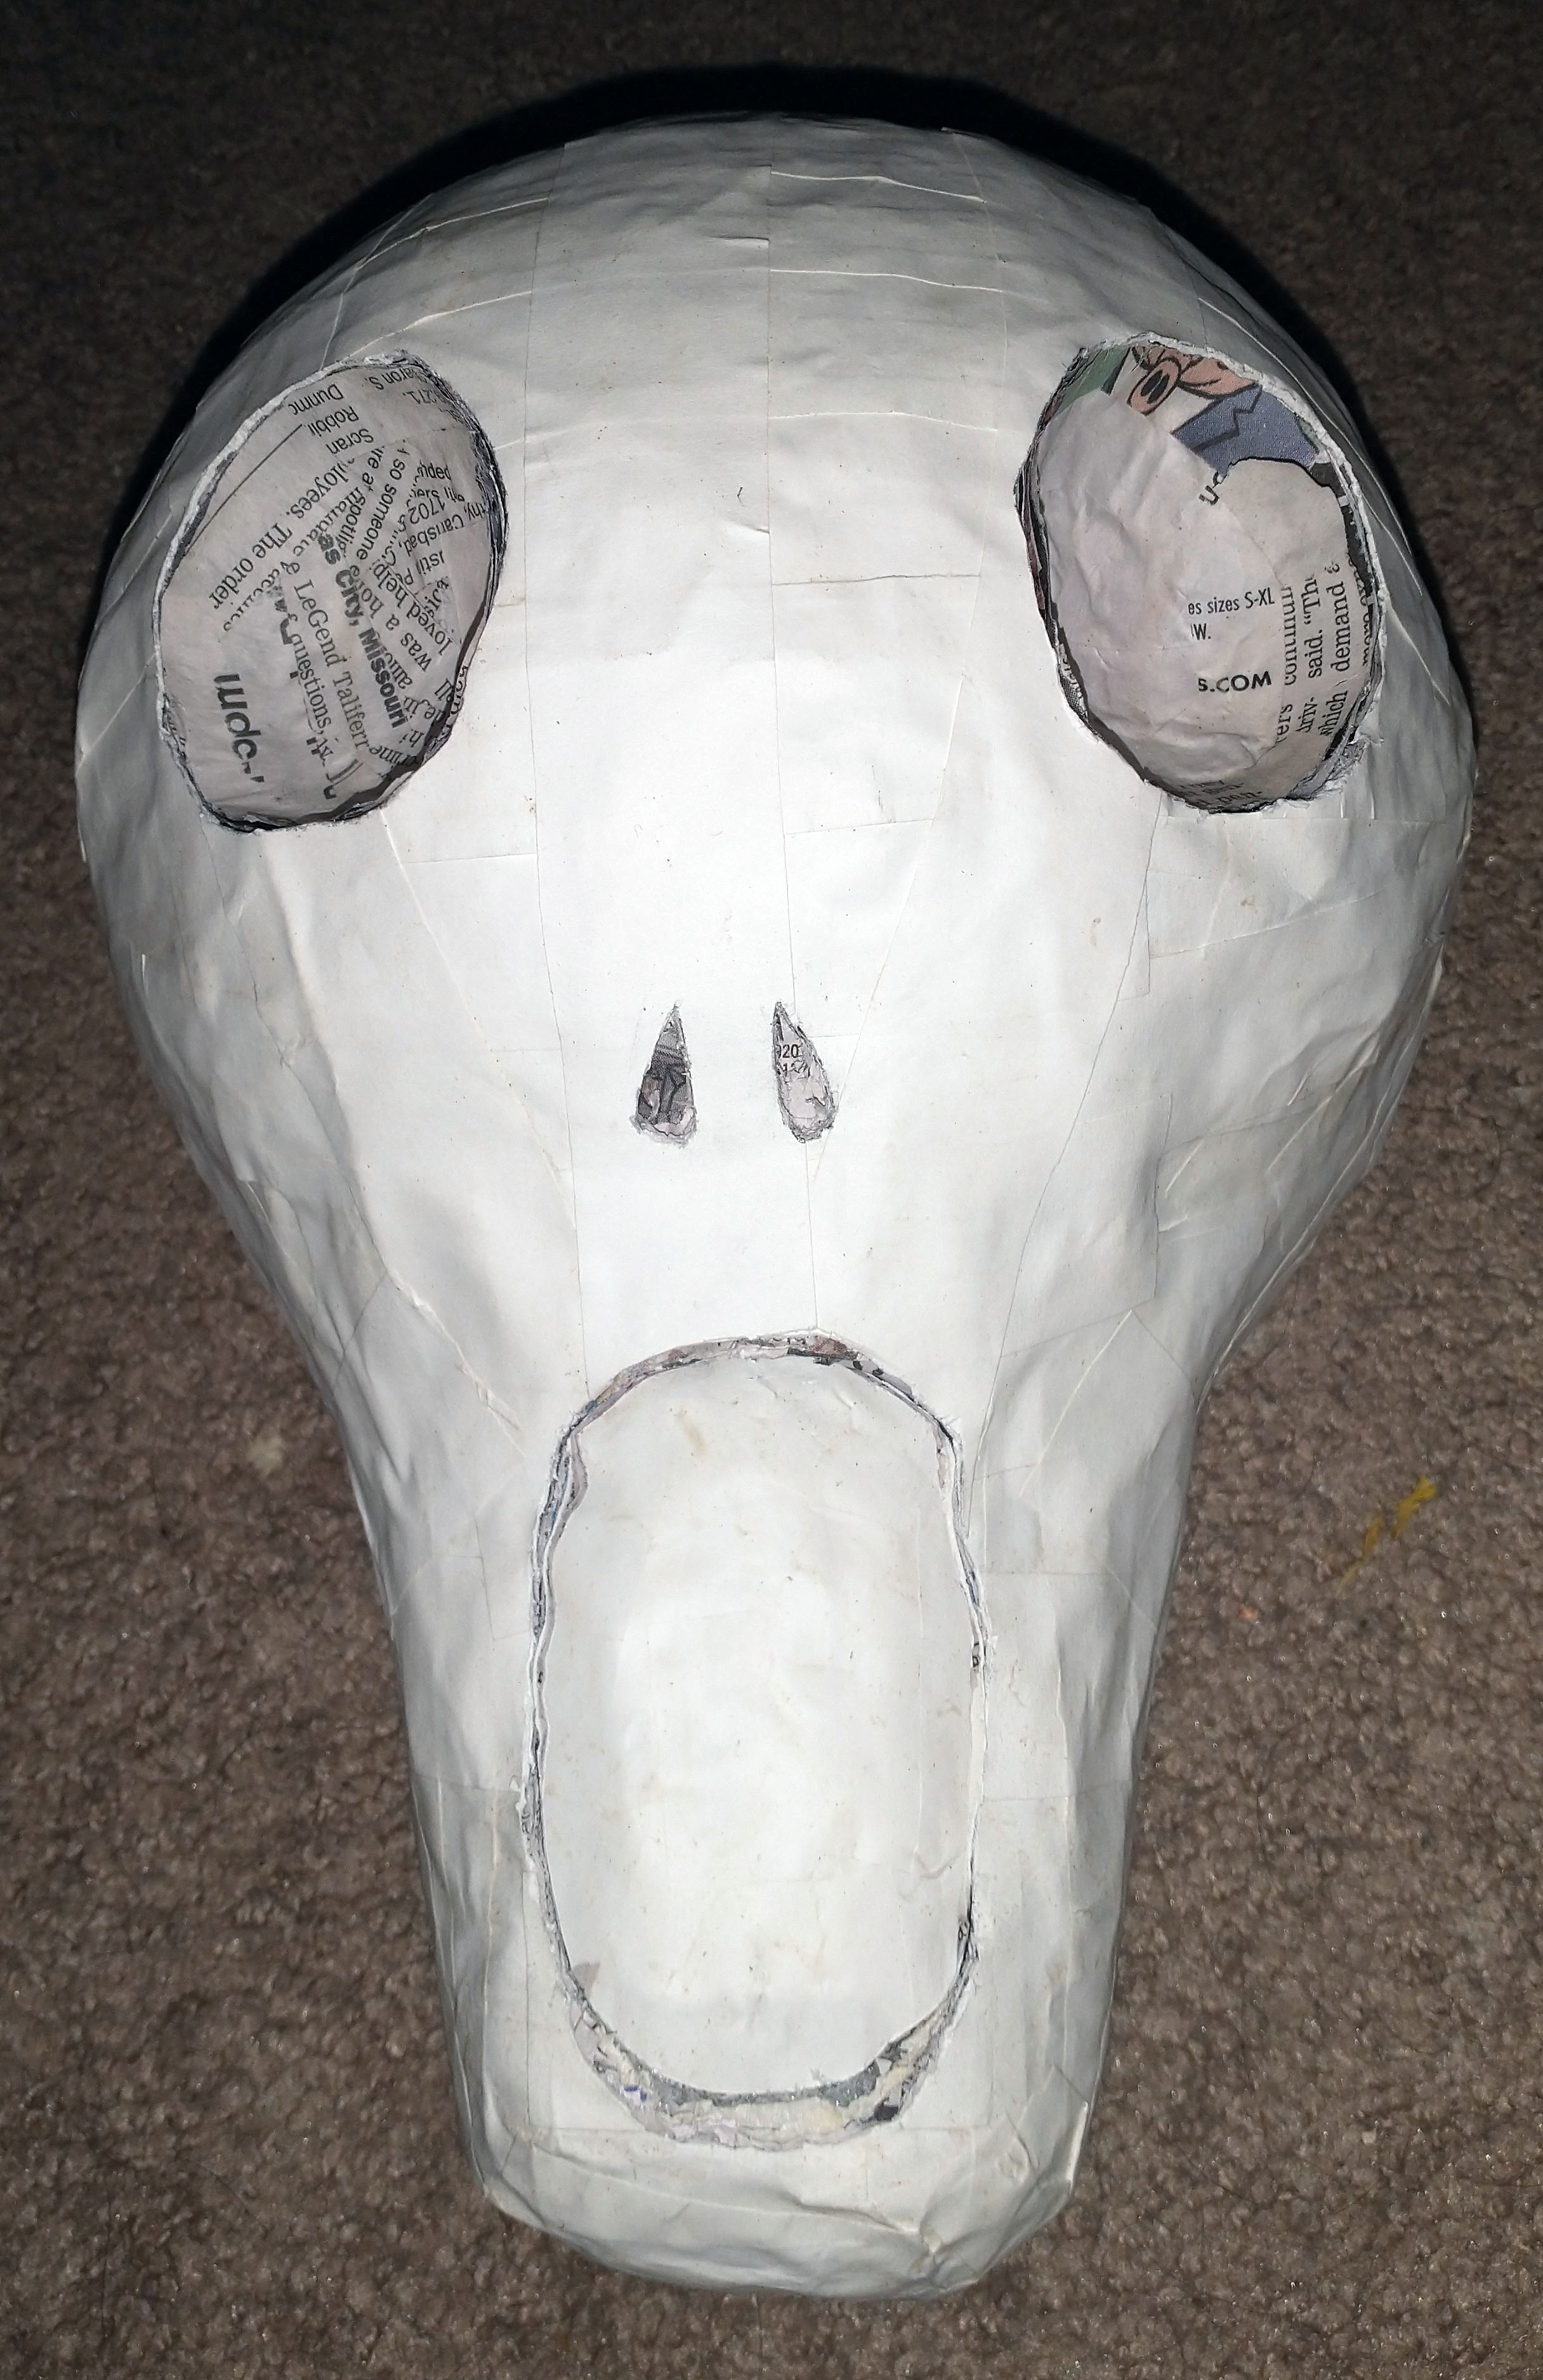
Next, I prepared the head. Using a balloon and more pool noodles, I created the base of his skull, I tried to make sure I kept the back relatively flat so that I could better adhere it to the cardboard backing. I then made a rig to shape smaller balloons into a more oval shape. These were used to create the indented mouth, eyes, and nose. This is where I began to forget to take photos, so you’ll have to deal with my translation of it.
I then took the plunge and began paper macheing. Nothing was easy, everything was a learning experience, especially those nose pieces, they were entirely too small to work with, so when it came to adhering the indented mouth, eyes, and nostrils, I cut into the head to make the holes and used the pool noodle to carve small indents for the nostrils and added paper mache into them.
After this photo, I did another layer of paper mache to make it seamless and eventually used paper mache strips to attach the head and hands to the board. To add extra depth, the railing is enhanced using pipe cleaners under the paper mache to bring them out a bit.
To finish everything off, I painted it to recreate the painting to the best of my abilities, matching the colors and the strokes. I ended with this piece, I do wish I was more careful with my painting and made the colors blend better, but I am more than pleased with the final outcome and I hope you are too.


Thank you for beginning this journey with me, and please tell me about yourself! I can’t wait to see you later!