The lost wax process is highly time consuming. Because of the time and energy it took to create my piece, I had to divide the process between two posts. The previous post, “The Lost Wax Process,” focused on the creative process of the casting bronze, and this post will focus on the clean up of the piece.
The clean up of the piece occurs after the mold is created. At this point all of your time is focused on making the piece look complete and how you want to present it. Cleaning the piece is like a craft because it involves more mechanical work, for example polishing, instead of forming and creating. At this part in the process the piece is formed and created, now you have to add finishing details and create the piece you had envisioned.
Stage 1
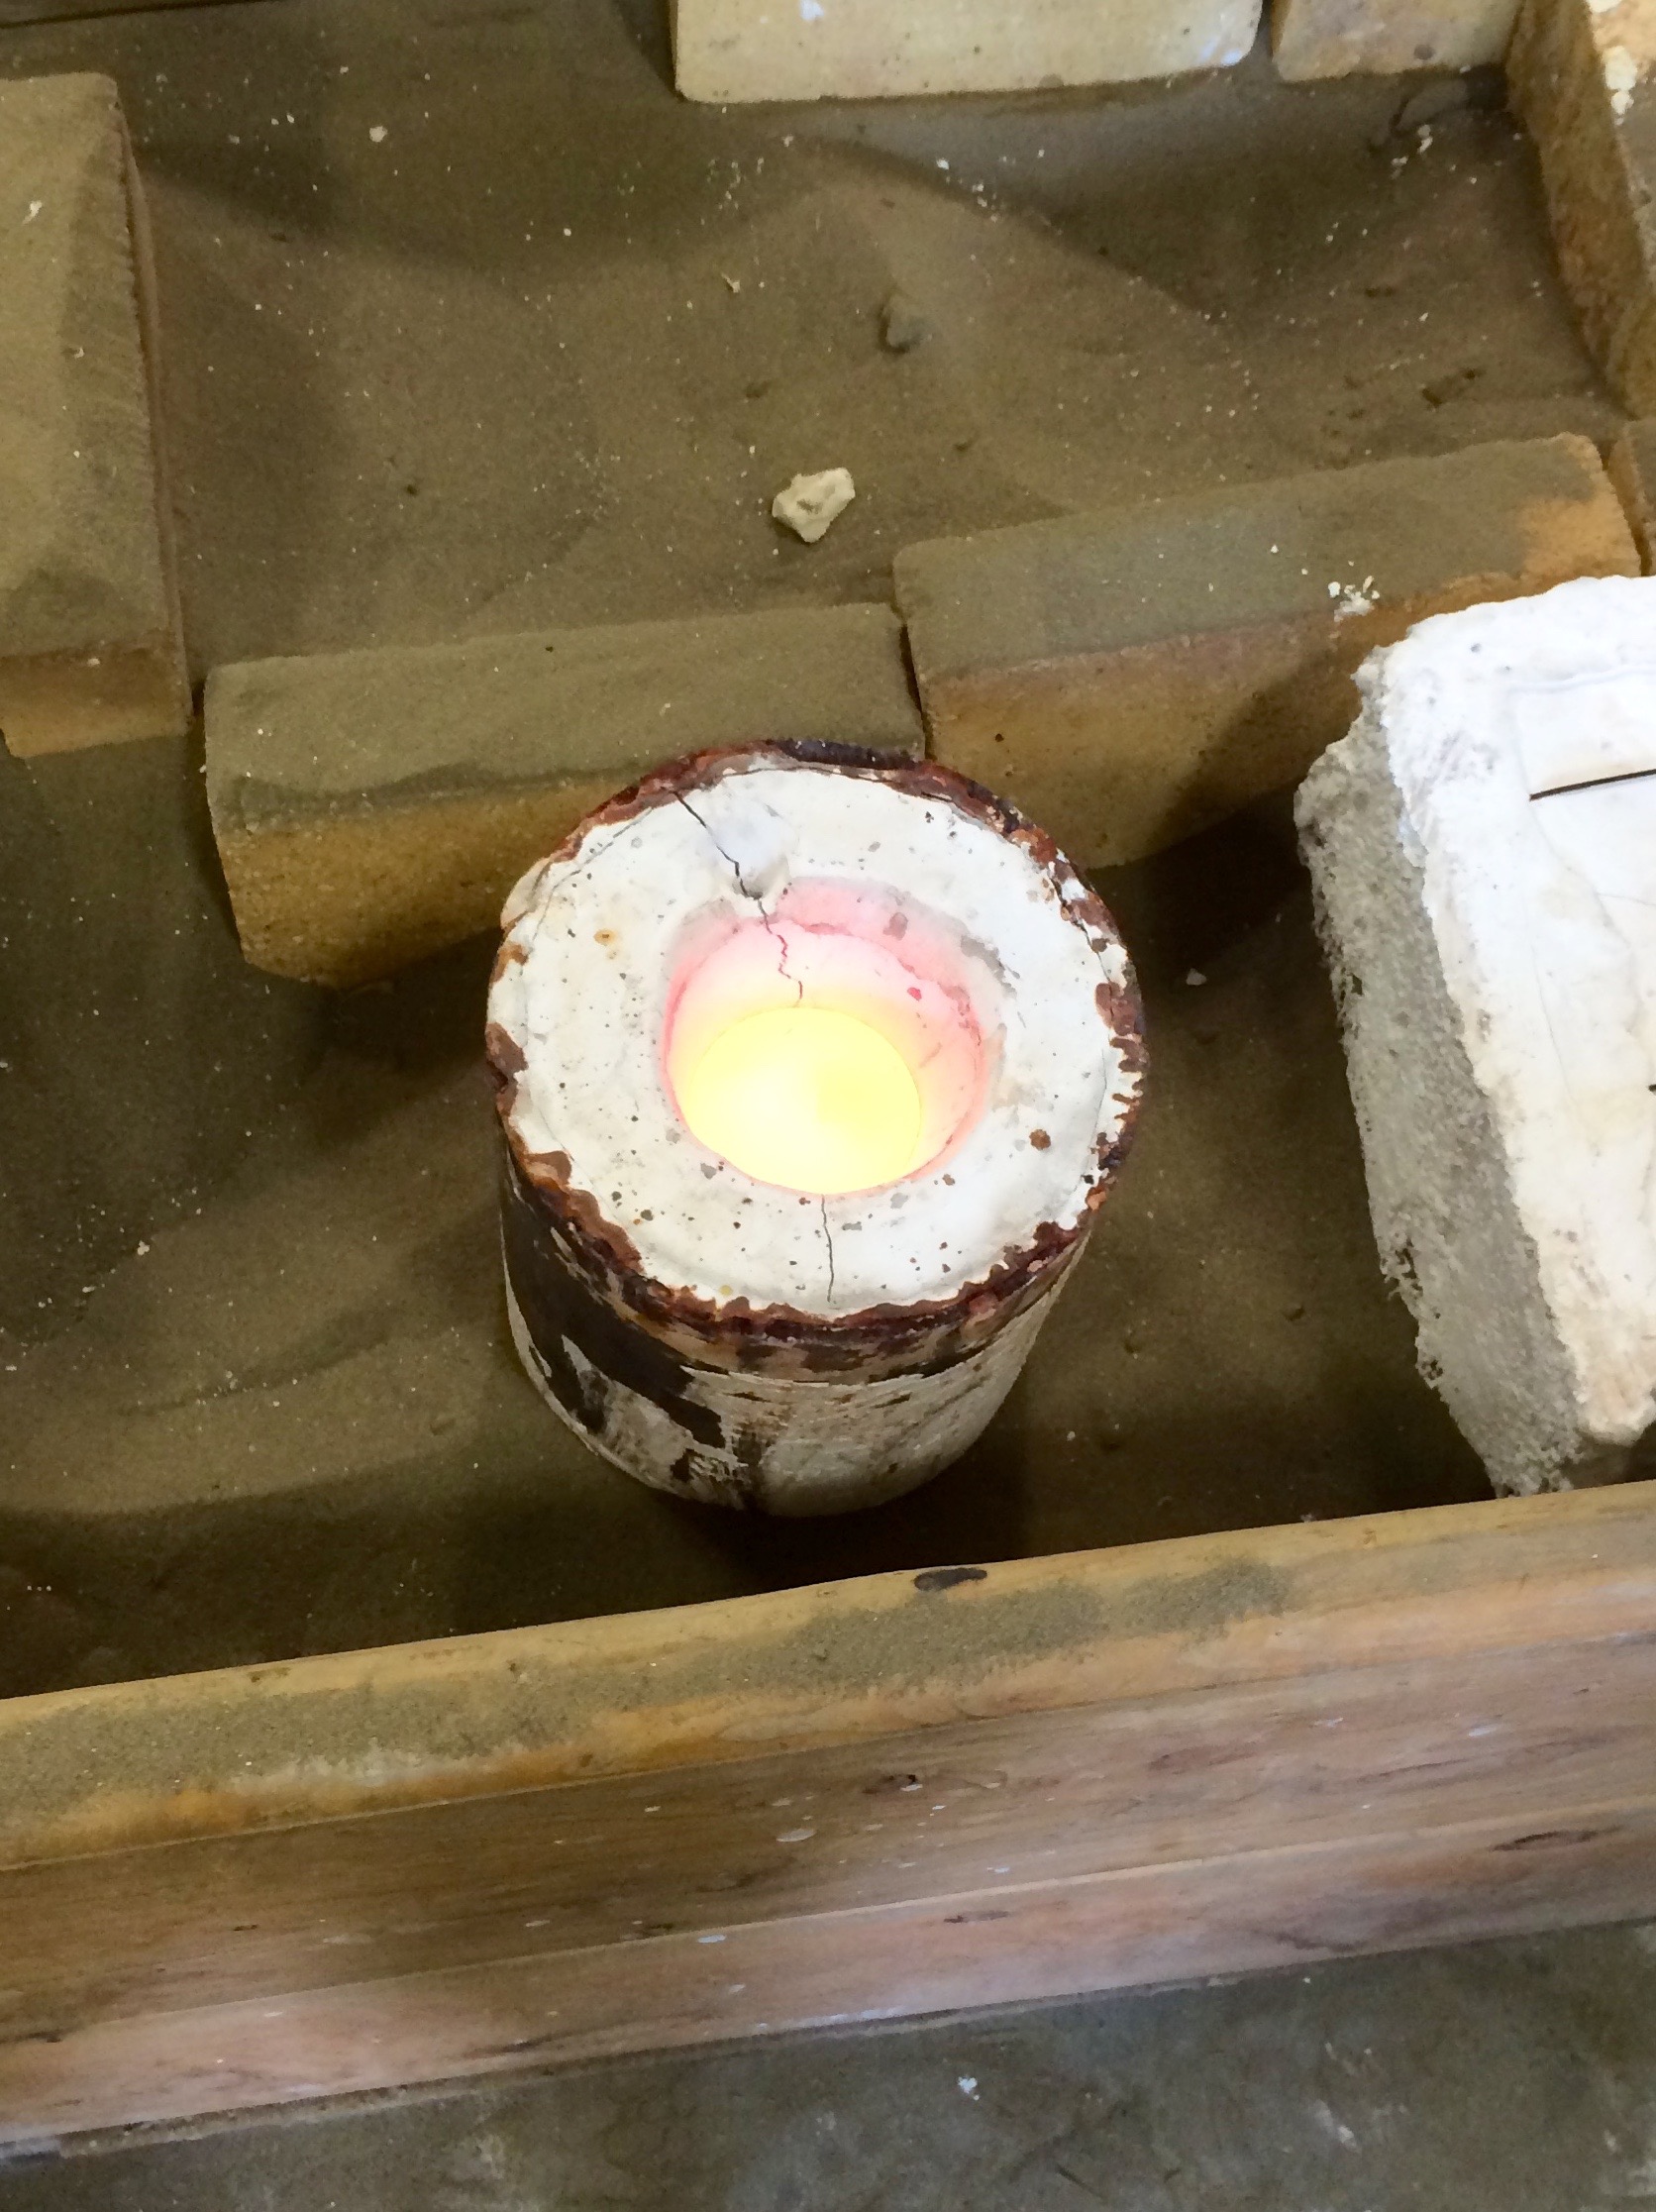
After the negative mold for my piece was completed, I poured liquid bronze into the pour cup and watched as the smoldering hot liquid filled the mold. The steaming yellow-orange liquid changed into a deep reddish brown, harden stone. The liquid bronze filled the negative and created my form.
stage 2
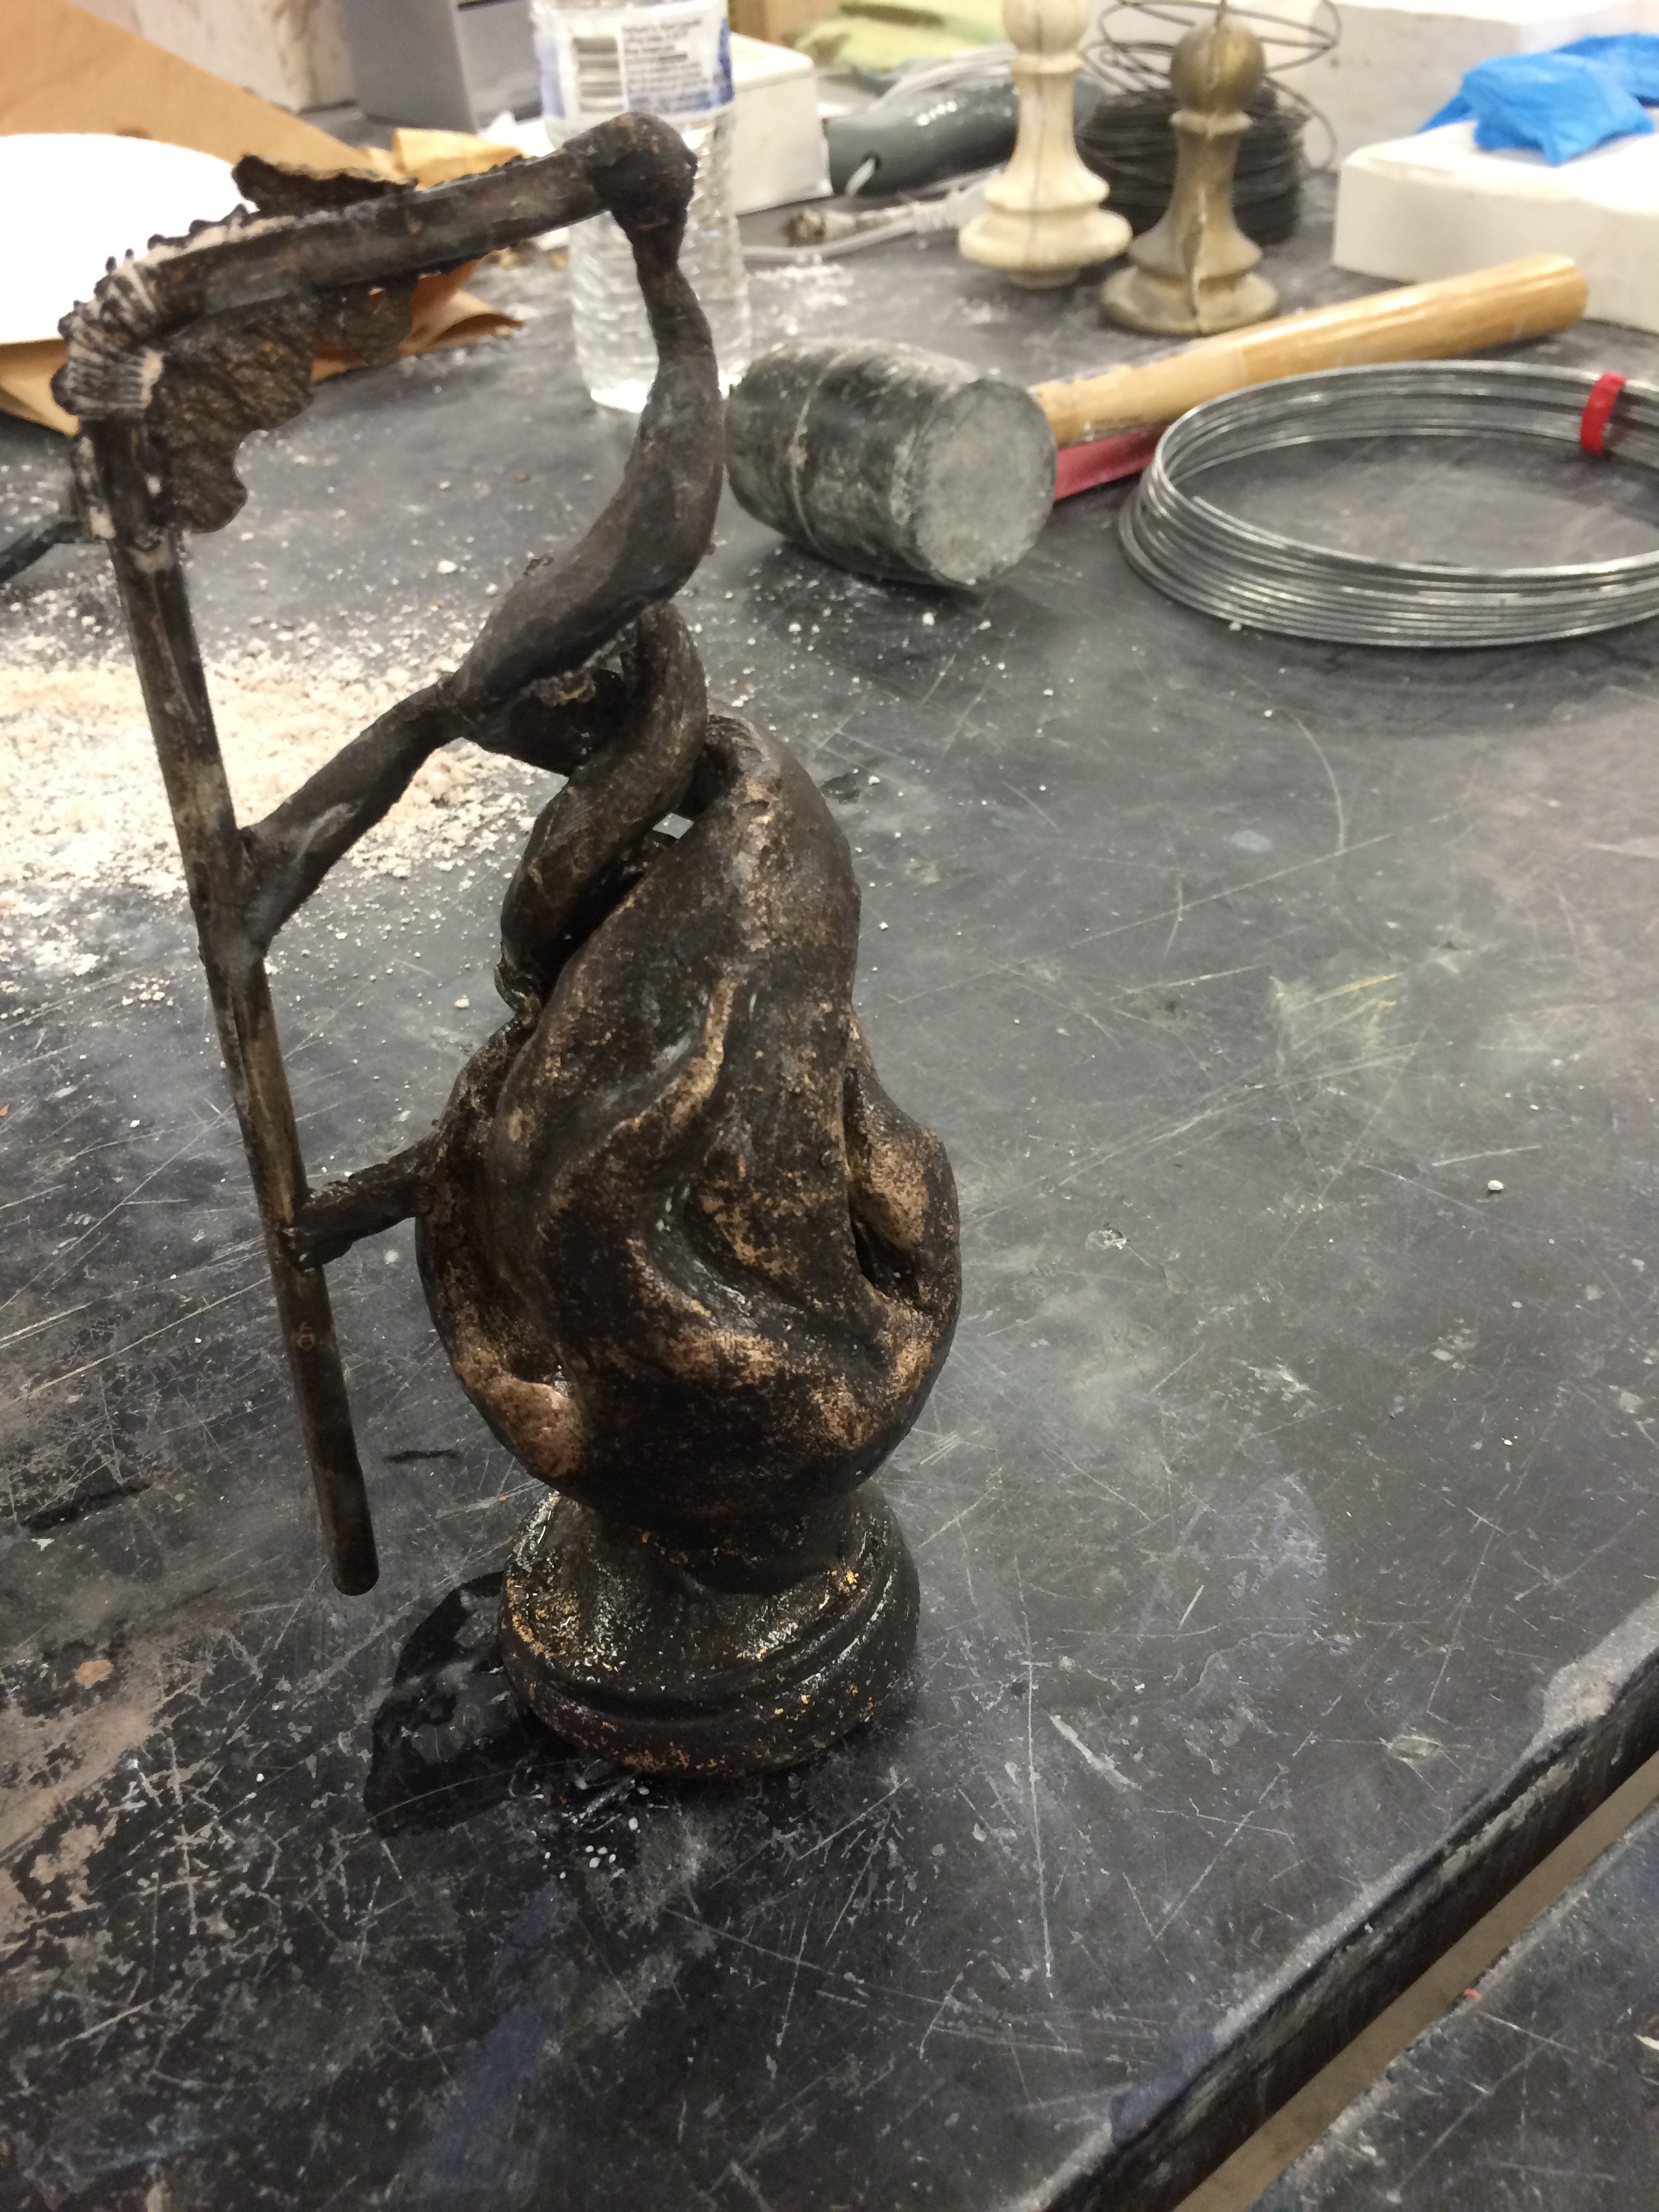
This was the most tedious and time consuming stage of the entire process. To reveal the bronze sculpture hidden inside the plaster mold, you have to break apart the mold and remove every ounce of plaster. My piece is hollow in the center, and to remove all of the plaster, I was only able to use a hose and small sculpting tools. This stage took me about 2-3 hours to complete because there wasn’t an easy access point to remove the plaster from the inside of the form. The picture shown in the gallery below is bronze sculpture when I had removed all of the plaster.
stage 3
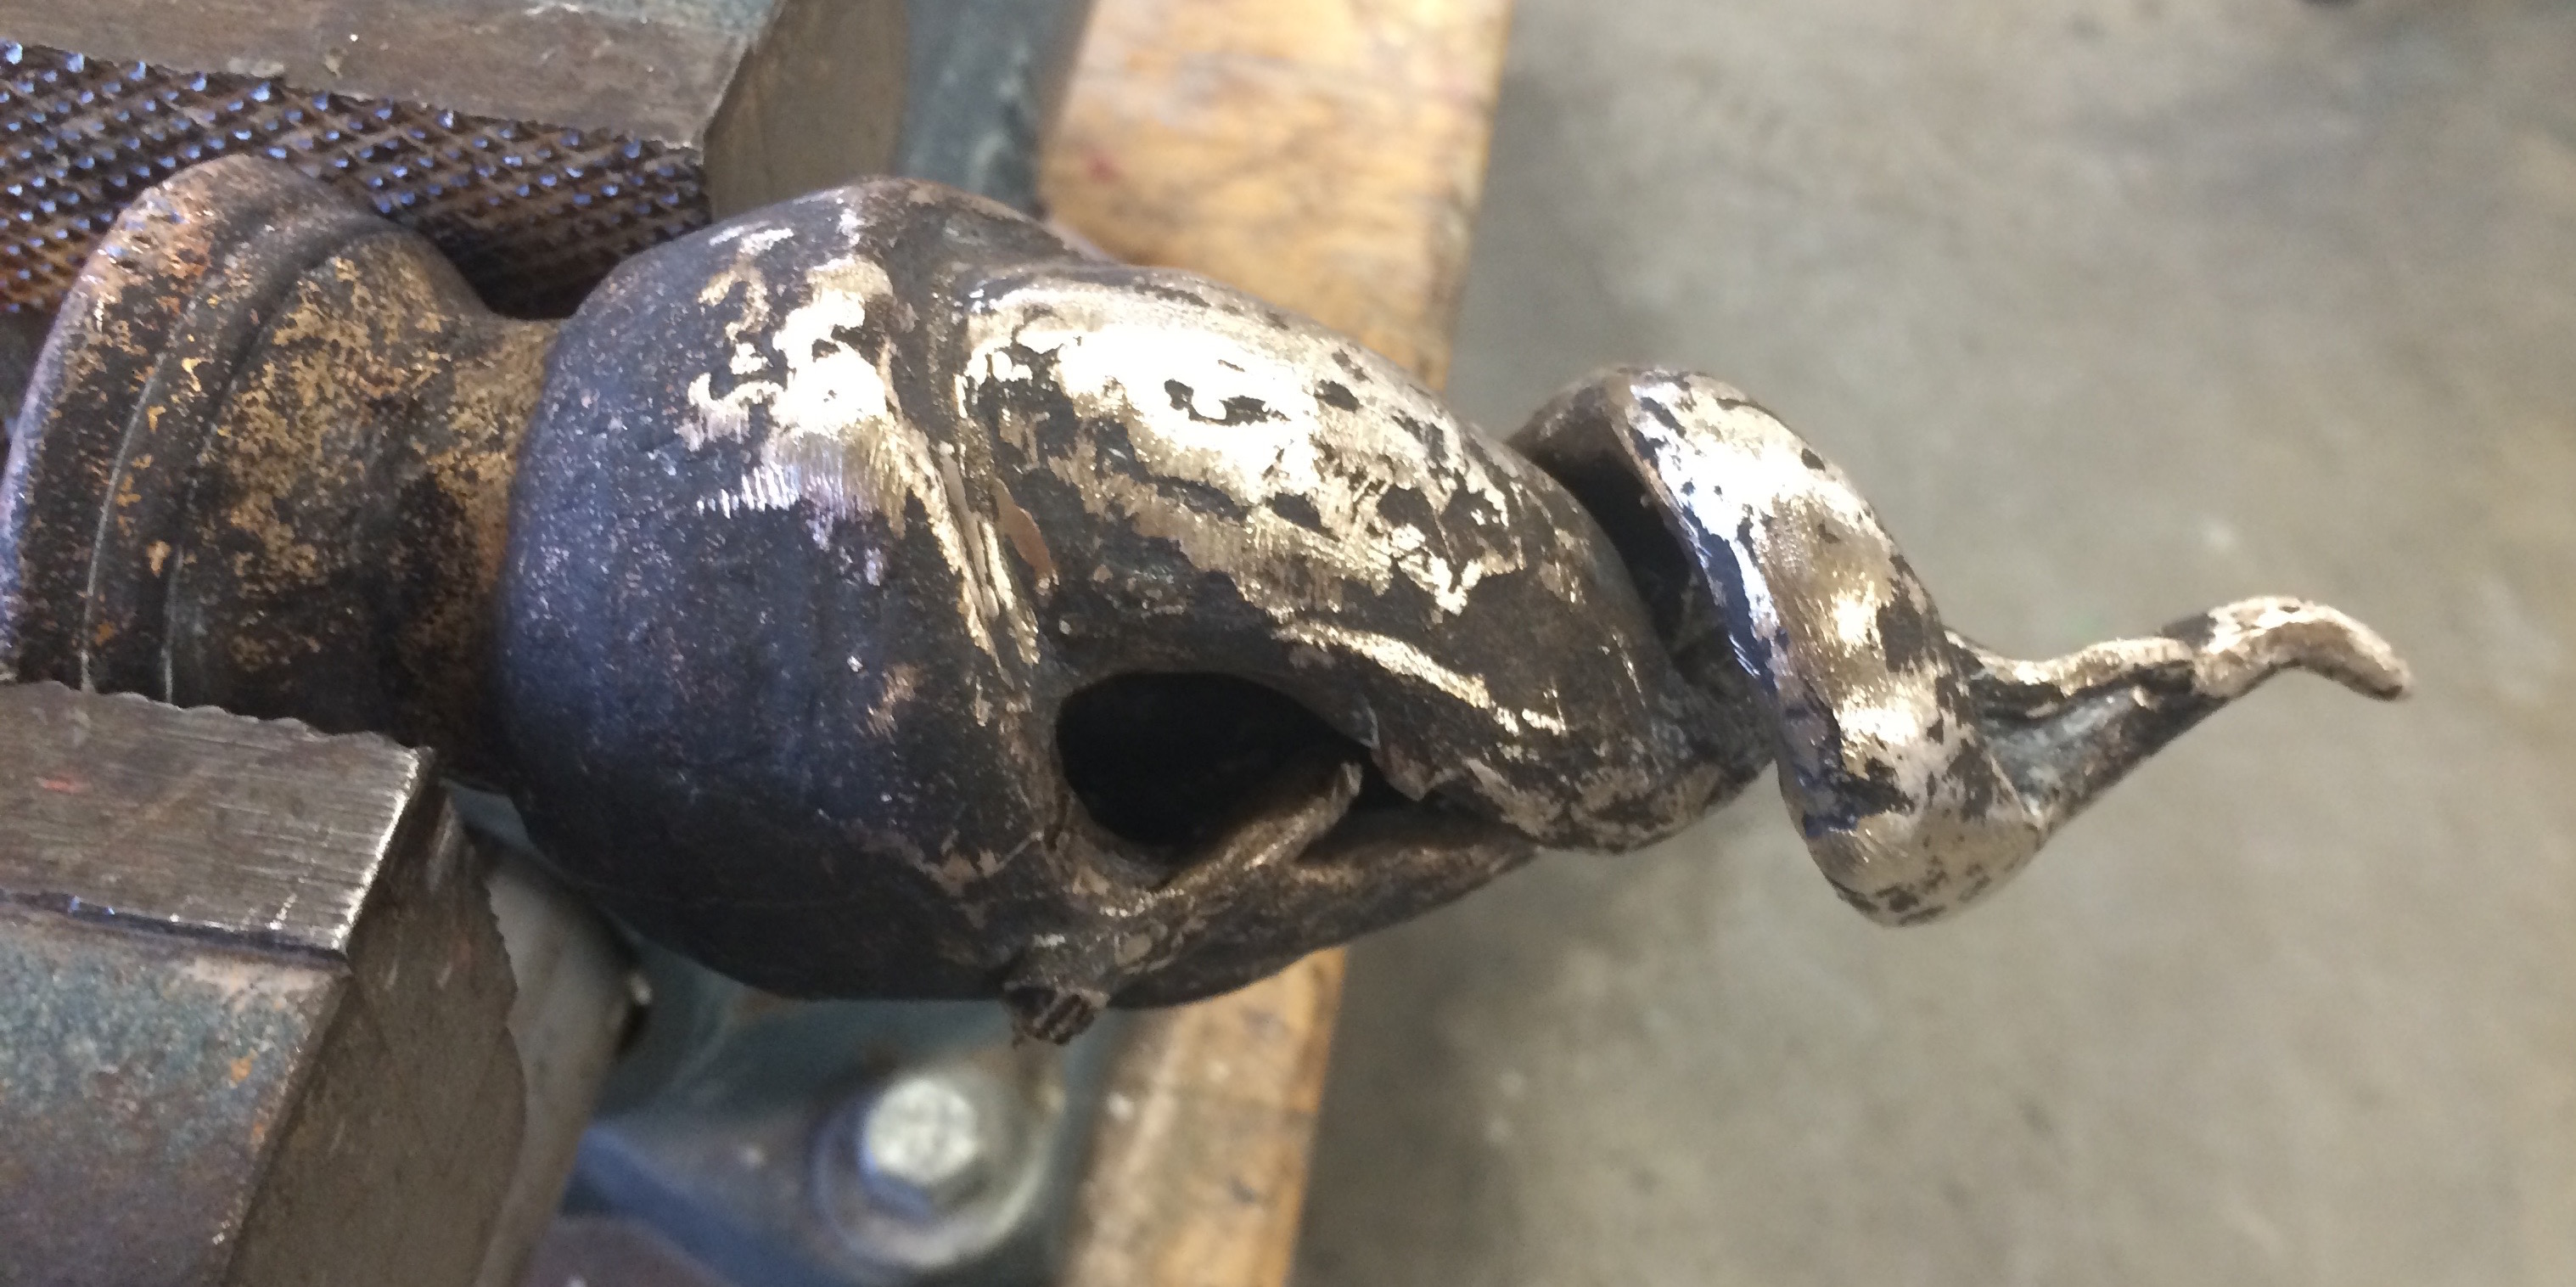
This stage was mainly altering the shape that was extracted from the mold to my desired form. I used chisels, a band-saw, and files to remove the access material. I removed sections of the piece that were required for the casting process that I didn’t want on the form, such as the vents and the pour cup. In the image shown of stage 3, I had the form completely altered and shaped, except for the pour cup.
stage 4
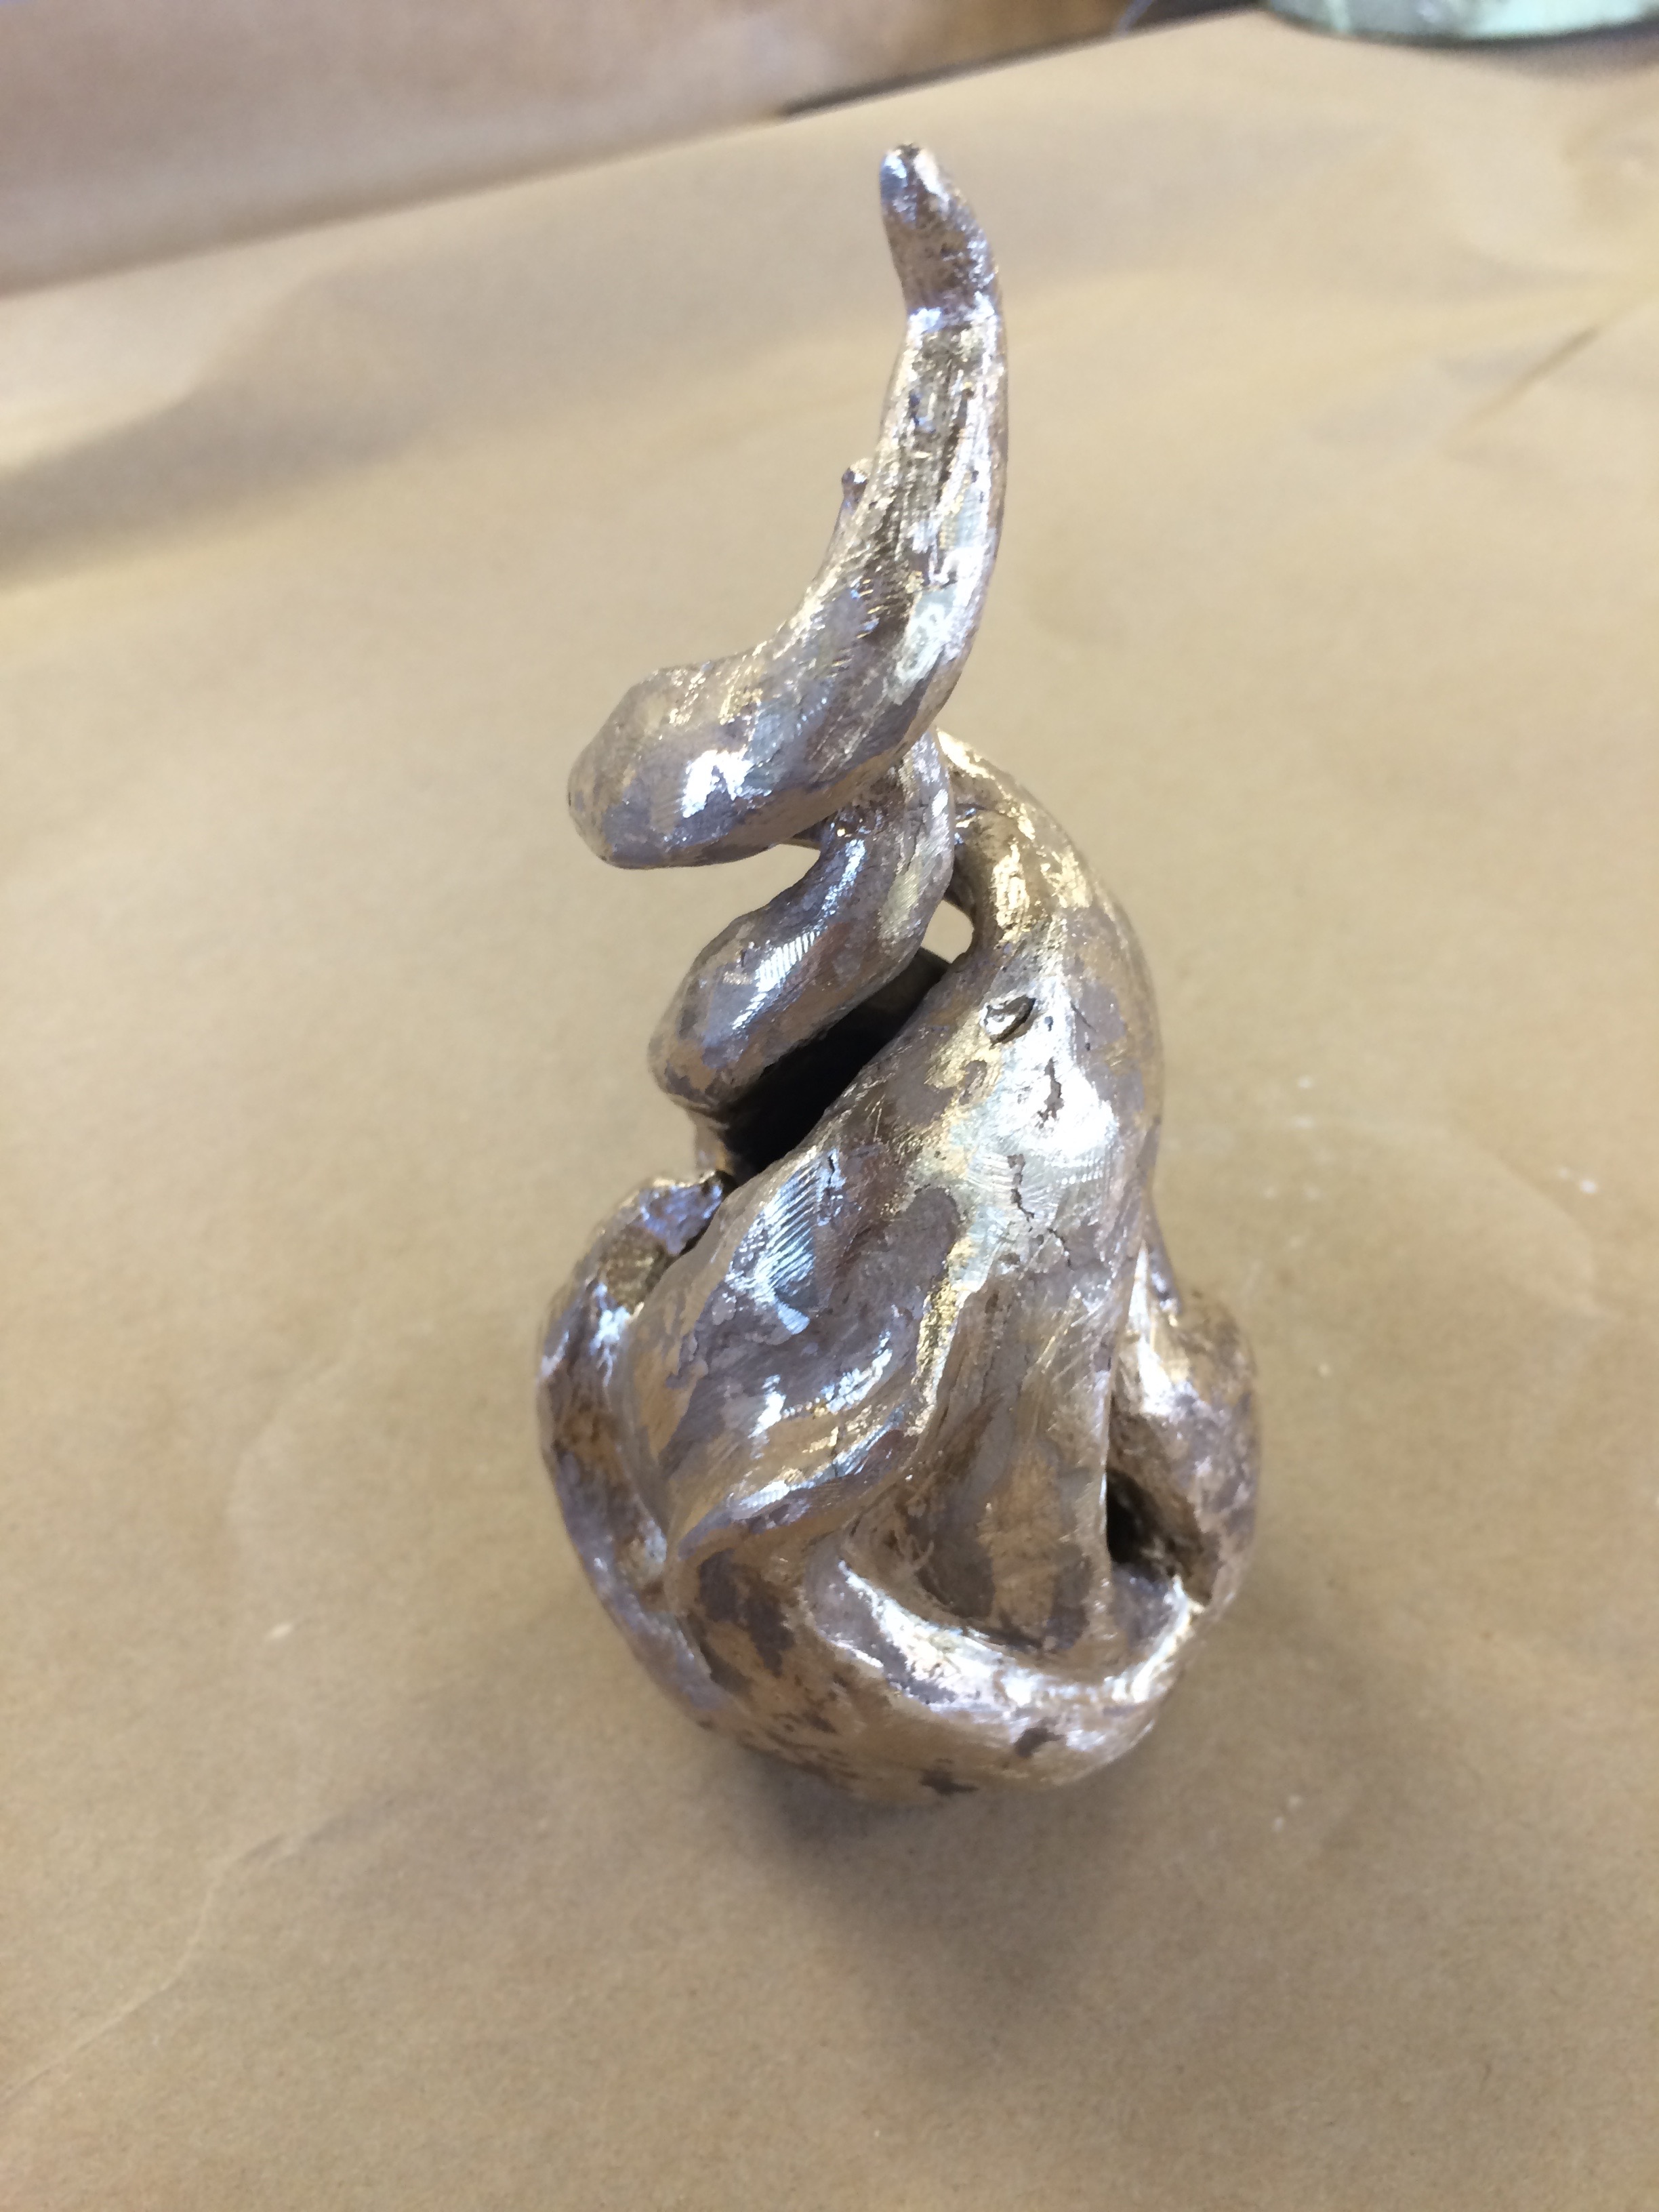
This stage is when the form is sand blasted. Sand blasting forces pressurized air and sand on to the piece; when this is done on a bronze piece, it removes all of the dirt and other particles from the piece. After sand blasting the piece, all of the dirt is removed from the sculpture’s surface and sand is in its place. The sand coats the surface of the bronze piece making it have a tan color and covers any details on the piece.
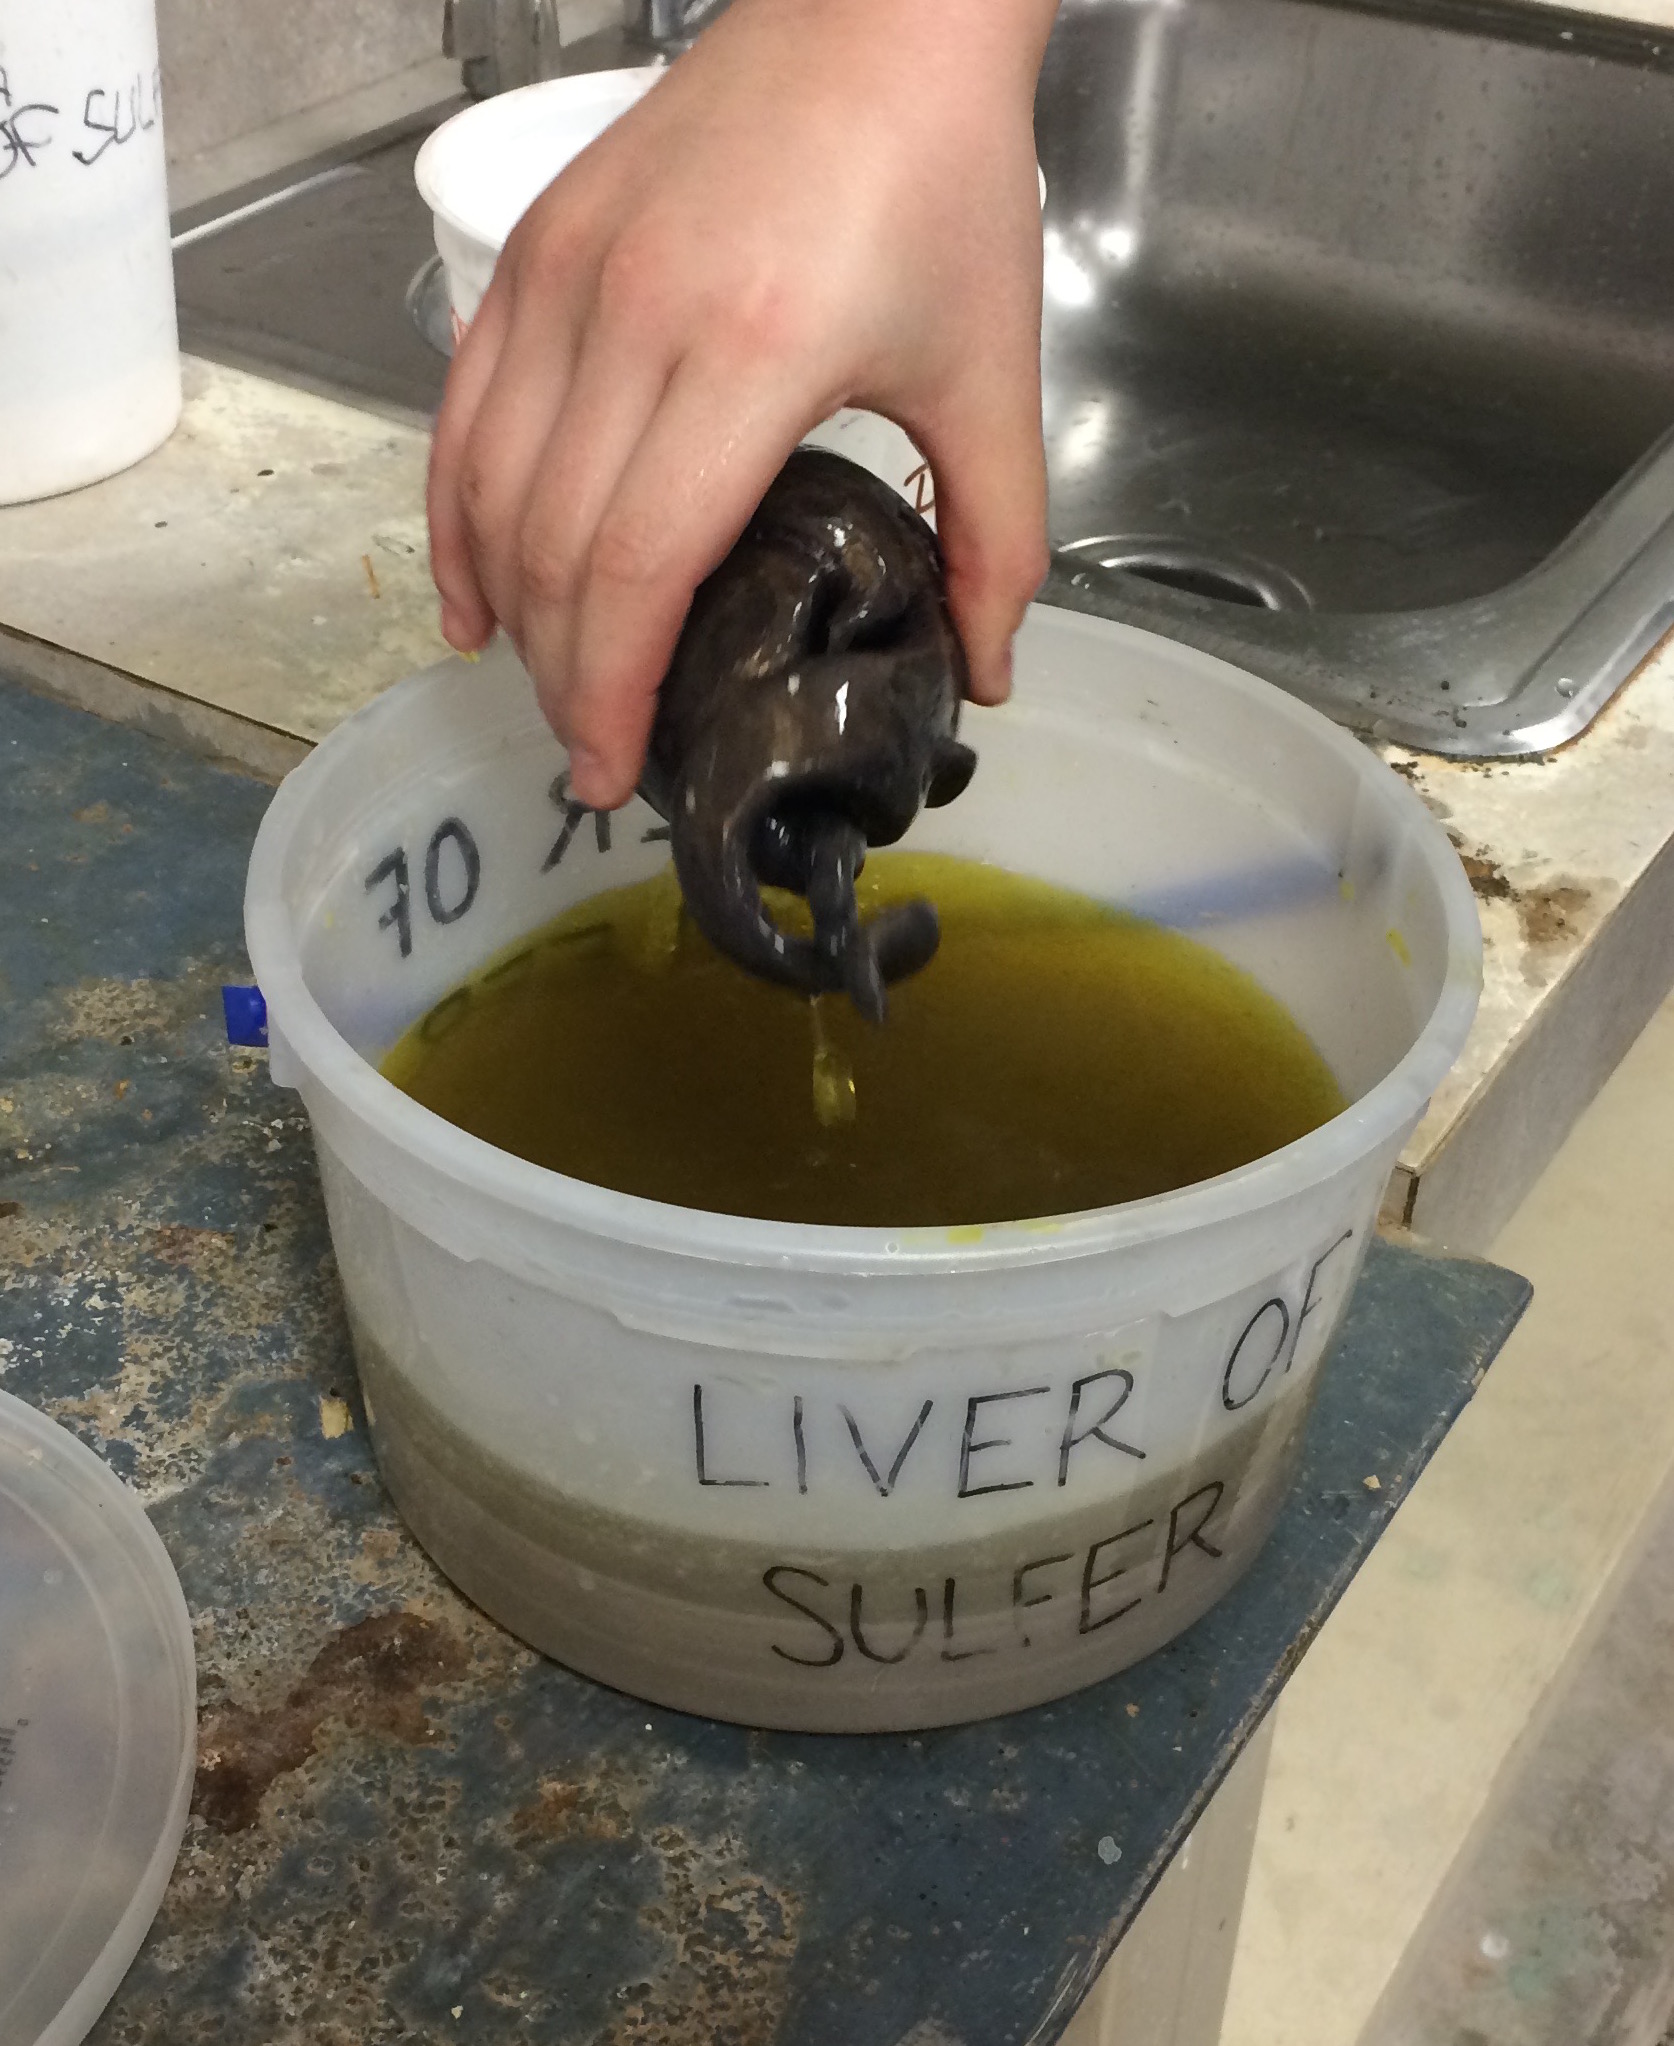
stage 5
This part in the process is when you alter the color of the piece by dipping it into a patina mixture. Patina oxidizes the bronze sculpture, turning it into a darker bronze color. This gives the bronze an aged look, removes the tan color, and reveals the detailed surface of the material.
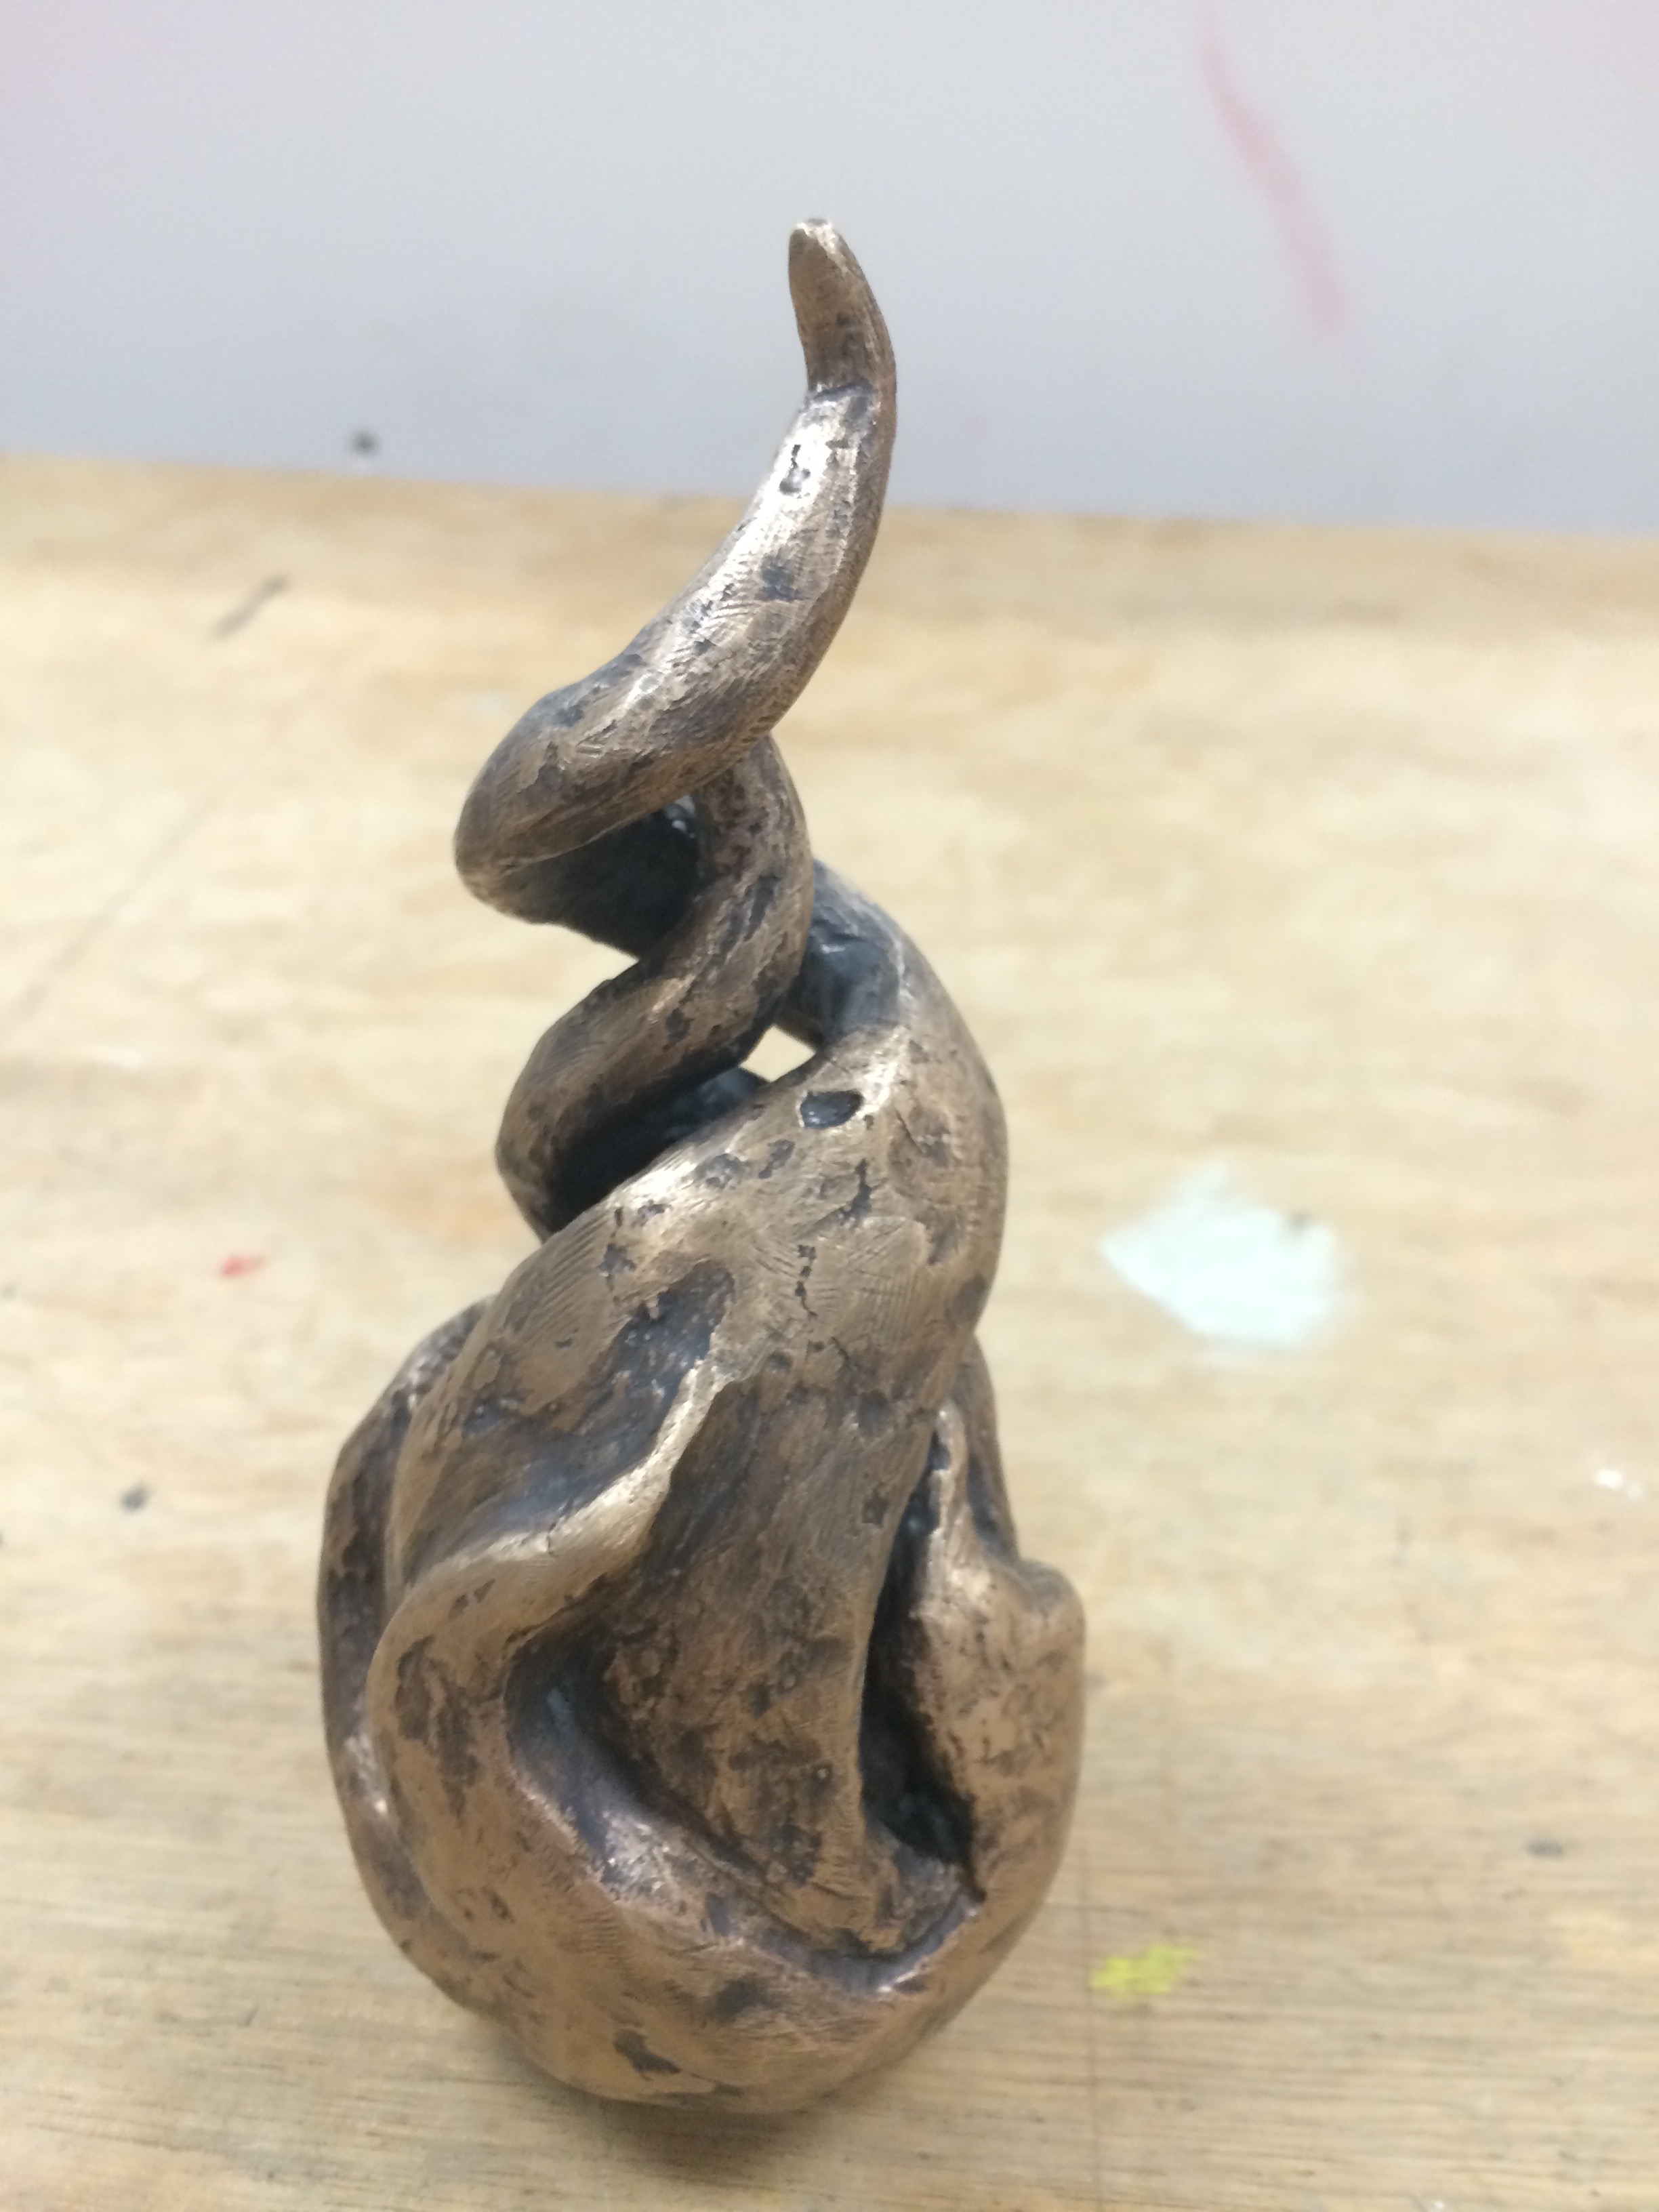
stage 6
This stage is immediately after the piece has been dipped into the patina. This is before any polishing work has been applied. You can see the difference in the sculpture from before and after it was dipped into the patina. The color of the form becomes darker and dulled. At this point, you have to study your piece and determine where there should be highlights and lowlights.
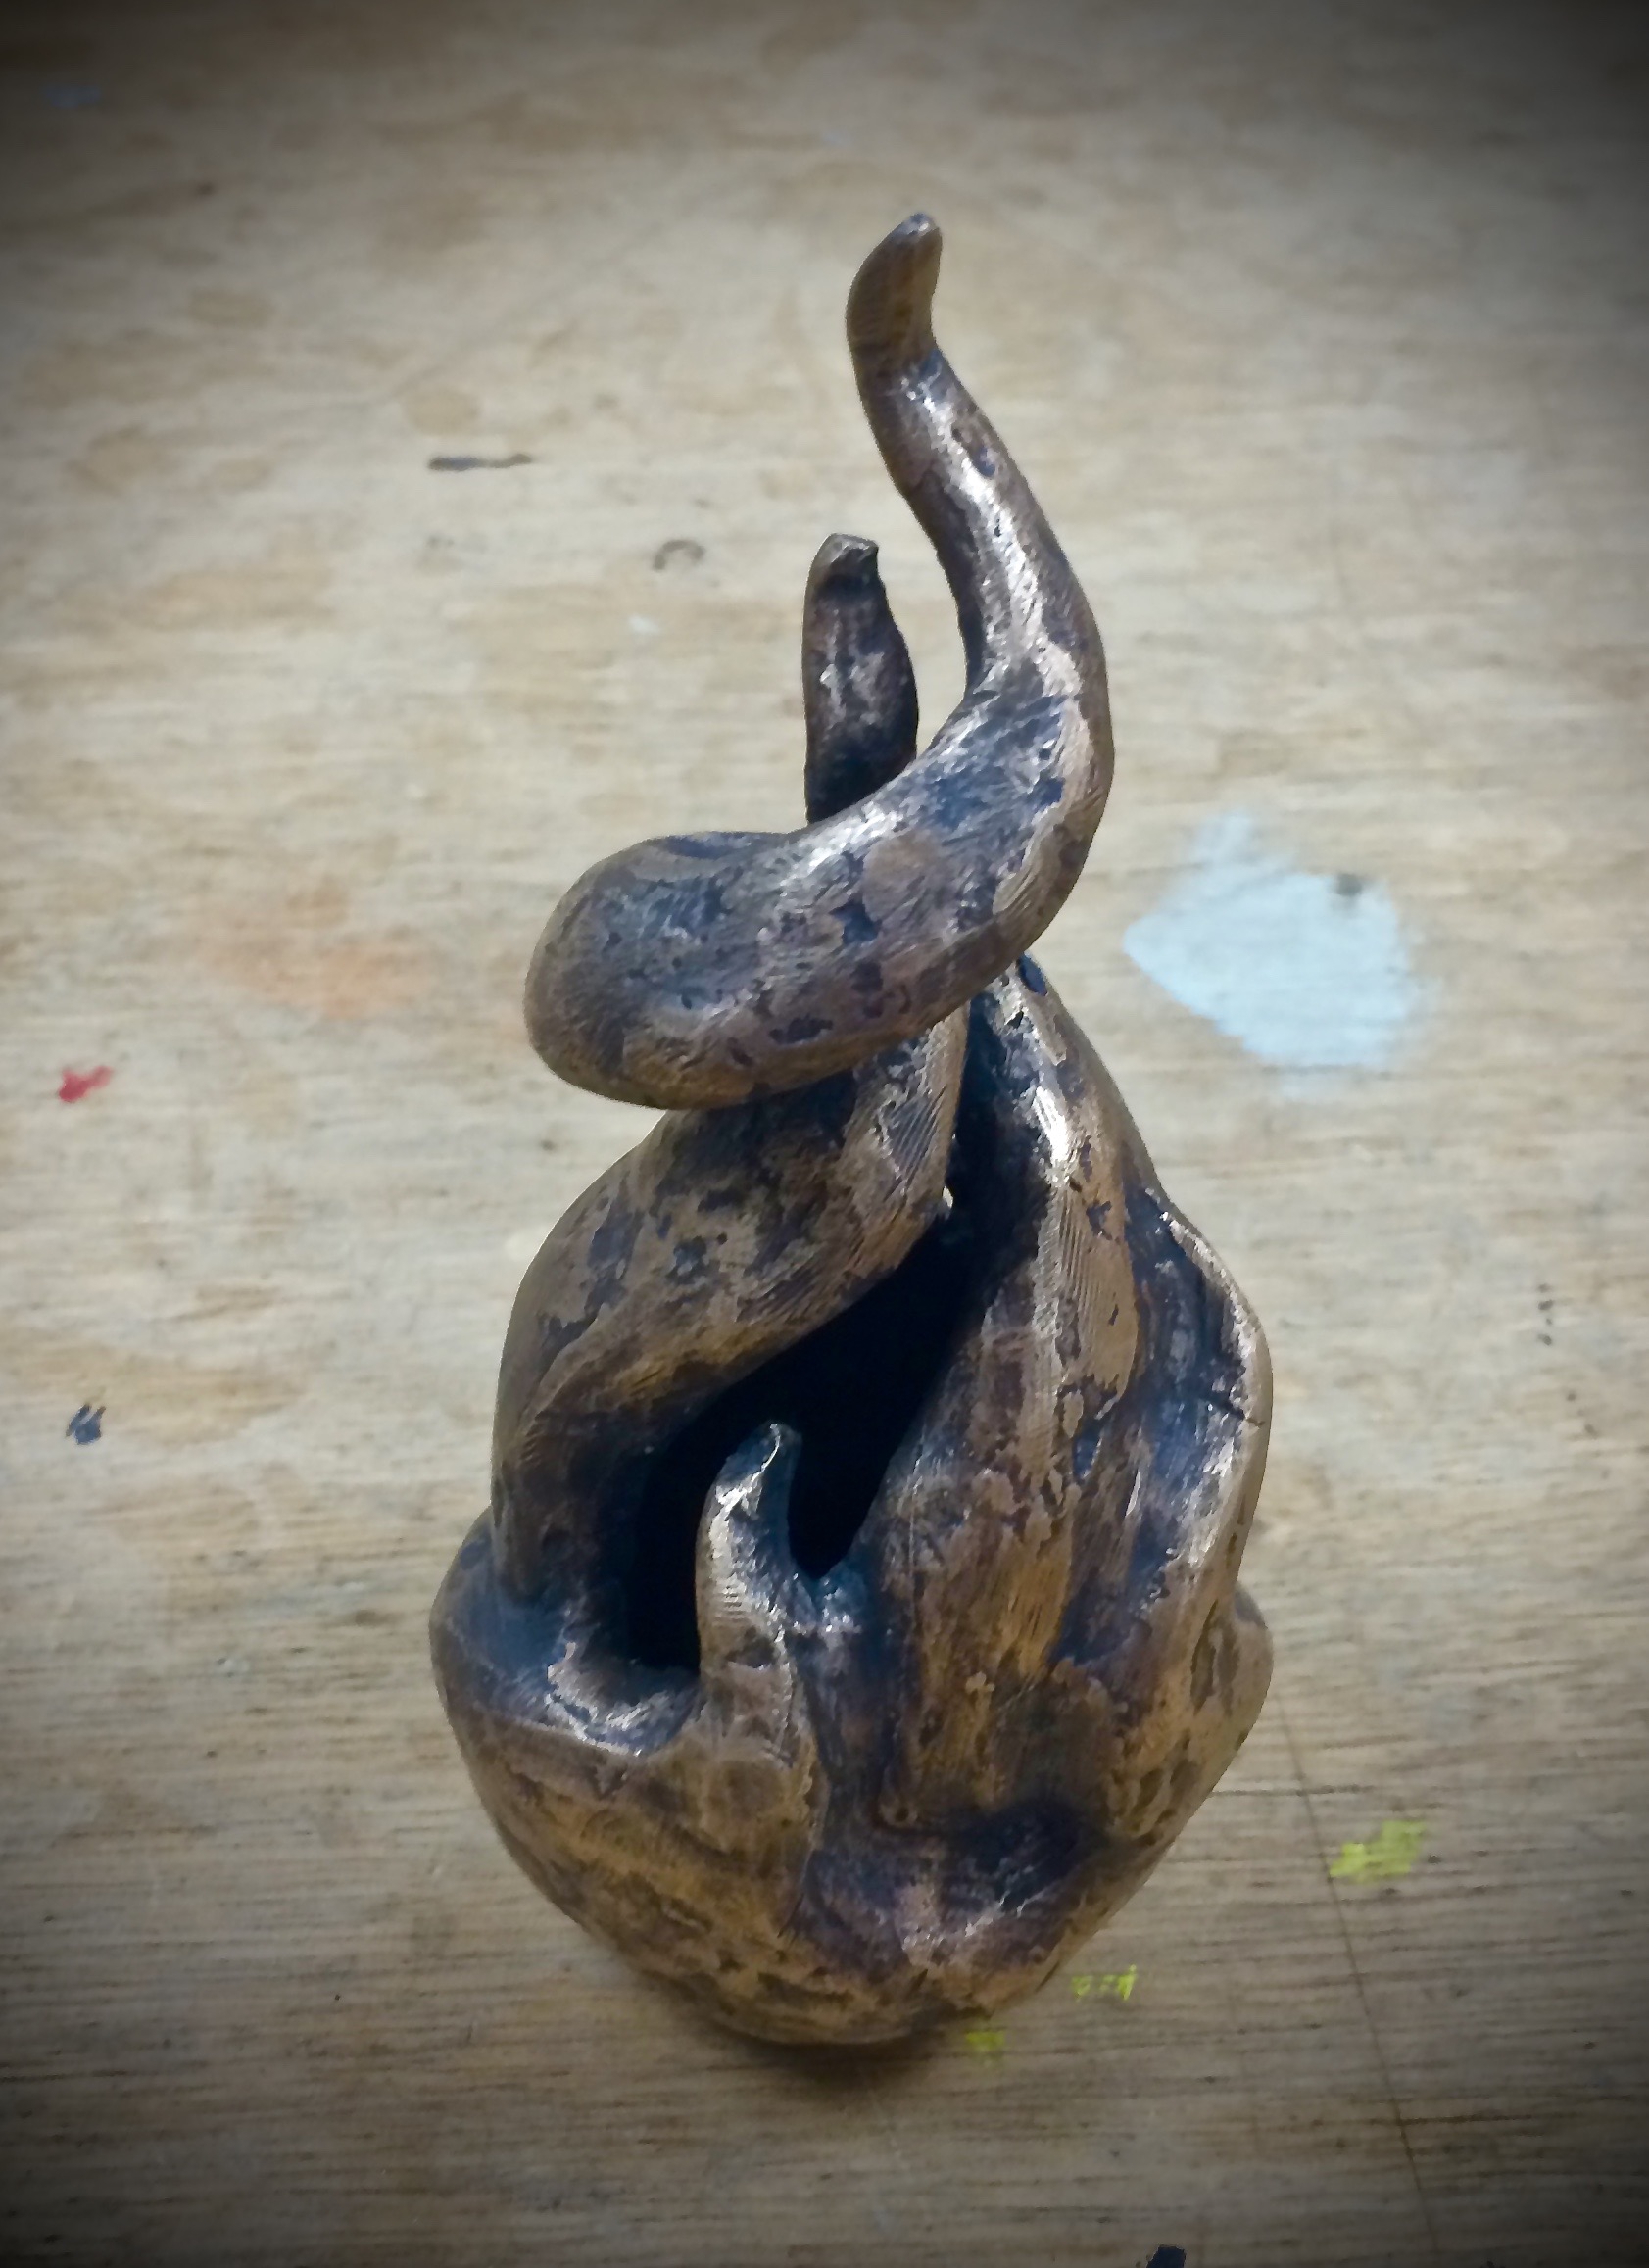
stage 7
This stage is applying final touches to the bronze sculpture. By using the materials, polishing wax, steel wool, and a polishing cloth, you can control what areas are the darkest and the lightest on the form. Adding the wax on to areas will make the darker areas of the form shine and appear darker; areas that you brush with steel wool will expose more of the bronze’s bright, golden surface; and the polishing cloth acts as a buffer, creating a more finished, polished look. Through these techniques, you can create highlights and lowlights, create layers, and more. This process adds the final touches to your bronze sculpture.
I did enjoy this process, but I find much more comfort when working with clay. I am very pleased with the finished sculpture and am glad I had the opportunity to work with this material.