So this past week I was looking on Pinterest and came across a picture of dozens of beautiful ceramic ornaments by a potter named Gary Jackson. With the approaching holidays, I decided to try my hand at throwing some!
As seen in the picture, you call tell that these ornaments are a closed form, without an opening like a regular pot. Throwing these on the wheel seemed like it would be the most efficient way to achieve a round, hollow, closed form. So I got a lump of clay weighing about 4 pounds and started banging these babies out! To throw these I used a technique referred to as throwing off the hump. I centered the entire lump and coned up the clay, and proceeded to make the ornament from only about 1/6 of the clay on the wheel. This technique is very effective for fast, non stop production of pots. The only issue is if you don’t compress the clay enough at the bottom of your pot, “s” cracks may appear in the drying stage (so far all of my ornaments are crack free)! I began throwing the ornament like I would throw a cup, a small cylindrical shape. Once I pulled the clay up as much as I could and got the walls to a consistency I was content with, I collared the top in, and pulled up the extra clay in the neck until I could close the form. After the form was closed I had somewhat of a unicorn horn shape, so then I would use my wooden tool to finish shaping the ornament. Because of the trapped air inside, the clay was very sturdy and responsive to my touch. Once I cut the ornament off, I put it on a bat and poked a small pinhole in the ornament with my needle tool. This helps the drying process, and you can’t fire a piece without a hole in it! It would blow up in the kiln if I forgot this step.
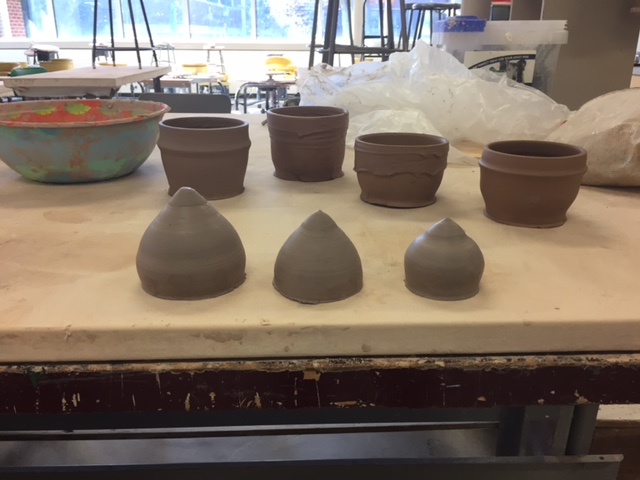
Soon-to-be ornaments freshly thrown (front)
Next I let the ornaments dry out until they were ready to trim. Trimming them wasn’t going to be easy. I wanted to make the “tops” of the ornaments round and bulbous (the to be top of the ornament was the bottom of the piece when I threw it). So in order to do this I had to trim the piece. The ornaments all had elongated pointy bottoms, so I had to make a “chuck” to trim them. A chuck is piece of clay thrown and centered, in which you set your piece in upside down in order to trim it (pictures to follow). The process took a lot of time but I am so excited to see how these come out! Glazing will be the next feat, but for now check out my progress!


