Hello everyone! This week in the printmaking room we were tasked with creating a reduction linocut, and I have never done one before prior to this! A reduction linocut is a relief printmaking technique where a single piece of linoleum (or we used pieces of pbc board) is carved and printed in multiple layers, working progressively from the lightest colors to the darkest. So essentially, you have to work backwards and keep layering each color as you carve more out of the plate. This was really difficult for me to wrap my head around at first, so I digitally created the design I wanted to do and printed it out with the different stages so I knew what to carve for each color.
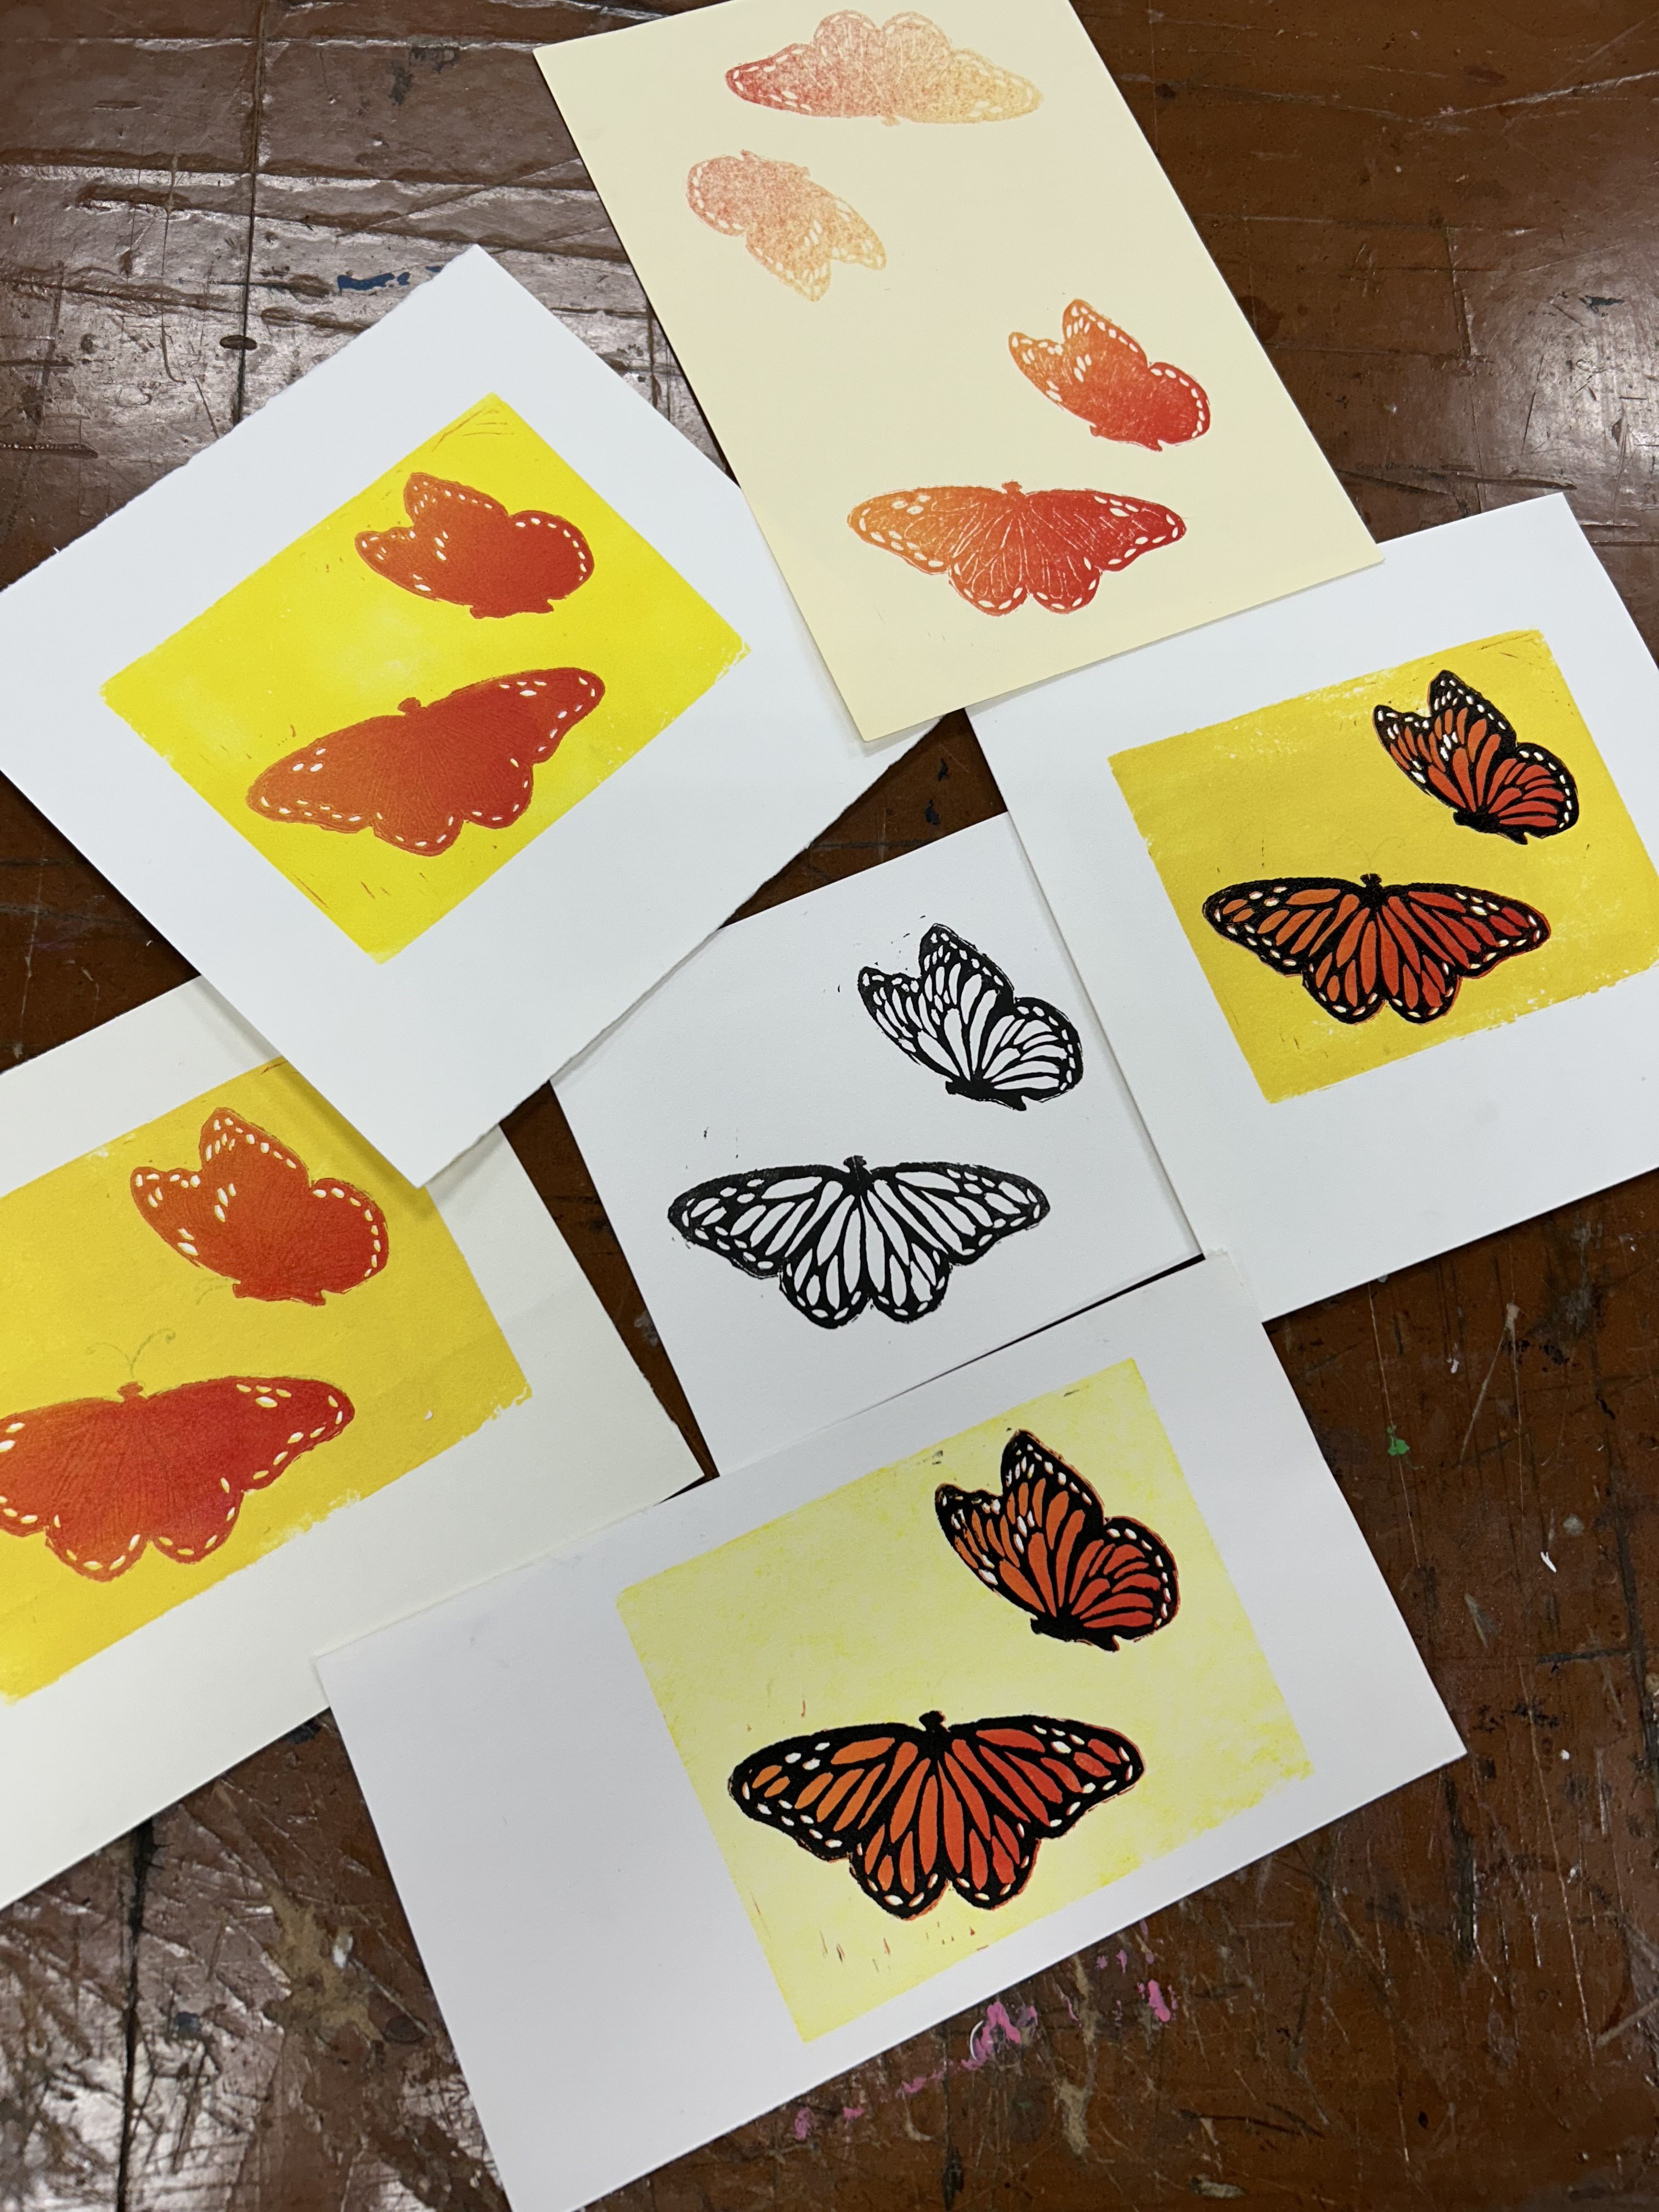
First, you start with the background and whatever you want to be white you carve out. For my design, I wanted to do two butterflies on a yellow background, so all I carved out were some of the spots on the edges of the butterfly to be white. Next, I needed to do the parts of the butterfly that were going to be orange/red, so I carved out the rest of the background and only left the full butterfly shape. This part was really difficult to do on this pbc board material, harder than anything else I’ve ever carved into. Lastly, I carved out the circles of the butterfly so that all I was left with was the outline of the butterfly that was going to be inked up in black. This picture shows all of the stages and it’s final product!

For a reduction linocut, since you are only using one plate, another aspect that had to be considered was registration. You have to make sure the plate goes in the exact same spot on the paper every time, so it was important to create some sort of registration technique to line it up every time. For me, I just used a piece of cardboard cut into an L shape that I lined up the plate against, and where I placed the paper on the edge of the cardboard in the same spot every time. This was working pretty well during my second stage with the orange color, but once I started printing the black on top it was a little difficult to line up and make sure I still had some of the white showing through from the first stage. I got probably 2 perfect prints with the white showing through, but the rest of them were still pretty good.
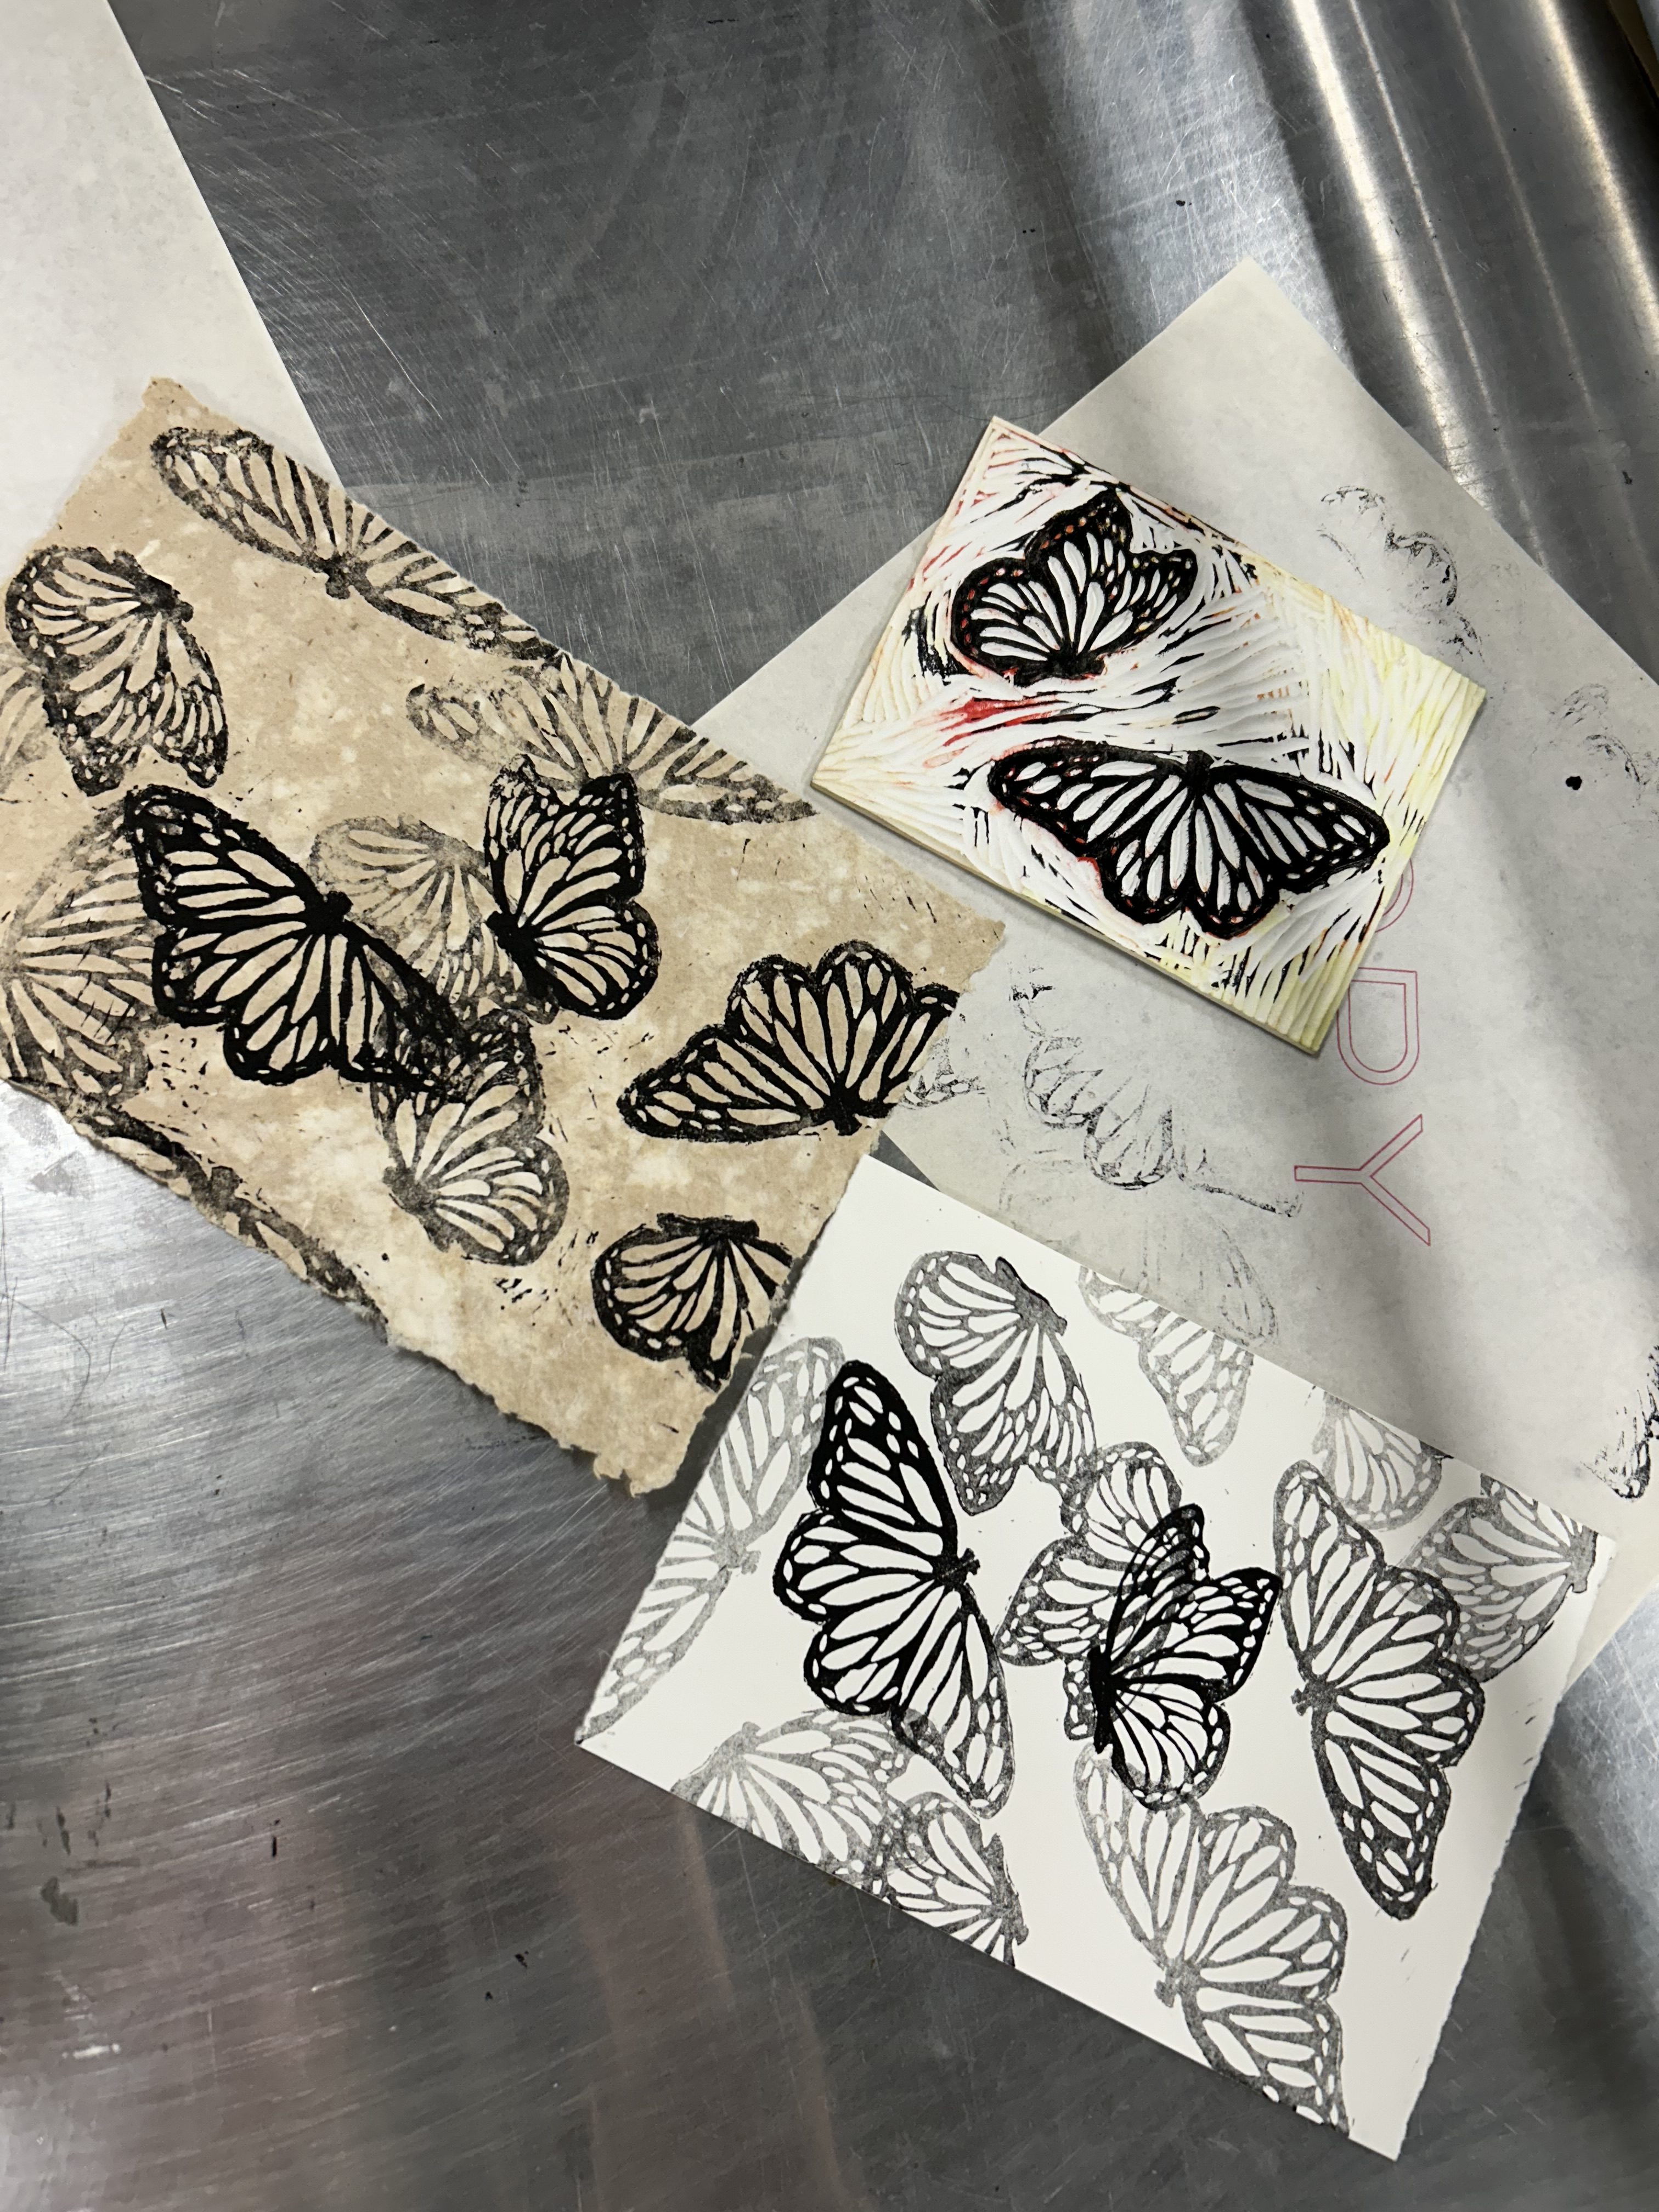
After I finished my layering, I was just playing around with the final stage, and was printing on some of my handmade paper and also experimented with layering! I think all of this came out so cool and I am so satisfied.

Thank you for reading! Next week, we will be working on some blind embossings which will be very cool, so stay tuned! Comment down below which version of the print you like the best!
-Ella 🙂