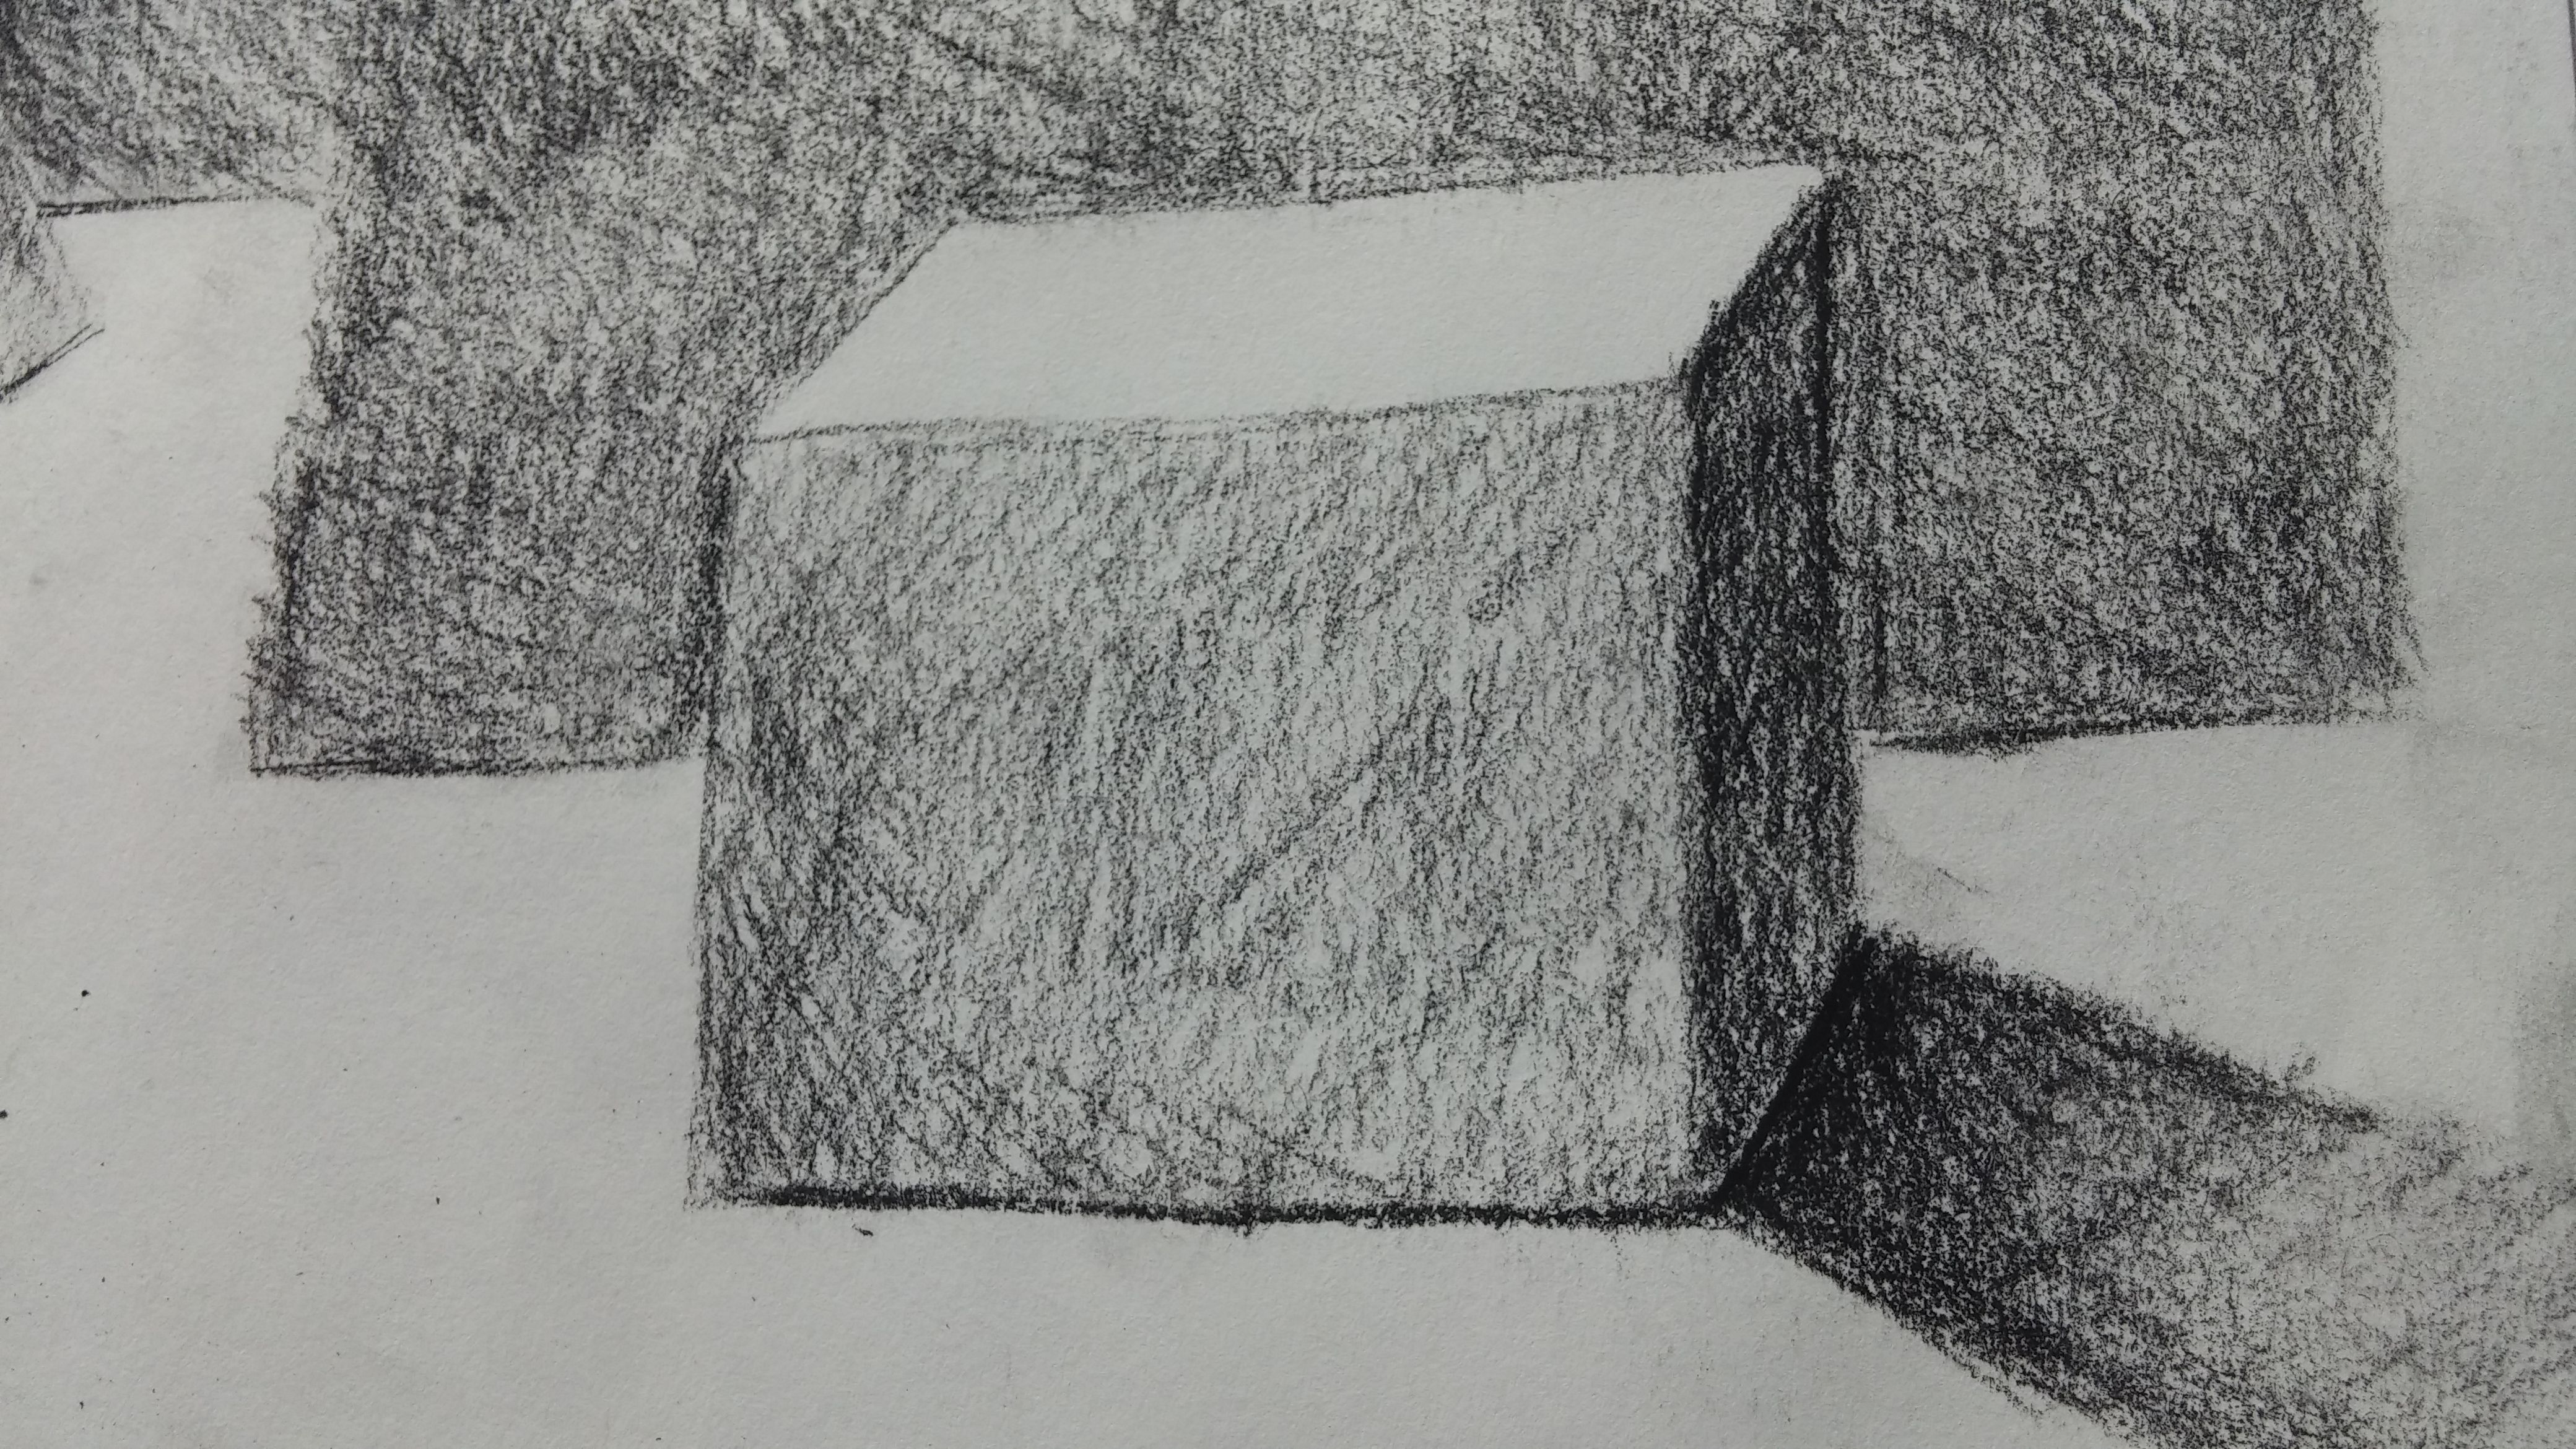
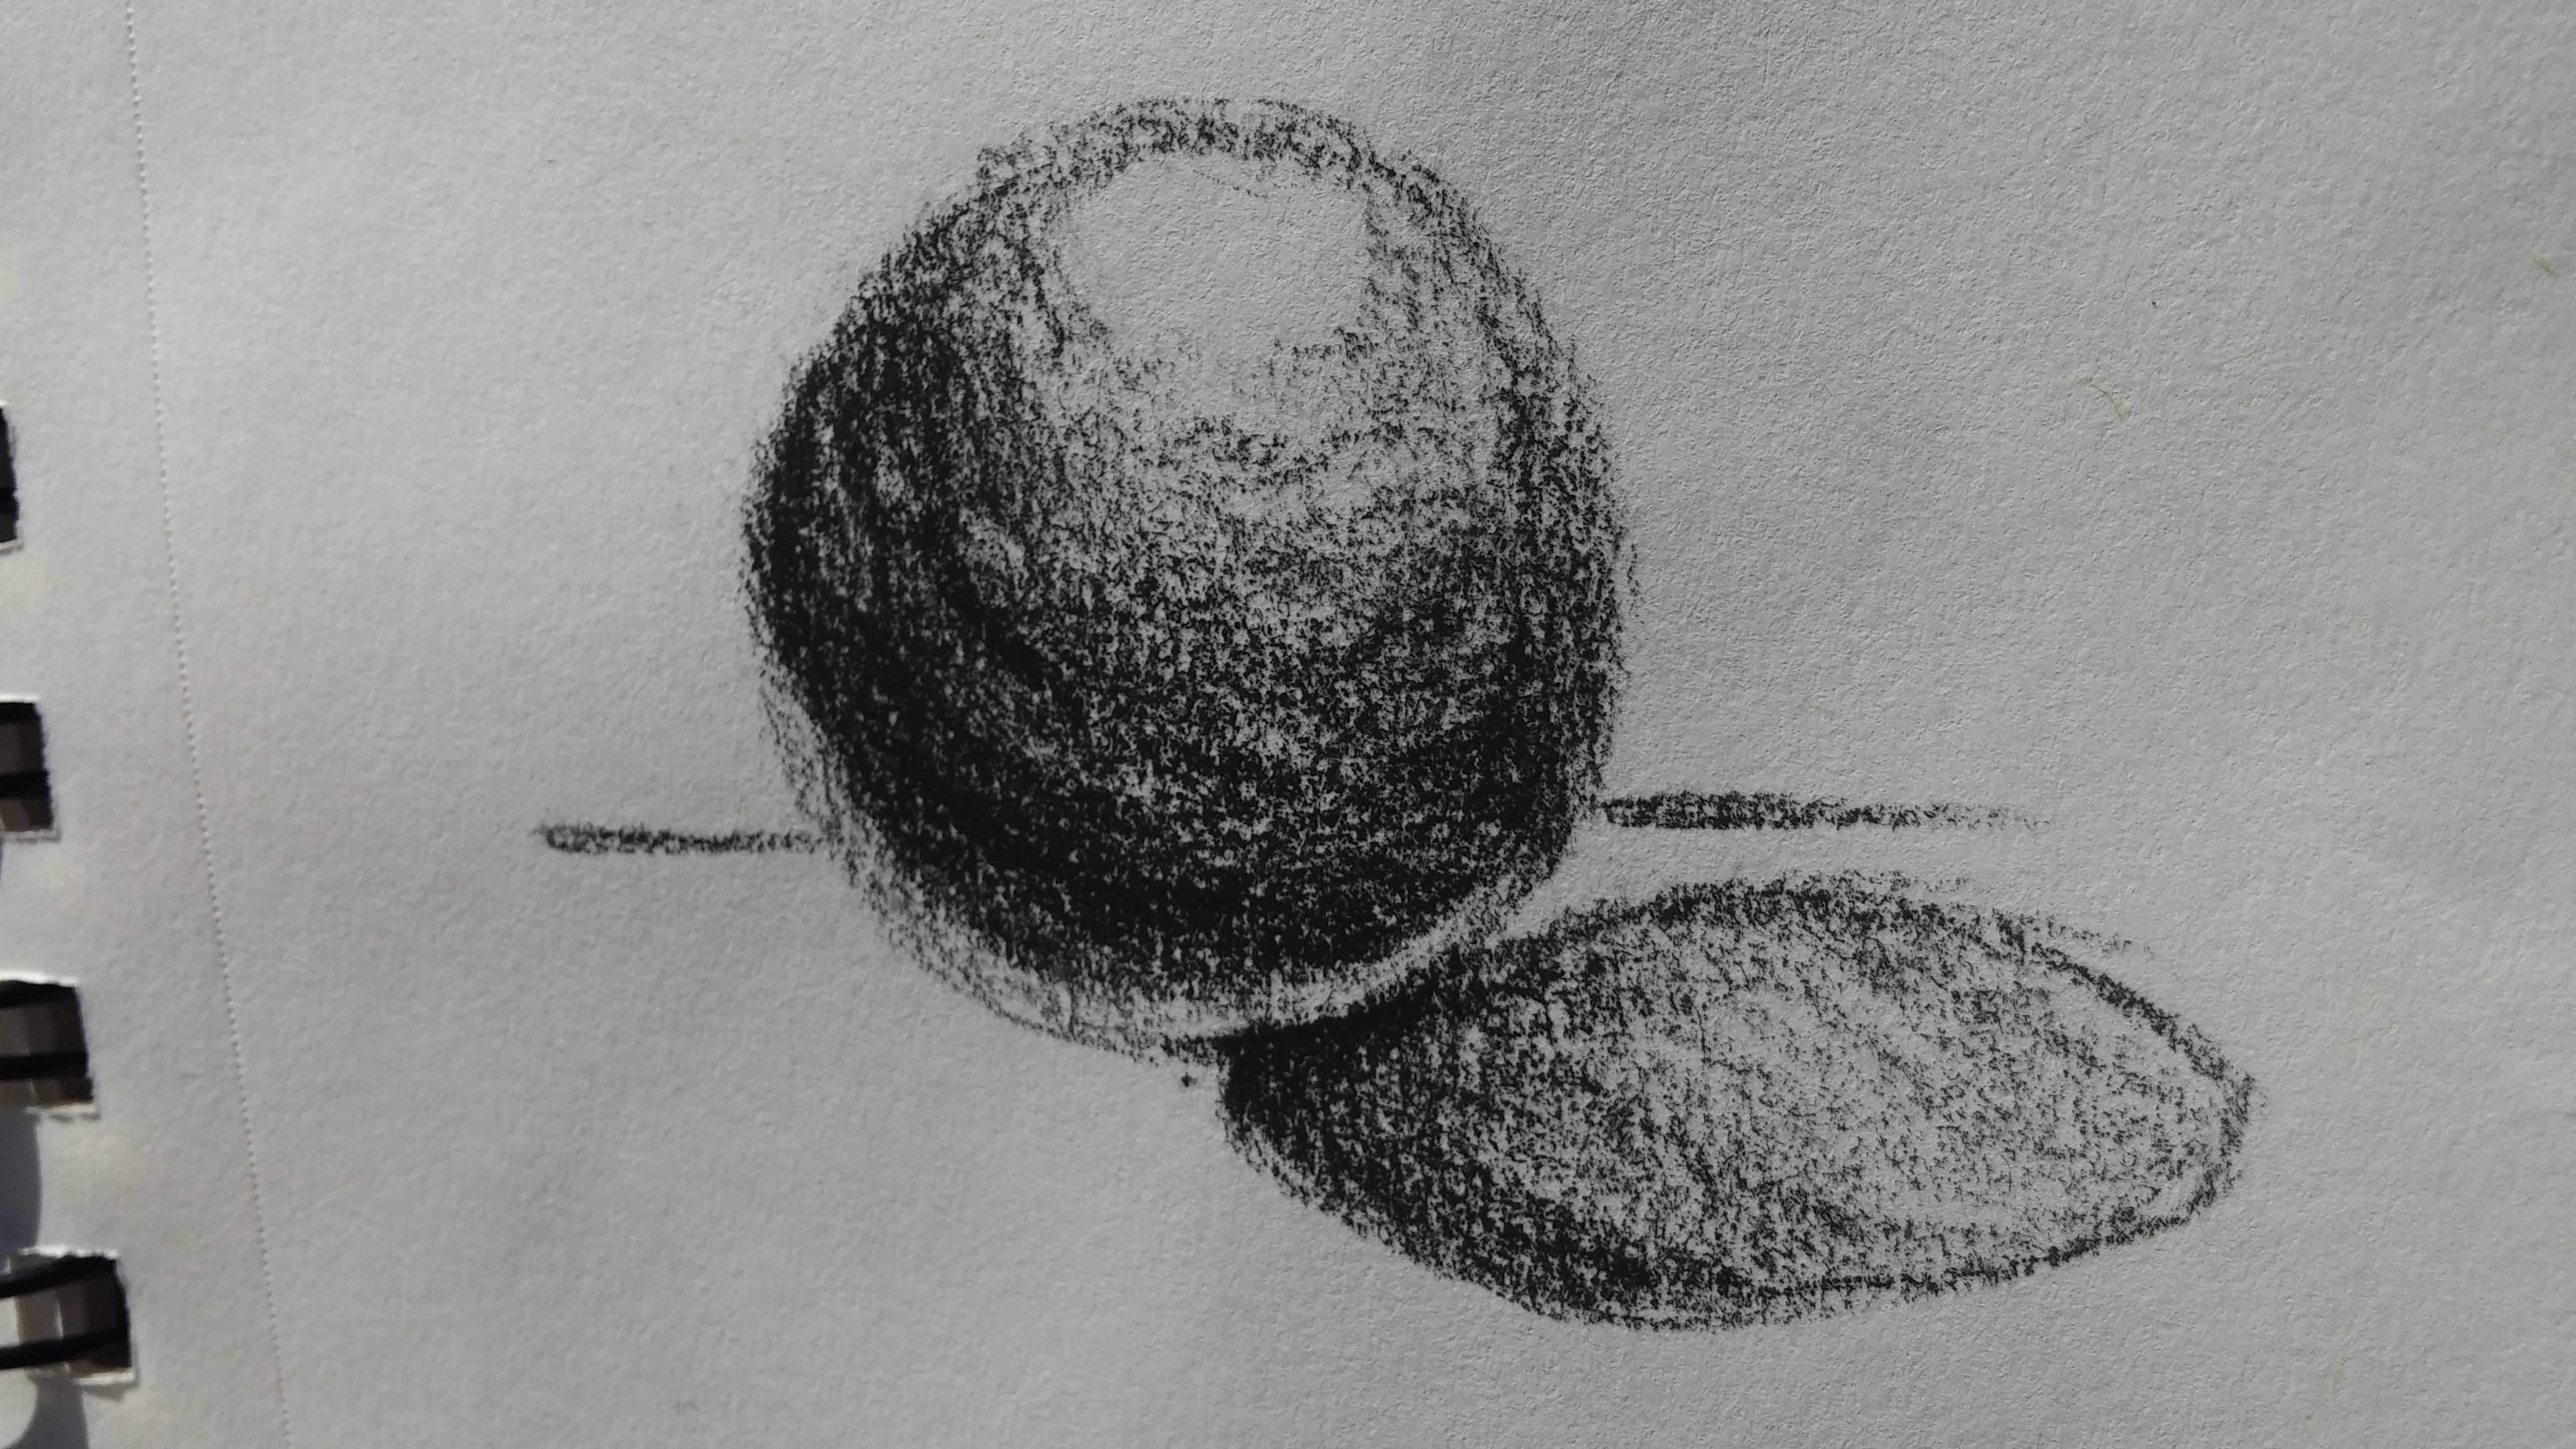
The basics of being able to shade lights and darks in a drawing all start with the basic shapes that can be broken down within object. Once you know how to shade basic three dimensional shapes, drawing from direct observation is so much easier.
Cubes – are the easiest to shade and are the best to begin with. Depending on the light source location, the side closest to it will be the lightest, the furthest side will be the darkest, and the final side showing will be a mid tone. The shadow coming off of the cube will be darkest where the edge of the cube meets the shadow, and will fade the further away it gets.
Spheres – are more challenging but become easier to draw with practice. Spheres have the brightest spot at the top in the direction of the light source. This highlight is a circle that gets darker the further away it gets from the light source, you would draw this with as gradient going around the sphere. Now light also reflects around the sphere at the furthest point away from the light source, so there would need to be a highlight there as well. The shadow faces away from the light source and is ovalish in shape and is also darkest where it meets the sphere.
Pyramids – are probably just as easy as cubes are, the side closest to the light source is the brightest and the one facing away is slightly darker. The shadow would appear as a triangle in the opposite direct of the light source and is darkest at the edge of the pyramid.
