Welcome back! Didn’t get enough teapot talk last week? Then that makes two of us. (Well, between you and me, let’s hope that more than just the two of us are reading this post.) Let’s start with a little recap…
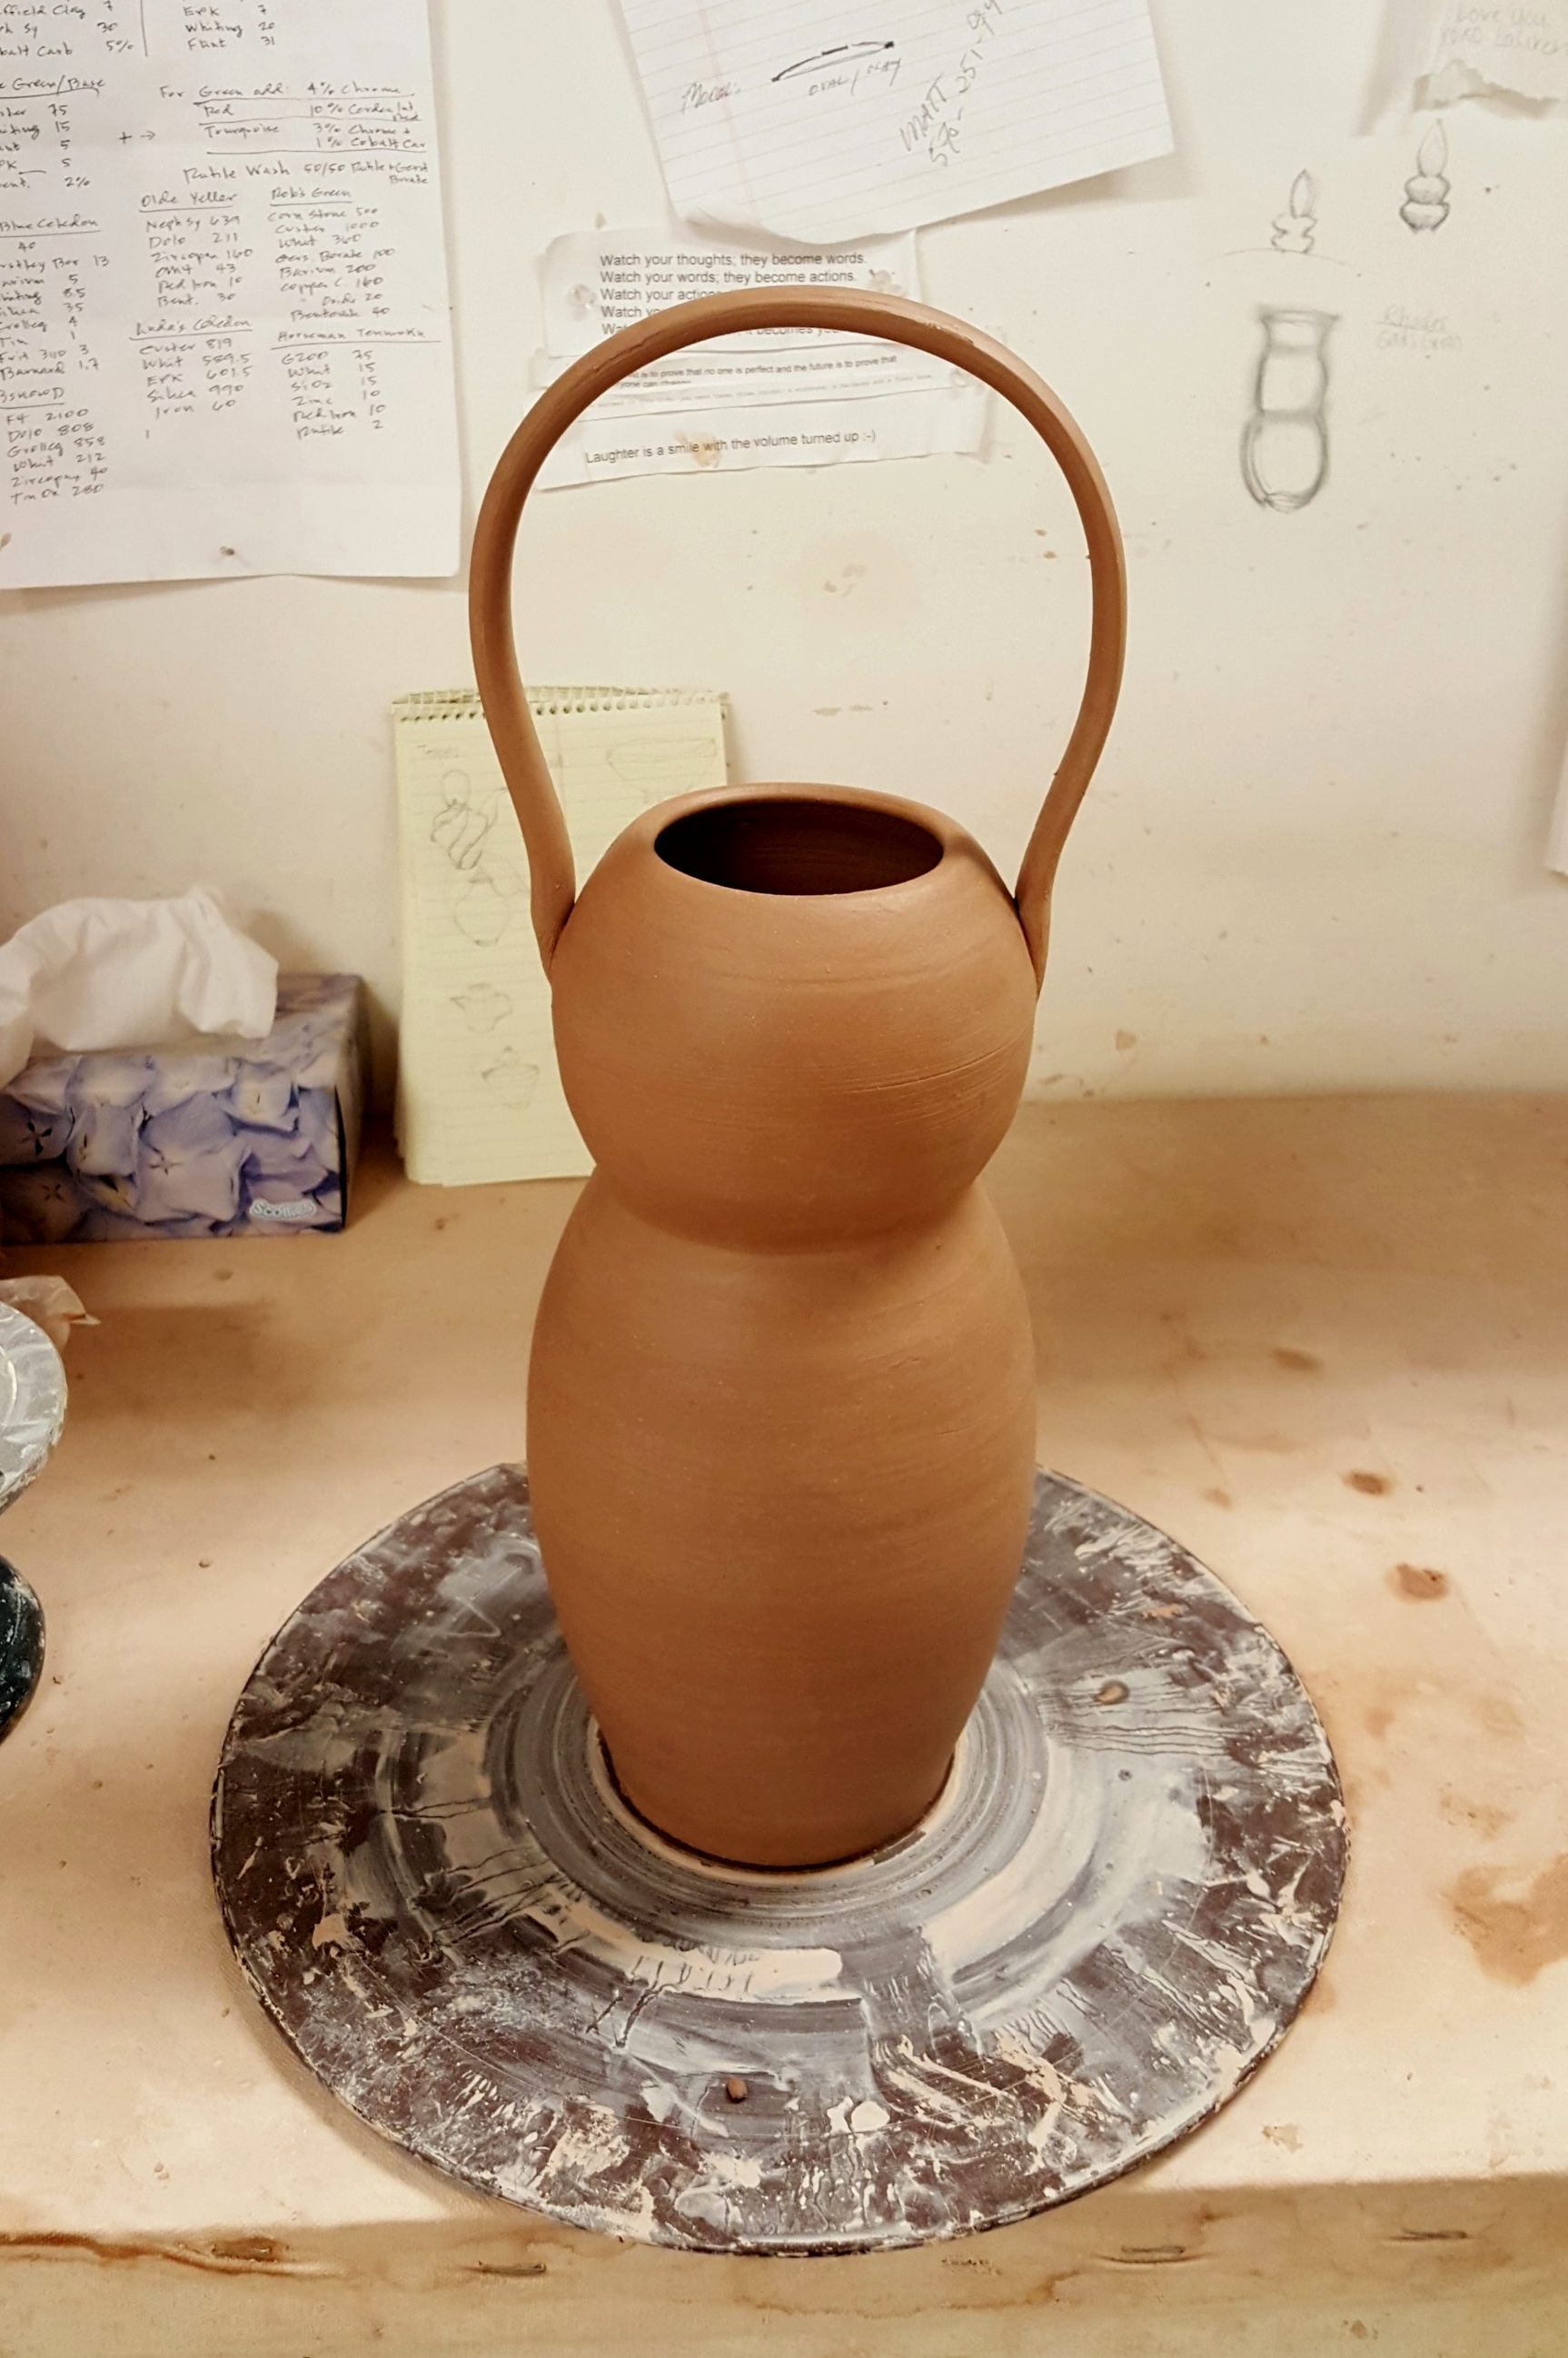
Last week, I mentioned I had been assigned a second project by my ceramics professor to construct a teapot, with almost no further specifications or requirements. Additionally, I considered form; I do love the traditional teapot form, but I also have a propensity to gravitate toward larger pieces and whimsical work. So I was left with a wide range of directions to go in, but I wanted to use the opportunity to challenge myself. I have often found in my studio that throwing taller pieces is much more challenging than throwing a lower profile vessel. A potter has a tendency, as an inherently flawed human, to lean away from center as he or she pinches and lift the walls of a pot. Lifting walls also becomes more challenging as a piece grows taller because it is more difficult to force one’s hands to work in tandem. No longer can a potter connect his or her hands for strength and stability if a tall wall is creating a barrier. So naturally, I decided to make a tall teapot.
I had also seen on other pottery blogs some interesting techniques for creating handles. I love perfectly circular handles that bend over the top of teapots, but stretching a strap of extremely wet clay would never sustain its own shape even after it dried. So I got an idea from Fine Mess Pottery where this artist chose to drape her handle over a roll of toilet paper resting on its side for support! How genius is that?
Luckily, when I tried my hand at the TP technique, my professor saw my innovative (or borrowed) method and reminded me that clay shrinks, meaning remove the roll sooner rather than later. I came very close to having to break my handle to release the roll of toilet paper I was using, or worse – it could have cracked on its own from too much pressure as the shrinkage continued.
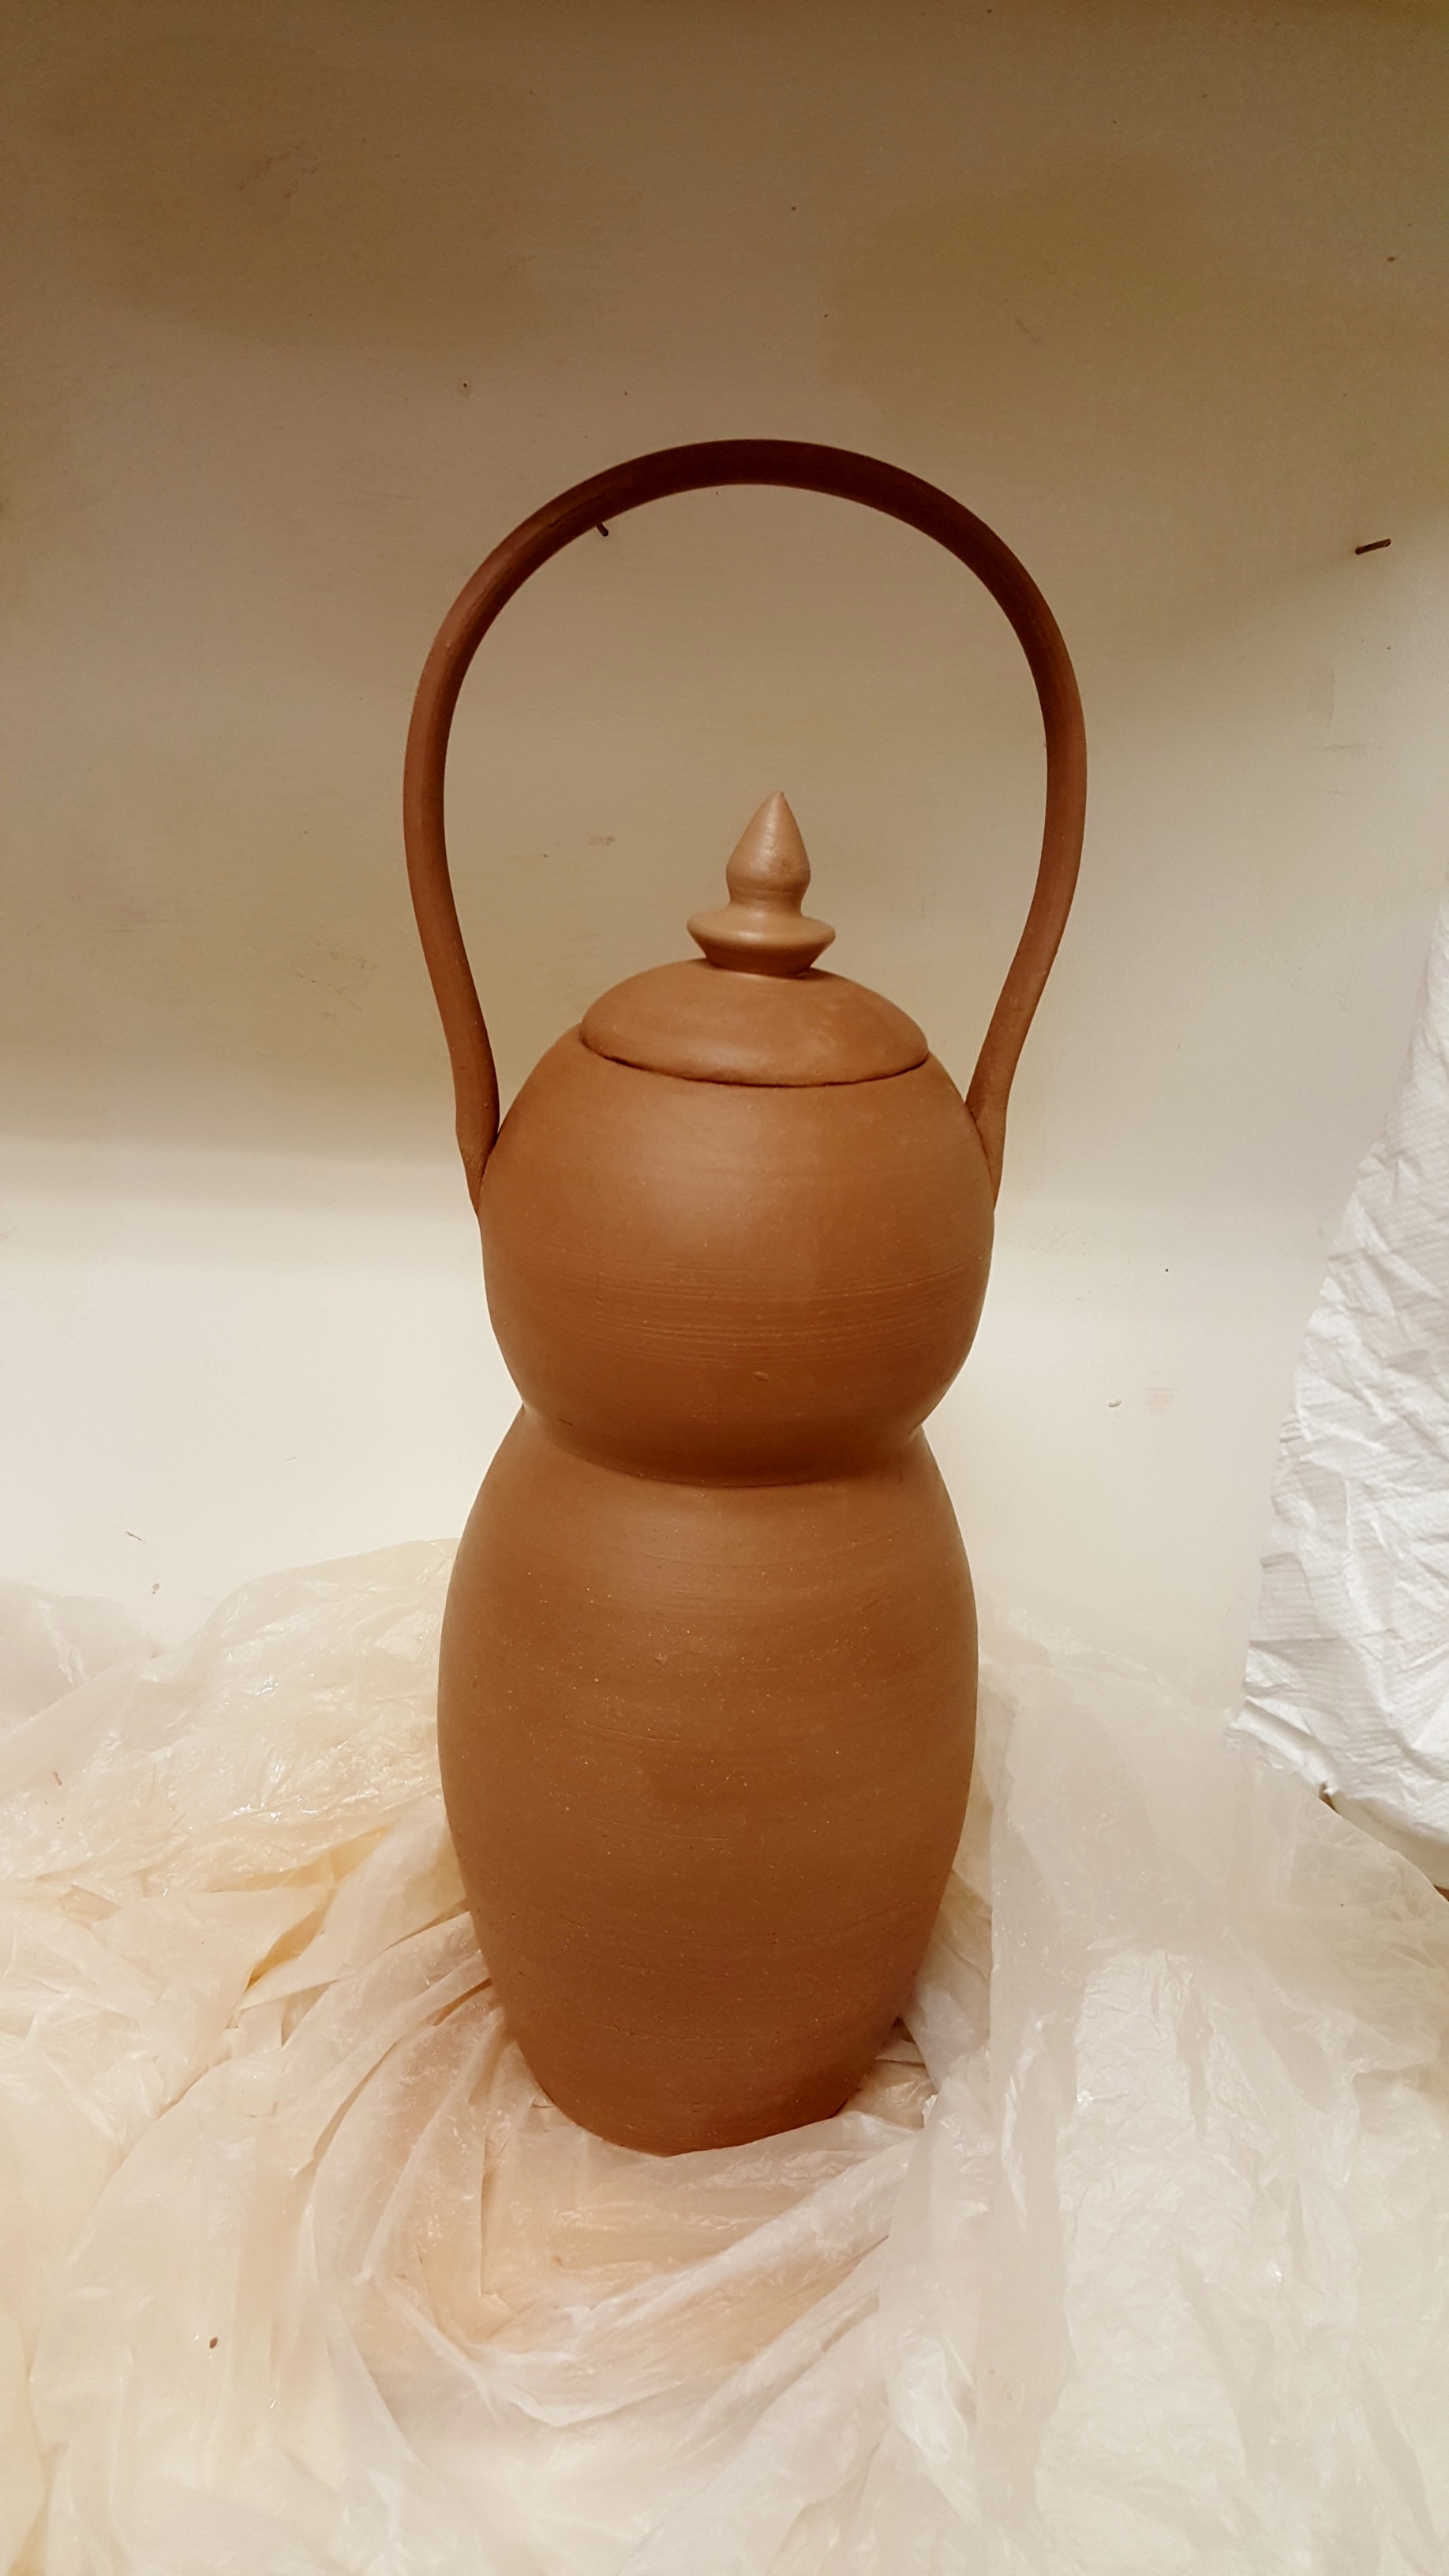
And after two attempts at a nice lid, we have almost a whole teapot:
Now as you can see, all that’s left is a spout… that demon spout. I’ve been in the studio every day this week attempting to make this one last component functional. I pulled a long, tapering coil much thicker than my handle and, once it was leather hard, I made a small incision in the middle of its underbelly. This would allow me to insert a loop tool to hollow the solid coil out. However, after I was finished hollowing, I ran into problems. Mending the underbelly while still retaining the integrity of the spout’s original shape proved to be a pain. I mistakenly thought that using slightly wetter clay to mend the gap would make molding it into its original shape slightly easier. Instead, as I should have known, the clay began to collapse into the cavity I had just created, giving the spout a very flat underbelly. Much to my dismay, I waited until the spout was again leather hard, recreated the incision and started from scratch. Remember when I said you can’t get too attached to your work? There’s another classic example. Sometimes you just have to roll with the punches.
Pictures of the finished form are to follow!! I’ll keep you posted, and thanks for the read.
If you have any suggestions for making component pieces more successfully, leave them in the comments below! I’d love to hear from you!